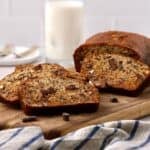
Chocolate Chunk Banana Bread Recipe
This chocolate chunk banana bread is rich, ultra-moist, and easy to make in one bowl. Made with ripe bananas, real chocolate chunks, and simple pantry ingredients, it bakes into a tender, bakery-style loaf that’s perfect for breakfast, snacking, gifting, or freezing for later.
Servings: 10 slices
Calories: 407kcal
Equipment
- 9x5-inch metal loaf pan
Ingredients
- 2 overripe bananas, mashed (average size, a little less than a cup mashed)
- 2 eggs, beaten
- 1½ cups granulated sugar
- ½ cup vegetable oil
- ¼ cup plus one tablespoon buttermilk
- 1 teaspoon baking soda
- 1 teaspoon vanilla extract
- ½ teaspoon salt
- 1¾ cups all-purpose flour, not sifted
- 1 cup chopped pecans
- 1 cup semi-sweet chocolate chunks
Instructions
- Preheat oven to 325°F
- Grease and flour a 9x5 loaf pan, or spray with non-stick baking spray with flour. Add a parchment paper sling to lift the bread out. (The chocolate tends to stick if it melts next to the pan.)
- Add the mashed bananas, beaten eggs, sugar, oil, buttermilk, baking soda, vanilla extract, and salt to a large mixing bowl, stirring to combine.
- Add the flour and stir until just combined.
- Add the chopped pecans and chocolate chunks, and gently fold them in until evenly distributed.
- Transfer the batter to the prepared loaf pan.
- Bake for 40 minutes, then loosely cover the tip with foil to prevent the bread from over-browning. Then bake an additional 30-35 minutes, until the top is golden brown and a toothpick or wooden skewer comes out with just a few moist crumbs attached, not wet batter. Insert the skewer off-center, not straight down the middle.
- The internal temperature, as measured with a digital thermometer, should be between 200 and 205°F. When checking the internal temperature, insert the thermometer into the center of the loaf and stop before reaching the bottom of the pan, which can give a false reading. Avoid visible chocolate chunks
- Let it rest 15 minutes in the pan. Use a thin knife and slide between the bread and the exposed ends. Use the parchment sling and lift it out of the pan. Let cool completely on a wire rack before slicing.
- Slice and serve, or wrap well, and it will be fine on the counter for 5-6 days, or you can freeze it for up to 60 days.
Notes
- To create a parchment sling, after greasing and flouring the pan, line it with a long length of parchment, leaving an overhang of about three inches on both sides. Secure with binder clips if desired. The overhang acts as handles so you can lift the bread out cleanly after baking. *See photo in step #2 in the blog post.
- I used "Enjoy Life: Semi-Sweet Chocolate Mega Chunks" in this recipe. I had never used this brand before and was dubious, but it worked well, and even though the bag says, “mega chunks,” the pieces were the perfect size.
- You can substitute dark chocolate chunks for the semi-sweet, but I don’t recommend milk chocolate, as I think it would make the bread too sweet. You could also substitute semi-sweet or dark chocolate chips.
- Because of the chocolate, this bread is rich, so I usually cut my slices a bit thinner when serving them.
- For picture-perfect slices, let the bread cool completely and use a serrated bread knife.
- If a banana looks good enough to eat, it will not work well in banana bread. Your bananas should have visible dark spots and be overripe, which means that the starches have turned to sugar for perfect banana bread.
- I tried various tricks to make my bananas ripen quicker, including putting them in a sealed brown paper bag with an apple, storing them in a warm spot, baking them in the oven, and even heating them up in the microwave. I didn’t find that any of these methods worked particularly well, though putting them in the oven or microwave does make them easier to mash. But it doesn’t change the taste.
- If you have overripe bananas but don’t have time to make banana bread, simply peel them and place the amount your recipe calls for in an airtight freezer bag, then freeze them. They thaw quickly.
- This is a quick bread recipe, which means that it is one of the quickest and easiest breads to make because you don’t have to let the batter or dough rise.
- This recipe is also easy because all the ingredients are combined in one bowl, and you don’t need an electric mixer. One bowl = fewer dishes to wash.
- I use a fork to mash my bananas, but you could also use a potato masher.
Nutrition
Calories: 407kcal | Carbohydrates: 63g | Protein: 6g | Fat: 16g | Saturated Fat: 5g | Polyunsaturated Fat: 3g | Monounsaturated Fat: 7g | Trans Fat: 0.02g | Cholesterol: 34mg | Sodium: 247mg | Potassium: 270mg | Fiber: 4g | Sugar: 40g | Vitamin A: 87IU | Vitamin C: 2mg | Calcium: 35mg | Iron: 3mg
