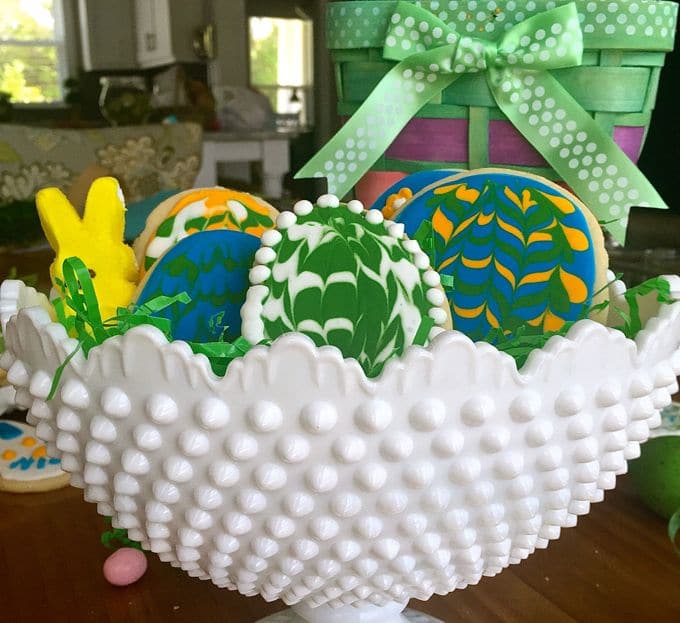
Those of you that know me know that I’m not much of a baker, but I really wanted to provide you with a step by step post on how to make and decorate sugar cookies with royal icing! Obviously, these cute cookies are Easter Cookies, but these same instructions and recipes apply no matter which holiday or special occasion you are making the cookies for.
I turned to my friend and expert cookie maker, Kerri Benson Mohar, who graciously agreed to share her Sugar Cookie and Royal Icing Recipes and allow me to take pictures and document the steps while she made these adorable Easter cookies.
Kerri grew up in Tallahassee and has been cooking since she was 19 years old. She loves to cook for her family and friends, loves to set a beautiful table, and she and her husband Rob love to entertain. In addition to baking, Kerri most enjoys preparing her Mom’s recipes. Chicken Divan and her Mom’s Macaroni Salad are two of her favorite dishes, and she makes them often.
Kerri, who is a retired flight attendant, initially got interested in baking and decorating cookies when she took a cookie decorating class several months ago. For additional decorating ideas for your cookies, she recommends that you check out the cookie decorating tips and videos on YouTube.
As you know, most of the recipes on my blog are quick and easy, but cookie decorating is not for the faint of heart or when you are rushed. Even with Kerri’s tips and tricks, this process takes time and patience. Although both recipes below are relatively simple, the cookies take time to bake and cool properly. The icing has to be divided, tinted, made in two different consistencies and you have to give it time to harden on the cookies. In addition, it takes time and practice to actually decorate the cookies. These cookies were made over a two-day period, but I doubt you will find a more delicious sugar cookie recipe, and baking and decorating cookies are a great way to showcase your baking skills and artistic abilities.
The ingredients for the Basic Sugar Cookies include all-purpose flour, confectioner’s sugar, baking powder, vanilla extract or emulsion, almond extract or emulsion, unsalted butter, an egg, and salt.
This Basic Sugar Cookie and Royal Icing recipe were adapted by Kerri from SweetSugarBelle.com.
When you are ready to make the sugar cookies, gather your ingredients and preheat your oven to 400 degrees.
Add the softened butter and confectioner’s sugar to the bowl of a stand mixer. Using the paddle attachment, cream the butter and sugar together until they are light and fluffy.
Mix the egg with the extracts or emulsions in a small bowl and then add that to the butter and sugar mixture. Mix well.
In a separate small bowl add the sifted flour, baking powder, and salt and use a fork or whisk to mix well.
With the mixer running, gradually add the flour mixture a little at a time, mixing thoroughly after each addition. When most of the dough comes together and sticks to the paddle, it is ready.
Let the dough sit for 5-10 minutes to firm up. It does not need to be refrigerated.
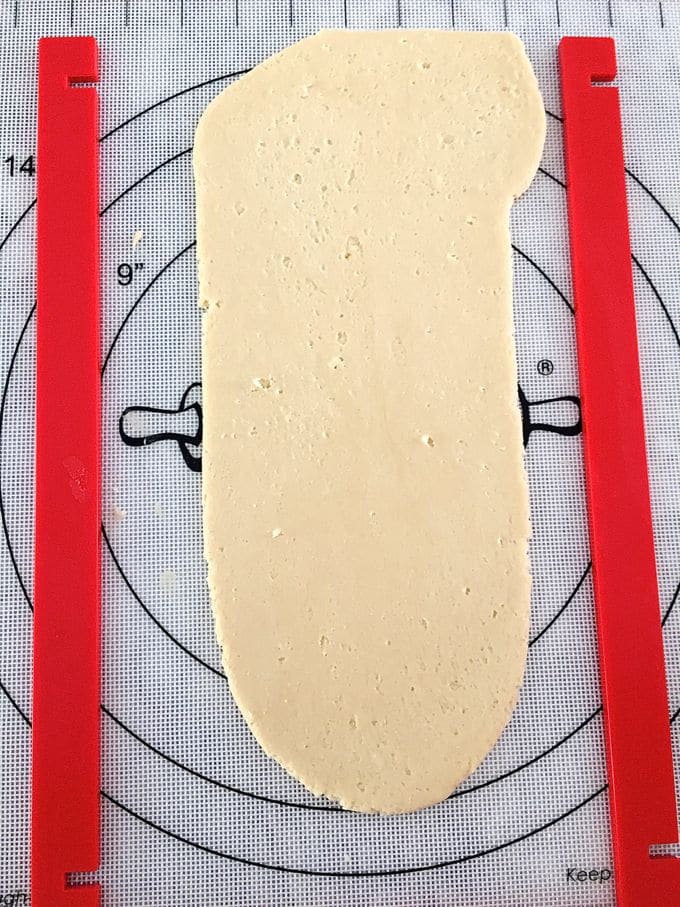
Place the dough on a lightly floured surface and use a lightly floured rolling pin to roll out to about ¼ inch thickness. (For a faster, easier, cleaner way to roll your dough, Kerri suggests using the DoughEZ Pastry Mat Kit with Guide Sticks. With this mat kit, you can roll out the dough to a consistent thickness over and over without having to add extra flour, and you never have to actually touch the cutout cookies or handle them.)
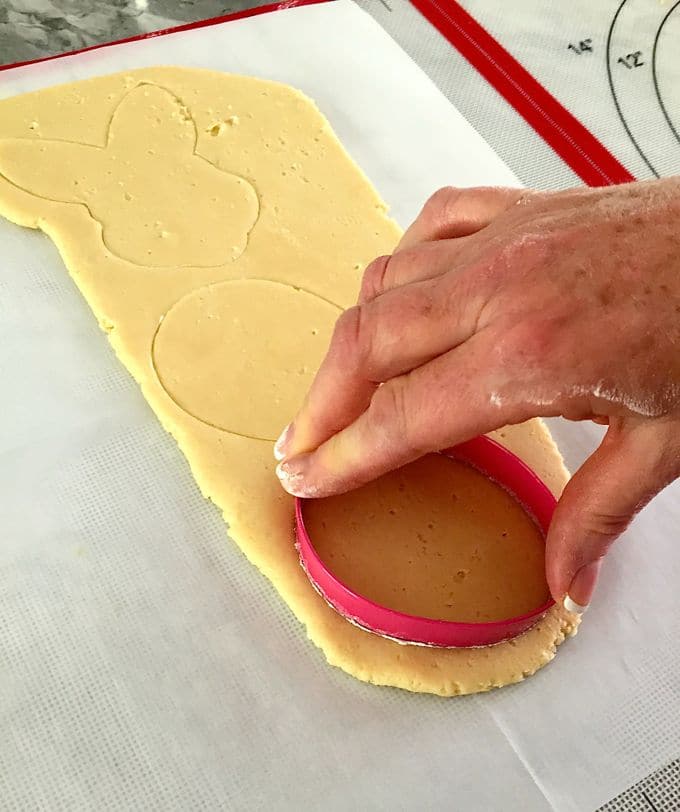
Lightly flour your cookie cutters and cut out the dough.
Once all cookies are cut out, use the same technique to roll out the remaining dough and continue cutting out the cookies.
Place the cookies on a baking sheet lined with parchment paper (use precut parchment baking sheets to save time) and bake for 7 minutes.
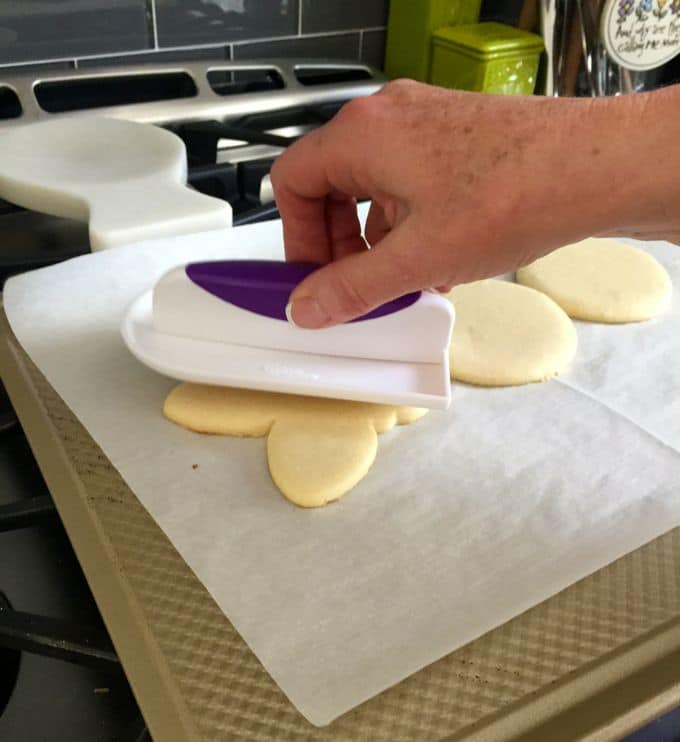
For best results use a fondant smoother or flat spatula to gently flatten the cookies when they come out of the oven.
Let the cookies cool completely on the baking sheet and store in an airtight container at least 24 hours before decorating. This allows the butter to come out of the cookies a bit and they will be easier to decorate.
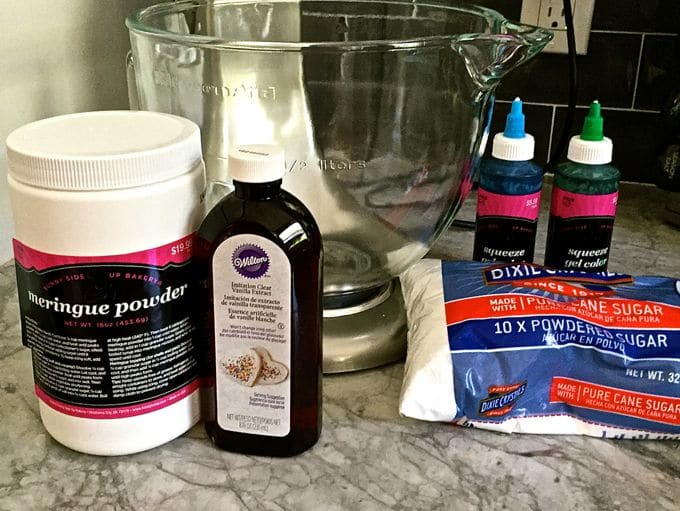
The ingredients for Royal Icing include confectioner’s sugar, meringue powder, oil-free vanilla extract, and gel food coloring.
To make the royal icing, gather your ingredients, add ½ of the water to a small bowl and stir in the extract or emulsion.
Add the confectioner’s sugar and meringue powder to the bowl of a stand mixer and slowly mix them together using the paddle attachment.
With the mixer on the slowest speed, slowly add the water/flavoring mixture to the dry ingredients.
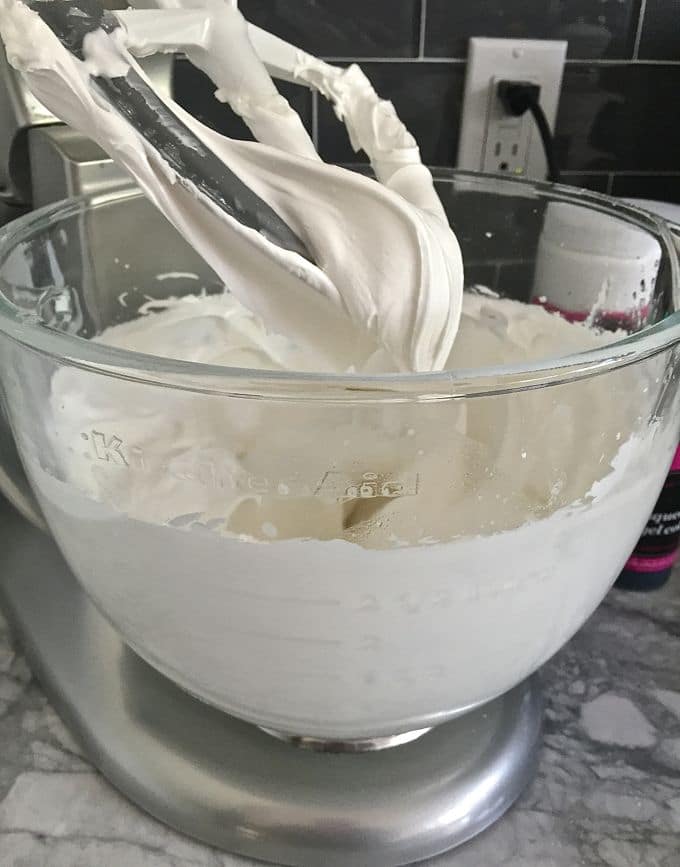
Continue adding the remaining water slowly until the mixture comes together and reaches a honey-like consistency. Once it reaches this stage, change the speed to medium and whip for 4 minutes, or until the icing is thick and fluffy and forms a soft peak. Do not over or under mix.
If you are not ready to decorate your cookies, cover the icing tightly and keep covered to keep it from drying out.
When you are ready to decorate your cookies, gather the following tools and utensils: 2 bowls with lids for each color of icing, plastic squeeze bottles (the kind you put ketchup and mustard in) for each color of icing, a scriber needle modeling tool, a disposable plastic tablecloth to protect your counters, disposable piping or decorating bags with #2 or #3 piping or decorating tips and couplers, rubber band clips to close the bags, and a small spray bottle to hold water. Optional, plastic gloves because the gel coloring can stain your hands.
When decorating cookies with Royal Icing you will need two consistencies of icing. It’s important that when you are not working with the icing, it is kept tightly covered to keep it from drying out.
First, you will need a thicker icing for outlining the design on the cookie and adding details. The thicker icing should be the consistency of toothpaste, and you will put this icing in the piping bags and use it to decorate your cookies.
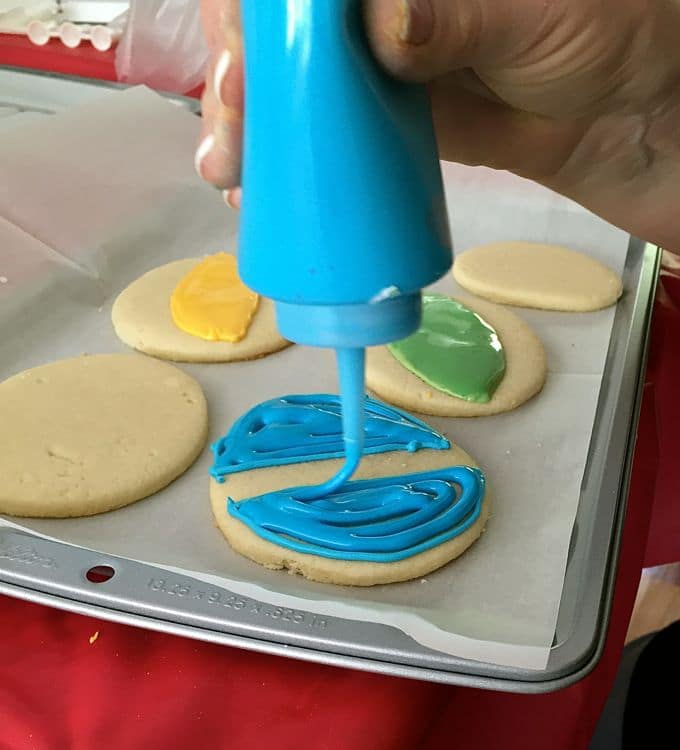
Second, you need a thinner icing. This thinner icing is used to “flood” the cookies with icing, and this icing should be the consistency of honey or Karo syrup. This icing is placed in the squeeze bottles, and it’s important that it flows easily through the tip of the squeeze bottle.
For the icing gather two small bowls with lids for each color of icing you will be using.
Place the plastic disposable tablecloth on your counter and use plastic gloves, if desired.
To prepare the icing, add some icing to a bowl and add gel coloring, just a drop at a time and mix well until you achieve your desired color. Be judicious, you can always add additional color, but can’t lighten it if it gets too dark.
Once you achieve the desired color, for the thick icing, use the spray bottle filled with water and spray the icing about five times and mix well. Check your consistency. It should be the consistency of toothpaste. If it’s too thick, add more water, one spray at a time. If it gets too thin, add just a dusting of confectioner’s sugar and mix well.
For thinner or “flood” icing, use the spray bottle filled with water and spray the icing about ten times and mix well. Check your consistency. It should be the consistency of honey or Karo syrup and flow in a thin ribbon from a spoon. If it’s too thick, add more water, one spray at a time. If it gets too thin, add just a dusting of confectioner’s sugar and mix well.
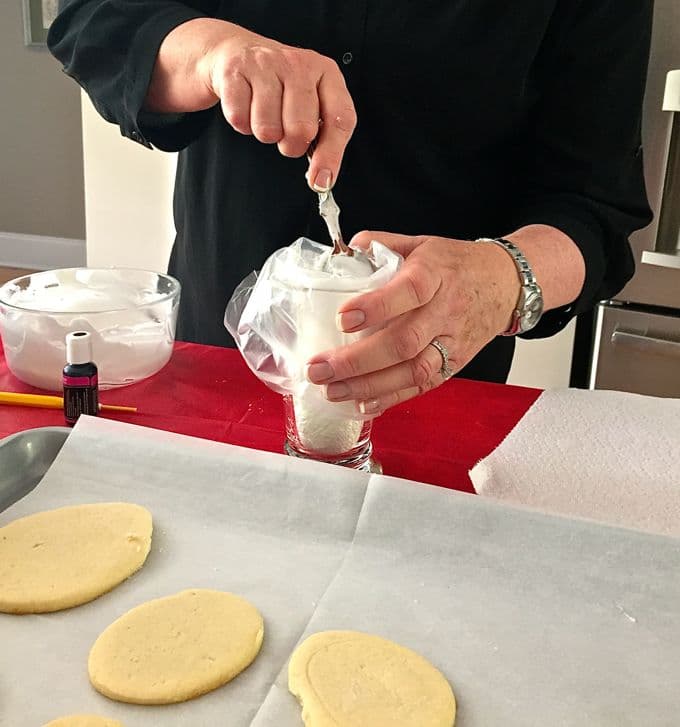
Place each batch of thick icing in a disposable piping bag fitted with a coupler and # 2 or #3 piping tip. Close the bag and secure with a rubber band clip. (To easily fill the bag, place it in an empty tall glass with the tip of the bag at the bottom and fold the excess over the rim of the glass. This way the glass keeps the bag open, and it’s much easier to fill.)
Place each batch of thin or “flood” icing in a squeeze bottle.
When all of your icings are ready, and you are ready to decorate the cookies, use a soft paintbrush or pastry brush and clean off any crumbs or rough spots.
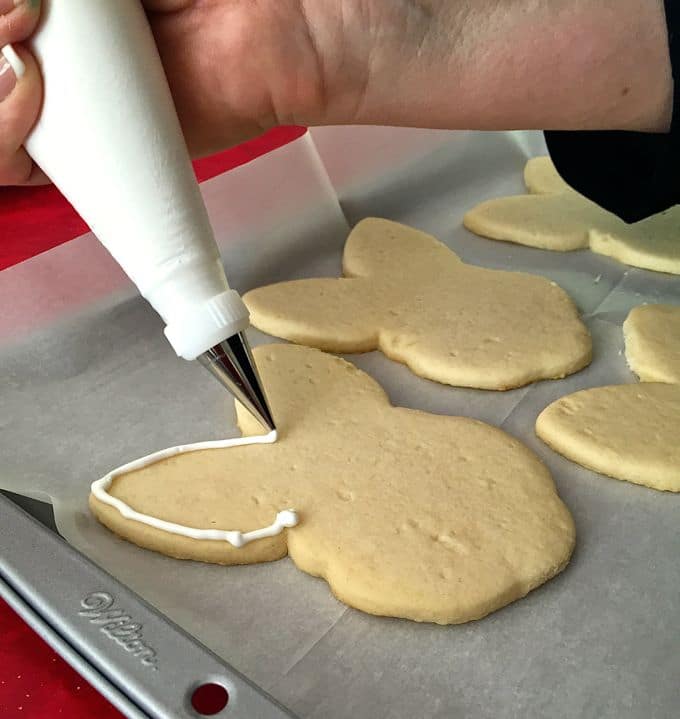
Take a bag of thick icing and outline the shape of the cookie. Use a firm and even pressure and do not touch the cookie with the tip. (Hint: you might want to practice on a piece of wax paper first.)
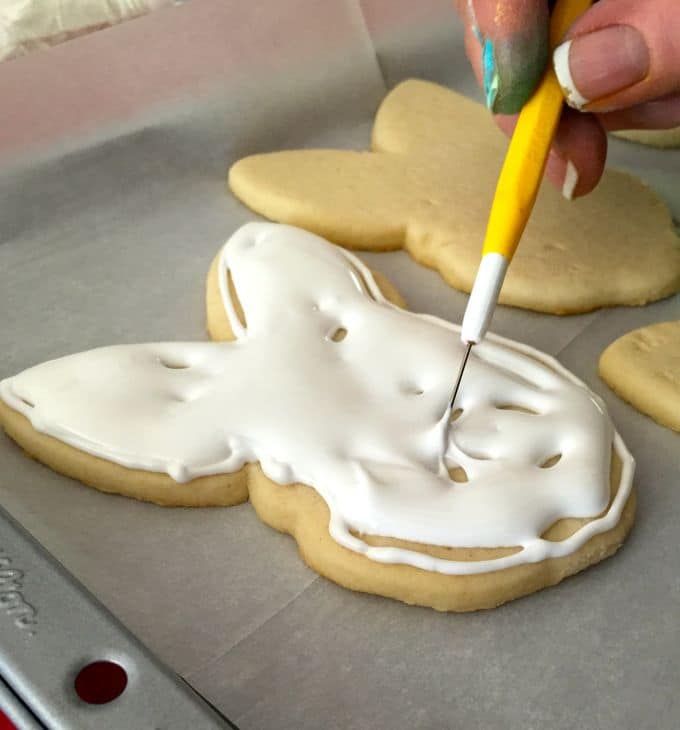
Once the shape of the cookie has been outlined, take one of your squeeze bottles of thin or flood icing and flood the area inside of your icing outline with a small amount of icing. Then, use a scriber tool or toothpick to spread it out evenly.
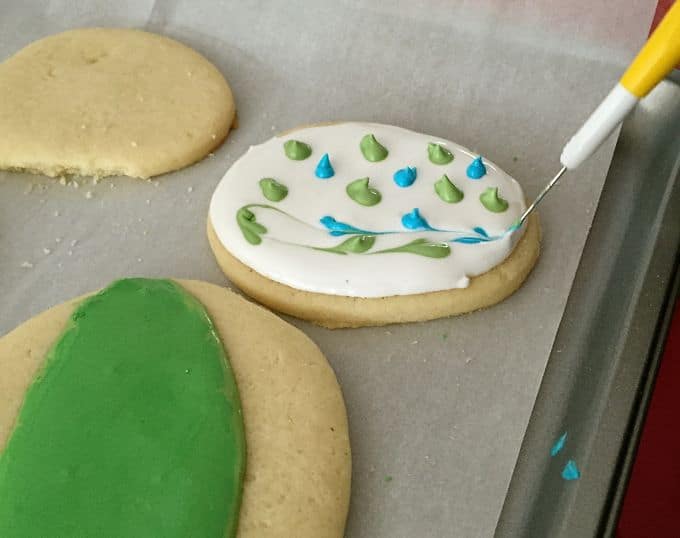
At this point, if you plan to add additional icing details or decorations, you will need to let the flood icing dry on the cookies for at least 4 hours before adding additional icing or decorations.
Iced cookies are shelf-stable, and although they should be kept in an airtight container, they do not need to be refrigerated.
📋 Recipe:
Want to Save This Recipe?
Enter your email & I'll send it to your inbox. Plus, get great new recipes from me every week!
By submitting this form, you consent to receive emails from Grits and Pinecones.

How To Make and Decorate Sugar Cookies
Ingredients
Basic Sugar Cookies Ingredients
- 1 cup unsalted butter softened
- 1-½ cup confectioners sugar
- 1 egg room temperature
- 1 teaspoon almond extract or emulsion
- 1 teaspoon vanilla extract or emulsion
- 2-¾ cups all-purpose flour sifted
- 2 teaspoon baking powder
- 1 teaspoon salt
Royal Icing Ingredients
- 2 pounds confectioners sugar
- 5 tablespoon meringue powder
- 2 teaspoon oil-free vanilla extract
- ½-3/4 cup water
- Gel food coloring
Instructions
Basic Sugar Cookies Directions
- Preheat the oven to 400 degrees.
- Add the softened butter and confectioner’s sugar to the bowl of a stand mixer. Using the paddle attachment, cream the butter and sugar together until they are light and fluffy.
- Mix the egg with the extracts or emulsions in a small bowl and then add that to the butter and sugar mixture. Mix well.
- In a separate small bowl add the sifted flour, baking powder, and salt and use a fork or whisk to mix well.
- With the mixer running, gradually add the flour mixture a little at a time, mixing thoroughly after each addition. When most of the dough comes together and sticks to the paddle, it is ready.
- Let the dough sit for 5-10 minutes to firm up. It does not need to be refrigerated.
- Place the dough on a lightly floured surface and use a lightly floured rolling pin to roll out to about ? inch thickness. (For a faster, easier, cleaner way to roll your dough, Kerri suggests using the DoughEZ Pastry Mat Kit with Guide Sticks. With this mat kit, you can roll out the dough to a consistent thickness over and over without having to add extra flour, and you never have to actually touch the cutout cookies or handle them.)
- Lightly flour your cookie cutters and cut out the dough. Once all cookies are cut out, use the same technique to roll out the remaining dough and continue cutting out the cookies.
- Place the cookies on a baking sheet lined with parchment paper (use precut parchment baking sheets to save time) and bake for 7 minutes.
- For best results use a fondant smoother or flat spatula to gently flatten the cookies when they come out of the oven.
- Let the cookies cool completely on the baking sheet and store in an airtight container at least 24 hours before decorating. This allows the butter to come out of the cookies a bit and they will be easier to decorate.
Royal Icing Directions
- Add ½ of the water to a small bowl and stir in the extract or emulsion.
- Add the confectioner’s sugar and meringue powder to the bowl of a stand mixer and slowly mix them together using the paddle attachment.
- With the mixer on the slowest speed, slowly add the water/flavoring mixture to the dry ingredients.
- Continue adding the remaining water slowly until the mixture comes together and reaches a honey-like consistency. Once it reaches this stage, change the speed to medium and whip for 4 minutes, or until the icing is thick and fluffy and forms a soft peak. Do not over or under mix.
- If you are not ready to decorate your cookies, cover the icing tightly and keep covered to keep it from drying out.
Directions for Decorating the Cookies:
- You will need the following tools: 2 bowls with lids for each color of icing, plastic squeeze bottles (the kind you put ketchup and mustard in) for each color of icing, a scriber needle modeling tool, a disposable plastic tablecloth to protect your counters, disposable piping or decorating bags with #2 or #3 piping or decorating tips and couplers, rubber band clips to close the bags, and a small spray bottle to hold water. Optional, plastic gloves because the gel coloring can stain your hands.
- When decorating cookies with Royal Icing you will need two consistencies of icing. It’s important that when you are not working with the icing, it is kept tightly covered to keep it from drying out.
- First, you will need a thicker icing for outlining the design on the cookie and adding details. The thicker icing should be the consistency of toothpaste, and you will put this icing in the piping bags and use it to decorate your cookies.
- Second, you need a thinner icing. This thinner icing is used to “flood” the cookies with icing, and this icing should be the consistency of honey or Karo syrup. This icing is placed in the squeeze bottles, and it’s important that it flows easily through the tip of the squeeze bottle.
- For the icing gather two small bowls with lids for each color of icing you will be using.
- Place the plastic disposable tablecloth on your counter and use plastic gloves, if desired.
- To prepare the icing, add some icing to a bowl and add gel coloring, just a drop at a time and mix well until you achieve your desired color. Be judicious, you can always add additional color, but can’t lighten it if it gets too dark.
- Once you achieve the desired color, for the thick icing, use the spray bottle filled with water and spray the icing about five times and mix well. Check your consistency. It should be the consistency of toothpaste. If it’s too thick, add more water, one spray at a time. If it gets too thin, add just a dusting of confectioner’s sugar and mix well.
- For thinner or “flood” icing, use the spray bottle filled with water and spray the icing about ten times and mix well. Check your consistency. It should be the consistency of honey or Karo syrup and flow in a thin ribbon from a spoon. If it’s too thick, add more water, one spray at a time. If it gets too thin, add just a dusting of confectioner’s sugar and mix well.
- Place each batch of thick icing in a disposable piping bag fitted with a coupler and # 2 or #3 piping tip. Close the bag and secure with a rubber band clip. (To easily fill the bag, place it in an empty tall glass with the tip of the bag at the bottom and fold the excess over the rim of the glass. This way the glass keeps the bag open, and it’s much easier to fill.)
- Place each batch of thin or “flood” icing in a squeeze bottle.
- When all of your icings are ready, and you are ready to decorate the cookies, use a soft paintbrush or pastry brush and clean off any crumbs or rough spots.
- Take a bag of thick icing and outline the shape of the cookie. Use a firm and even pressure and do not touch the cookie with the tip. (Hint: you might want to practice on a piece of wax paper first.)
- Once the shape of the cookie has been outlined, take one of your squeeze bottles of thin or flood icing and flood the area inside of your icing outline with a small amount of icing. Then, use a scriber tool or toothpick to spread it out evenly.
- At this point, if you plan to add additional icing details or decorations, you will need to let the flood icing dry on the cookies for at least 4 hours before adding additional icing or decorations.
- Iced cookies are shelf-stable, and although they should be kept in an airtight container, they do not need to be refrigerated.
















Leave a Reply