

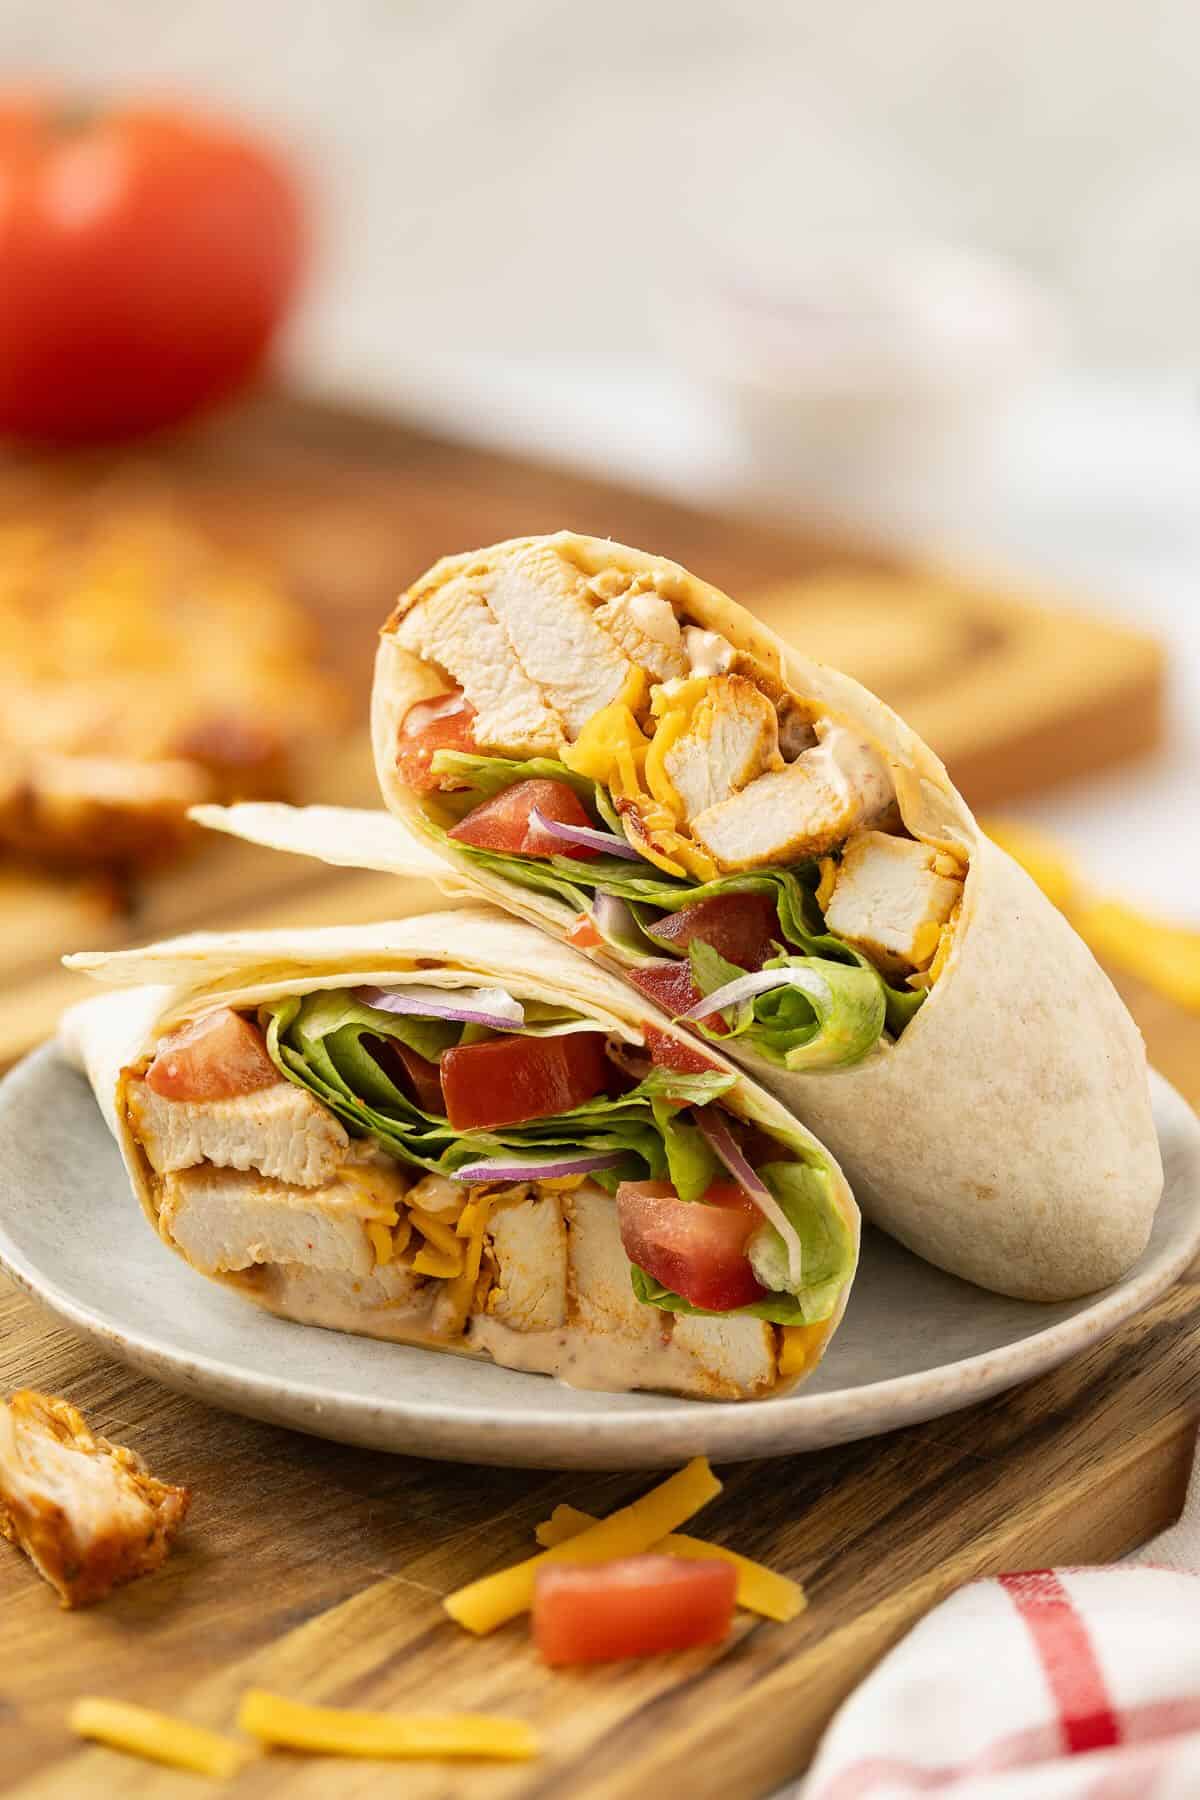
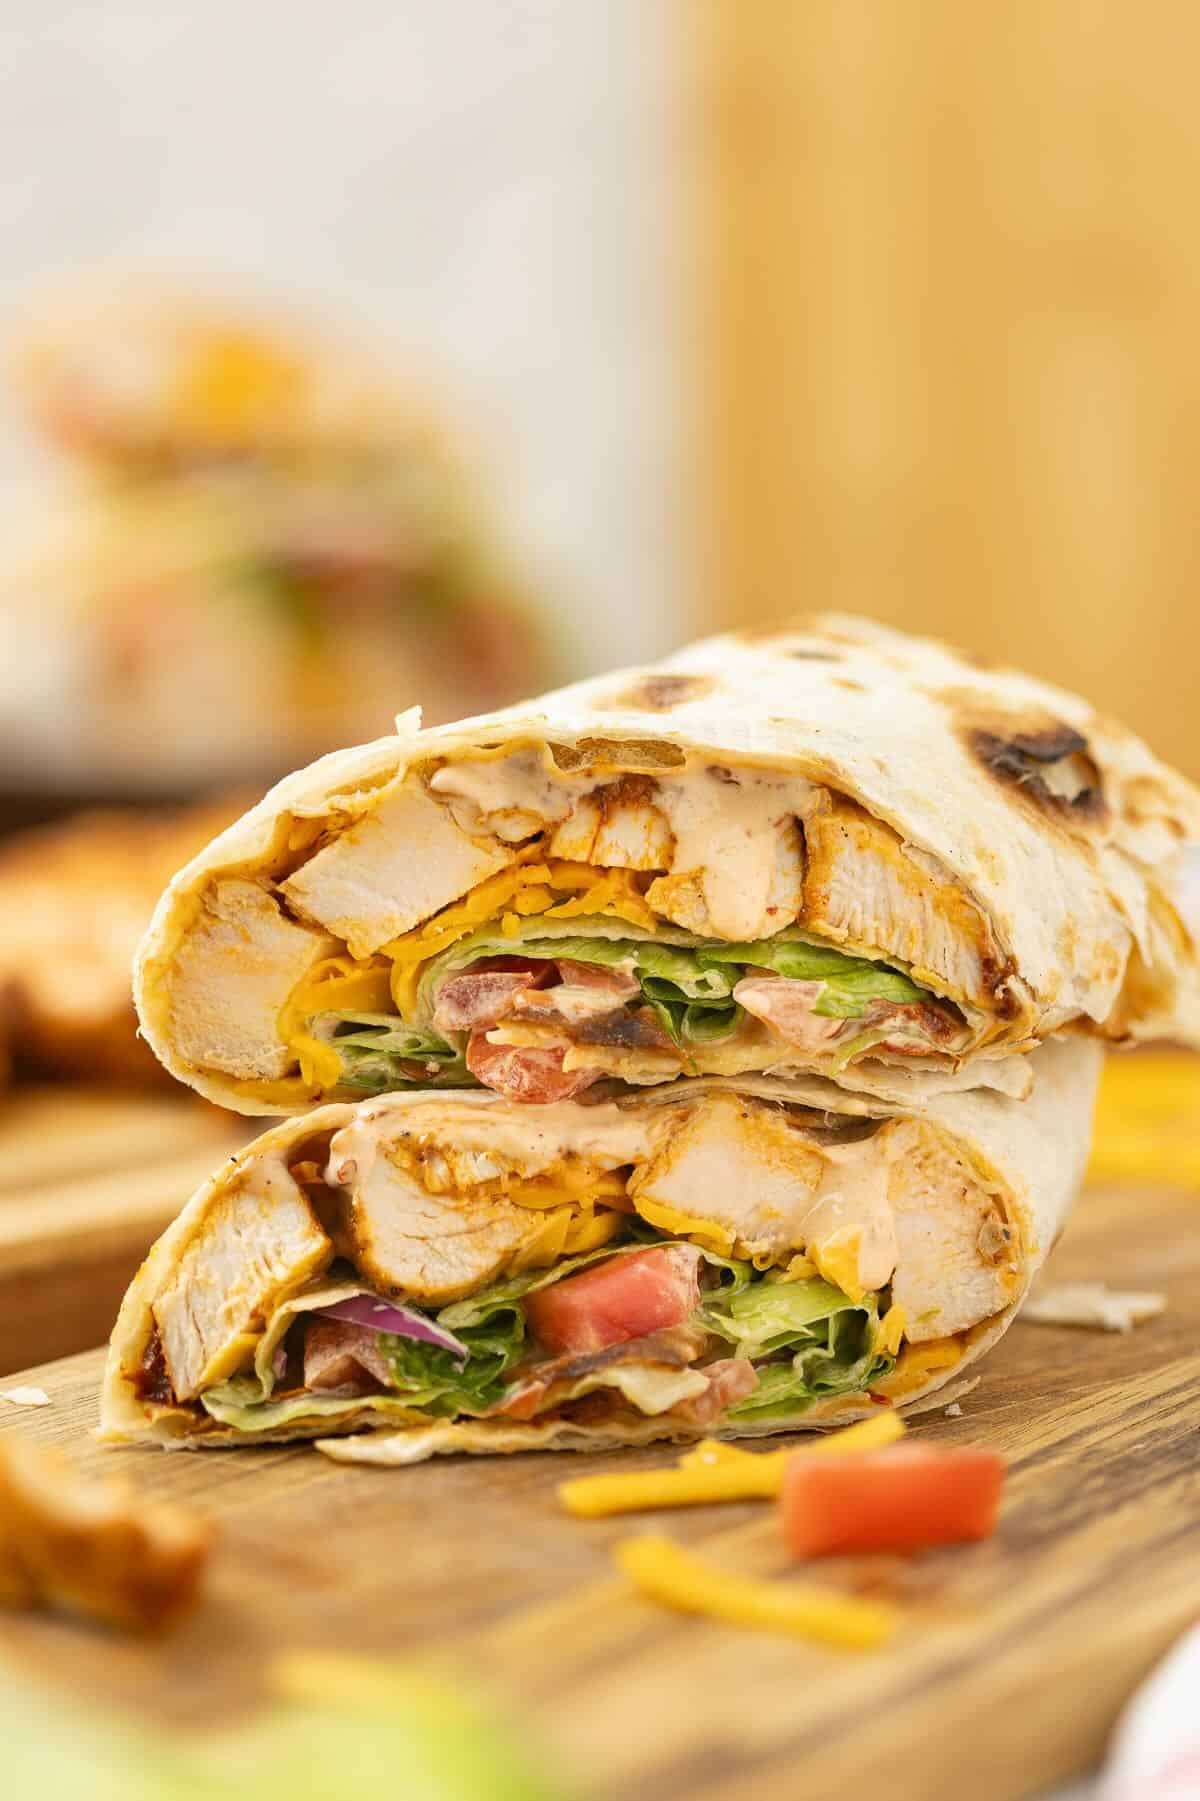
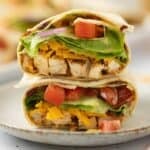
These grilled chicken wraps are juicy, smoky, and packed into a warm flour tortilla with crisp lettuce, fresh tomato, melty cheddar, and a creamy homemade chipotle mayo with just the right kick.
The whole thing comes together in about 30 minutes, and I tested it two ways: on my Big Green Egg and on a cast-iron grill pan on the stove; you can pick whichever works for you. Either way, the chicken comes out juicy every time, as long as you don’t skip the pounding step below. Prep is 15 minutes, cook time is 15 minutes, and this recipe makes 4 wraps.
Quick Look: Grilled Chicken Wraps with Chipotle Mayo
- Ready in: 30 minutes
- Yield: 4 wraps
- Difficulty: Easy - no fuss favorite.
- Best for: A casual weeknight dinner or lunch, and making ahead for picnics or a day at the beach. These grilled chicken wraps are also perfect for game day, whether you’re tailgating or watching on the couch with a plate in your lap.
- Make-Ahead Friendly: Yes, you can cook the chicken well in advance before assembling the wraps.
- Taste and Texture: A handheld, juicy, smoky chicken wrap with spicy mayo, lettuce, tomato, and cheese.
- Equipment: Outdoor grill or indoor grill pan.
- Why this Recipe? The secret to a good grilled chicken wrap isn’t the toppings; it’s what happens to the chicken before it ever hits the heat. Pounding the chicken breasts to an even thickness is the most important step because it lets the whole piece finish cooking at the same time, instead of drying out at the thin end while you wait for the thick center..
Have a question about this recipe?
Tap a button below to open ChatGPT with a question already typed in for you. Or, as always, leave your question in the comments below; I'm happy to help!
Jump to:
- Quick Look: Grilled Chicken Wraps with Chipotle Mayo
- Key Ingredients
- Substitutions and Variations
- How to Make Grilled Chicken Wraps with Chipotle Mayo
- Sharon’s Tips
- What to Serve With Grilled Chicken Wraps
- Storage and Reheating
- Grilled Chicken Wraps FAQs
- More Grilled Chicken Recipes You’ll Love
- Join the Conversation
- Recipe:
Key Ingredients
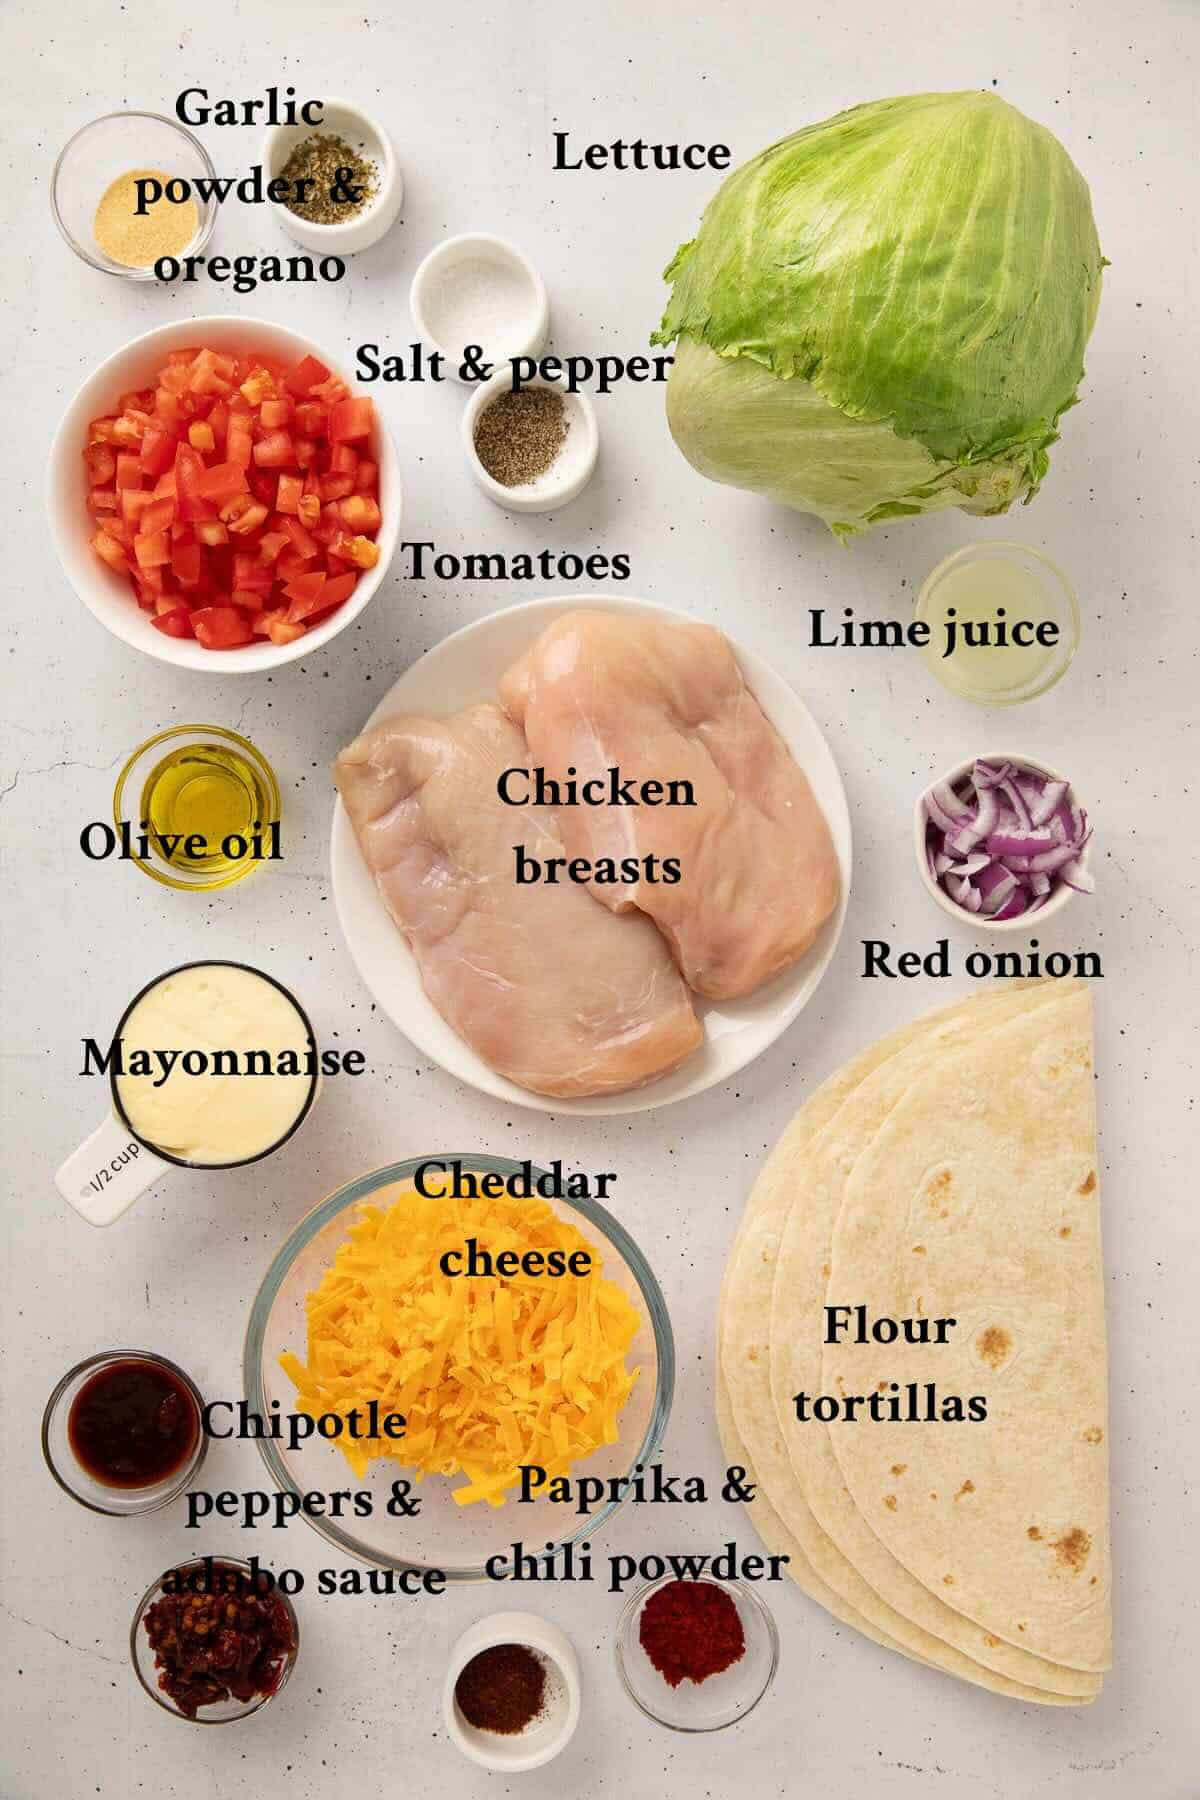
Complete measurements for all ingredients are in the recipe card below.
- Chicken breasts - Boneless, skinless, pounded to about ½ inch thick and sliced into thinner pieces so they cook fast and evenly.
- Chipotle peppers in adobo - The backbone of the mayo. A little goes a long way, and you’ll find them in the international aisle in a small can.
- Smoked paprika, garlic powder, chili powder, oregano - A simple rub that gives the chicken real char and flavor without a marinade or any extra planning.
- Iceberg lettuce leaves, kept whole - Not shredded. A big, sturdy leaf lies flat and cradles the filling instead of shifting and spilling out when you slice the wrap.
- Block cheddar, shredded at home - Melts smoother and tastes sharper than the pre-shredded bag stuff, which is dusted with anti-caking agents that get in the way of a good melt.
You will also need a meat mallet or rolling pin, an instant-read thermometer, and either an outdoor grill or a grill pan, depending on your choice. If you love the ease of this stovetop method, you’ll also want to try my Easy Indoor Grill Pan Chicken next.
Substitutions and Variations
- Chicken breasts → boneless, skinless chicken thighs. They’re more forgiving if you happen to overcook them slightly. I like thighs, but my husband is 100% a breast man. If you use thighs, you may need to grill them a few more minutes. Thighs are done when the internal temperature reaches 165°F, the minimum safe temperature, or 170-175°F for the juiciest texture.
- Flour tortillas → whole wheat, spinach, or corn tortillas (double up the corn ones so they hold the filling).
- Mayonnaise → avocado oil mayo works as a straight swap; Greek yogurt works too, but makes the sauce tangier and thinner.
- Cheddar → Monterey Jack, pepper jack, or mozzarella all melt beautifully here.
- Iceberg lettuce → romaine hearts are the next best thing, since the leaves are just as sturdy.
- Red onion → thinly sliced green onion for something milder.
Want to switch up the flavor entirely? Try a Southwest version with black beans, roasted corn, and crushed tortilla chips for crunch, or go Greek with oregano, lemon zest, tzatziki instead of chipotle mayo, and crumbled feta. Bacon ranch and buffalo versions are delicious too; swap the chipotle mayo for ranch or buffalo sauce and go from there.
Got leftover grilled half chicken, smoked spatchcock chicken, or even cast-iron roast chicken on hand? Leftover plain or lightly seasoned chicken works great in these wraps; just skip anything already sauced (teriyaki, BBQ) since it’ll compete with the chipotle mayo.
How to Make Grilled Chicken Wraps with Chipotle Mayo
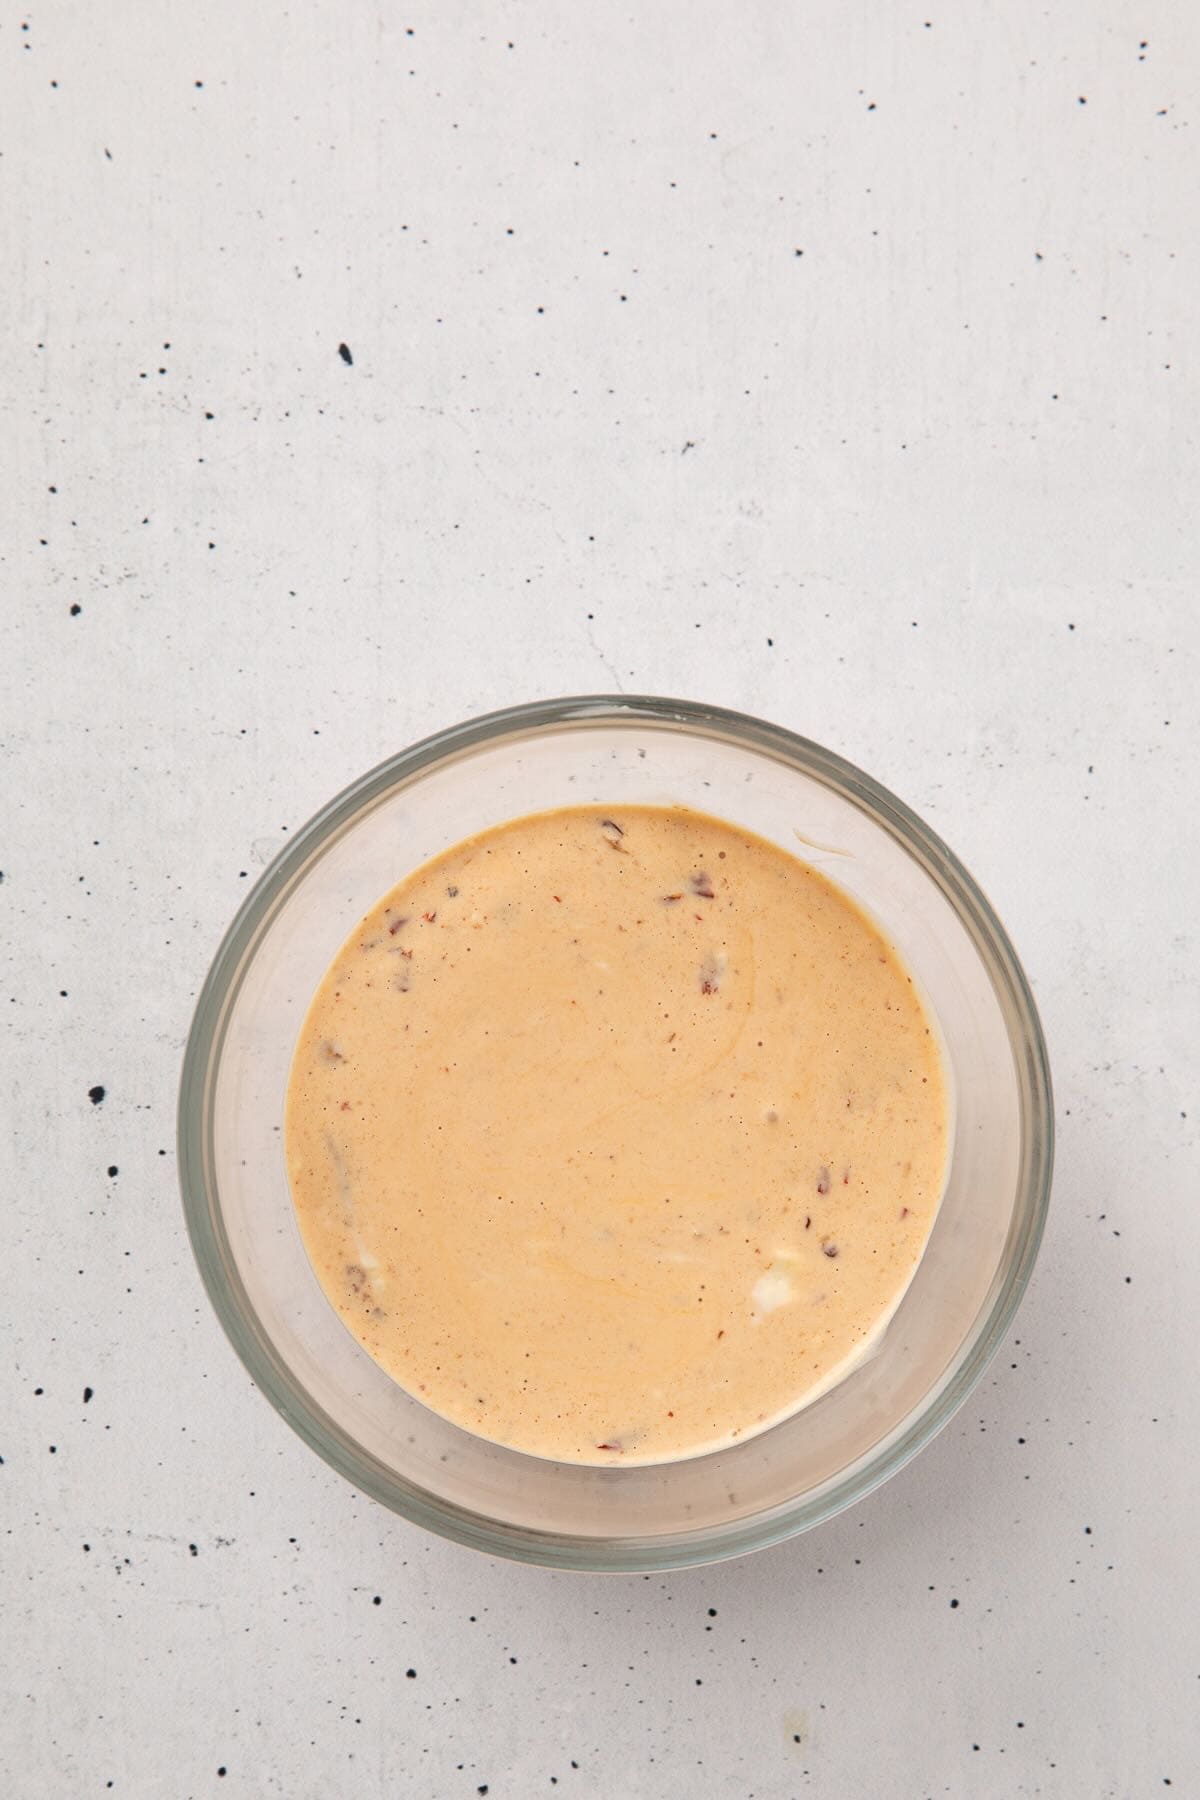
- Make the chipotle mayo. Stir together the mayonnaise, minced chipotle peppers, adobo sauce, lime juice, and salt in a small bowl until well combined. Taste it! Add more minced pepper if you like it spicier, or a small drizzle of honey if it’s too spicy. Cover and refrigerate until you’re ready to assemble.
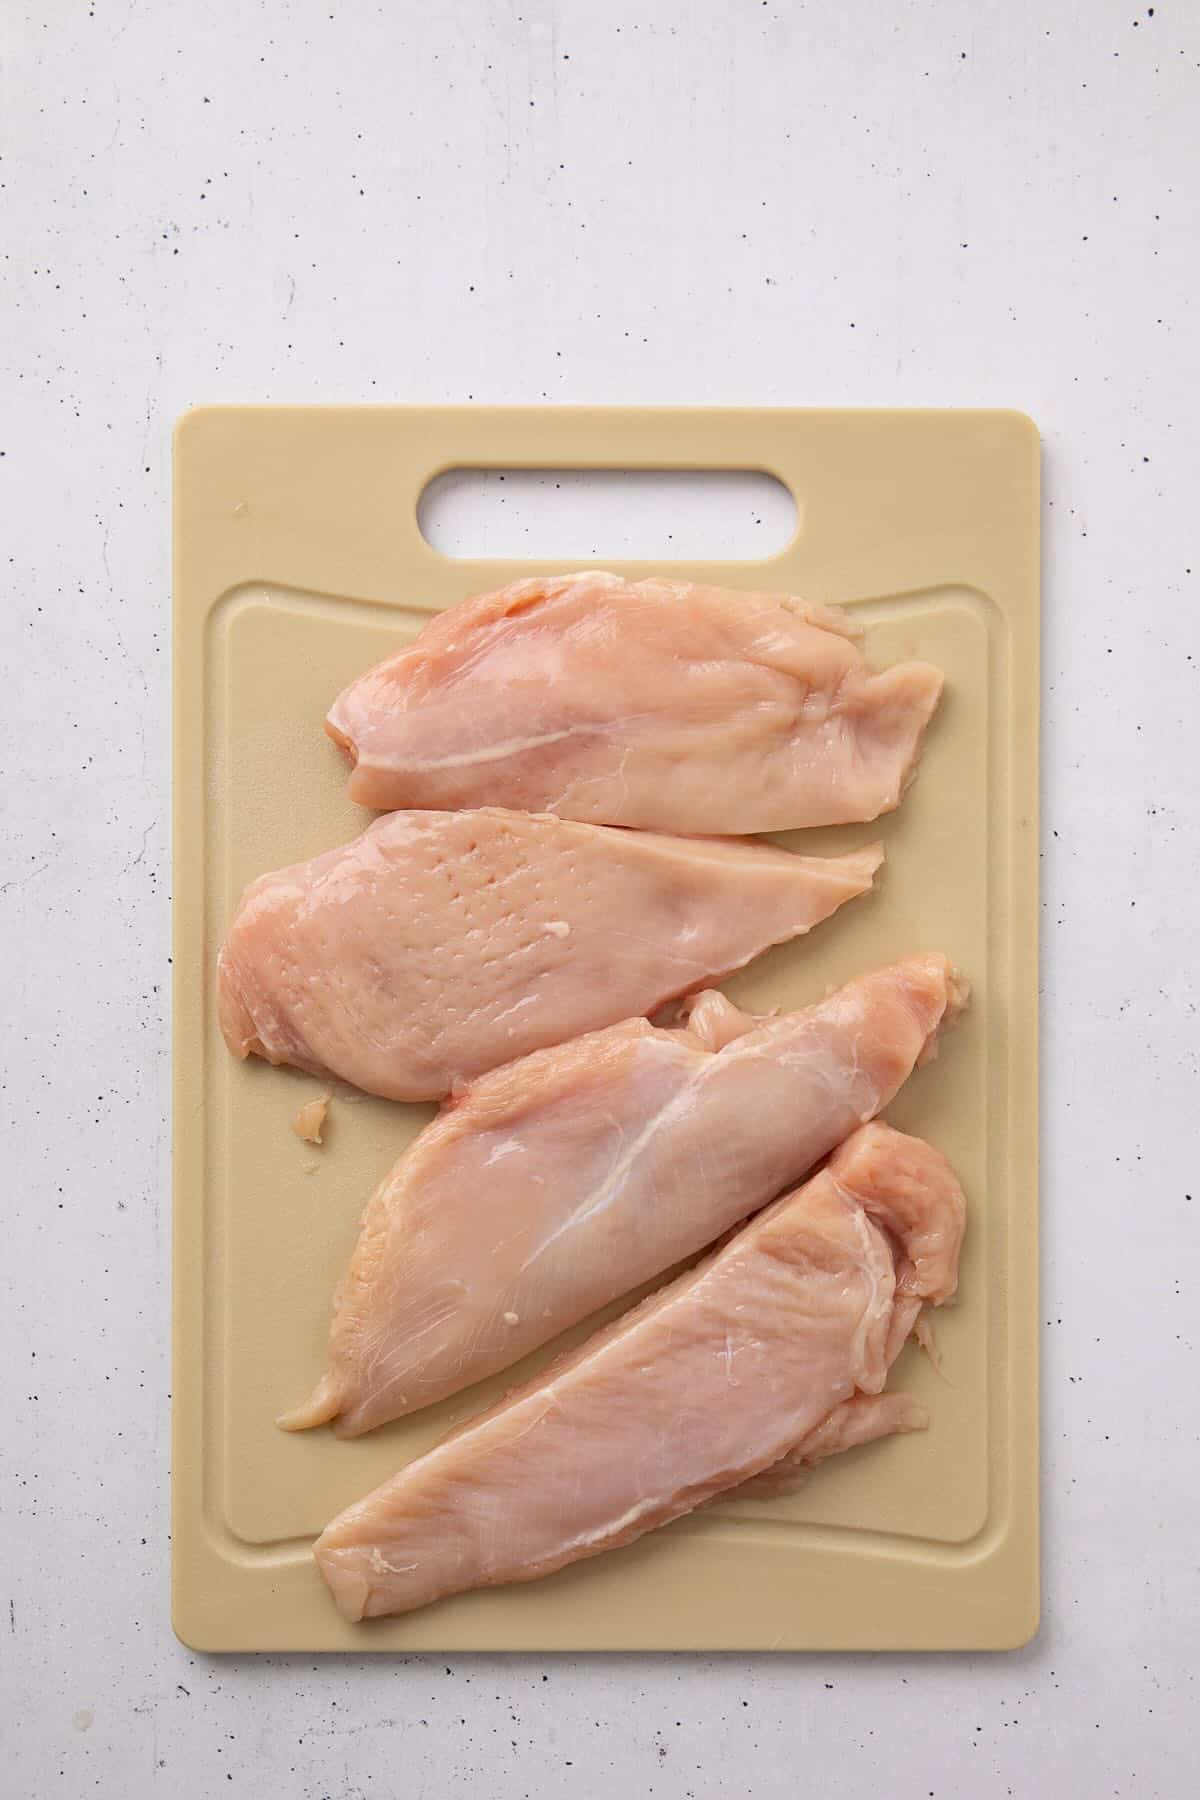
- Pound and slice the chicken. Place the chicken breasts in a zip-top bag and use a meat mallet or rolling pin to pound the thick end down to about ½ inch, matching the thin end. Don’t skip this. Uneven chicken cooks unevenly, and a dry edge is never worth the shortcut. Slice each pounded breast in half lengthwise into four thinner pieces.
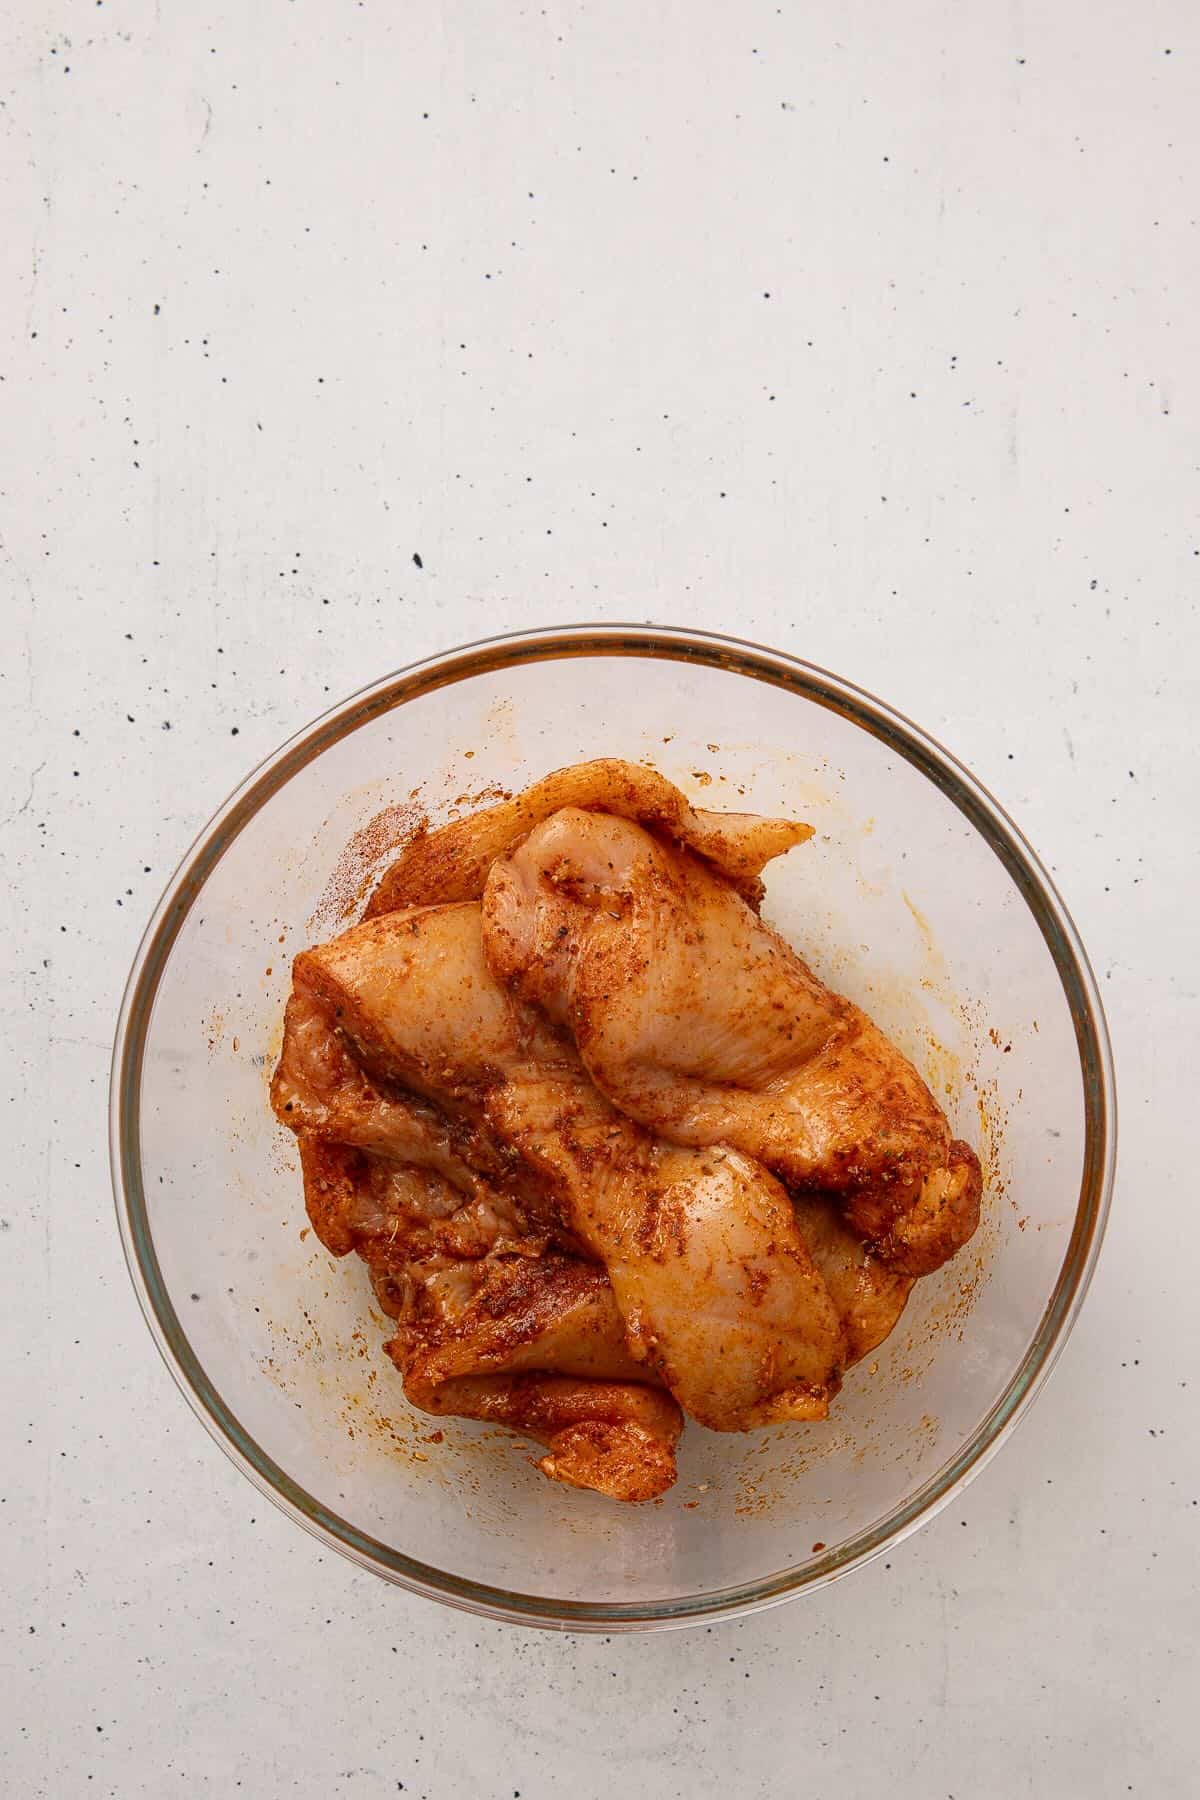
- Season. In a medium bowl, combine the smoked paprika, garlic powder, chili powder, oregano, salt, and pepper. Add the chicken, drizzle with olive oil, and toss to coat all sides evenly.
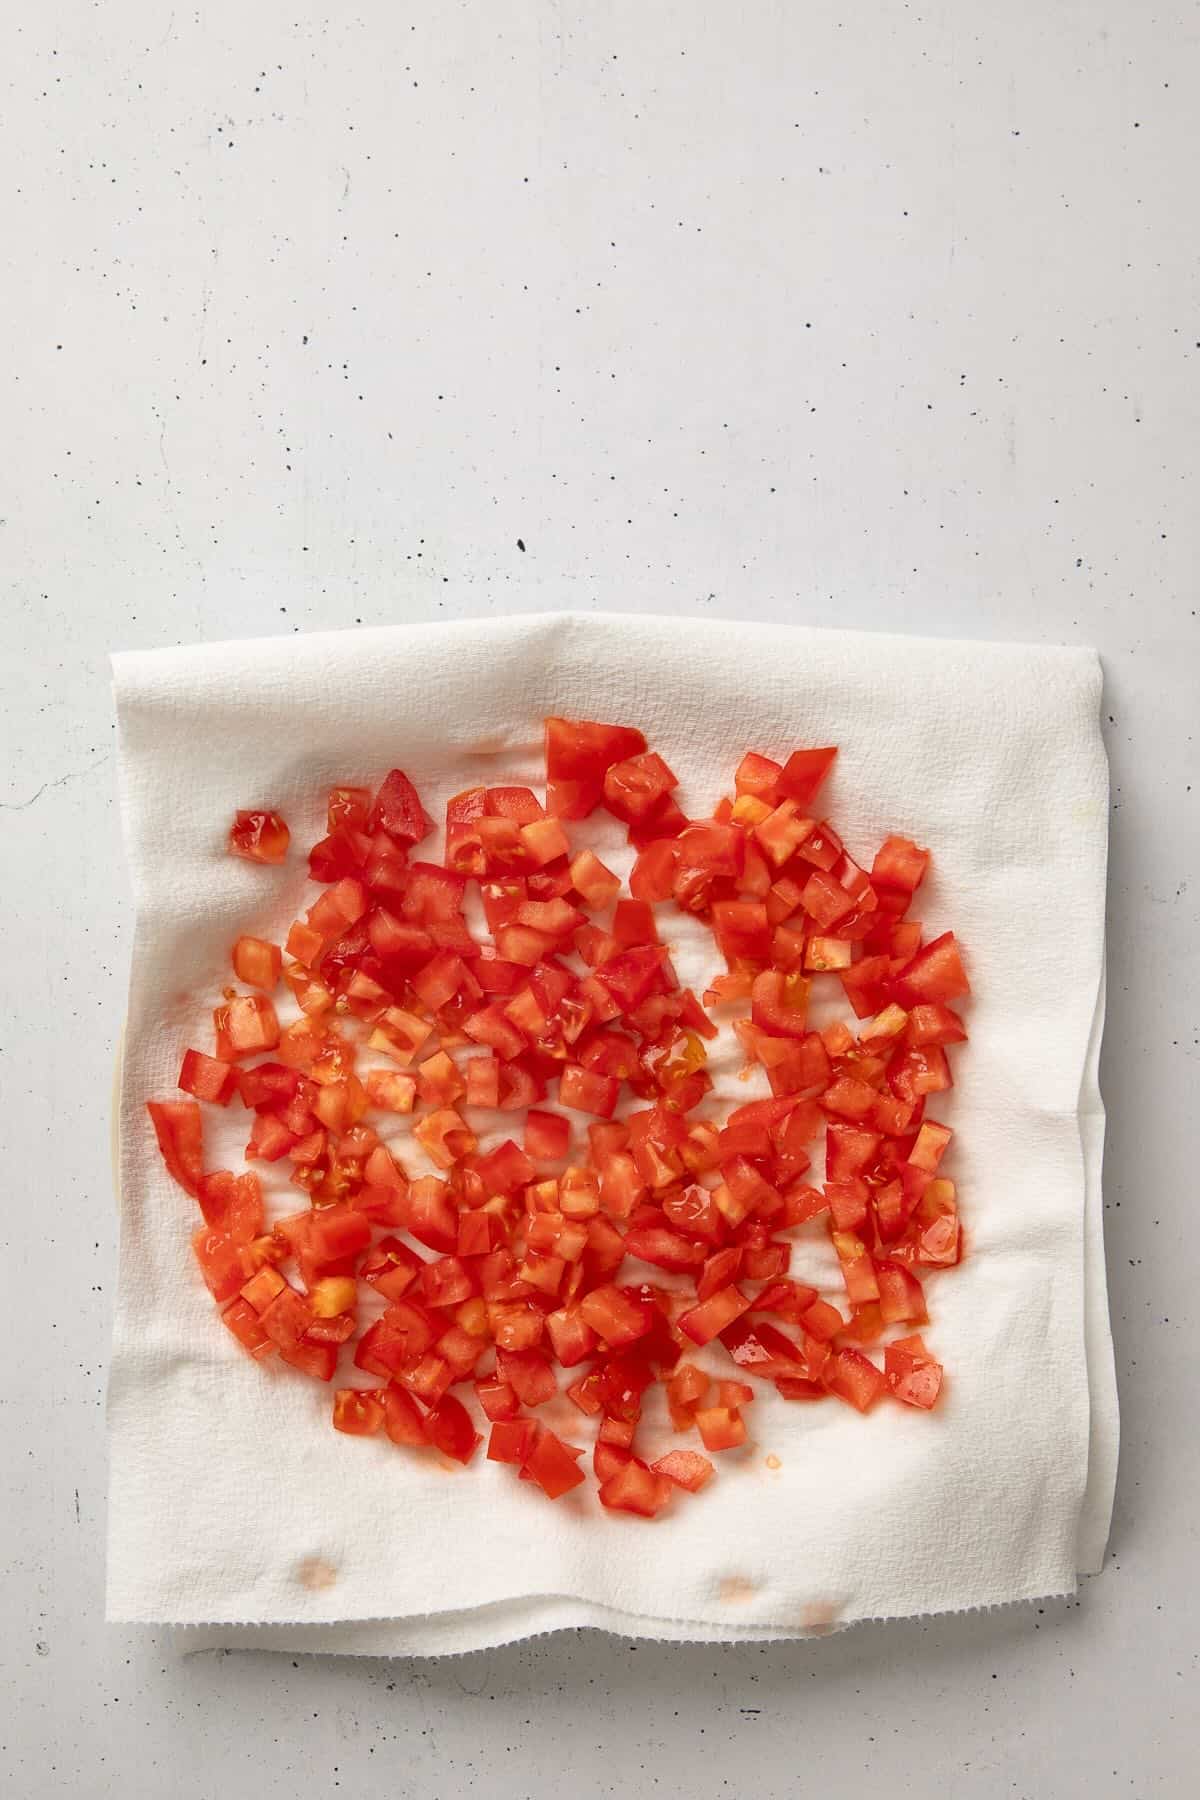
- Prep your tomato. Dice the tomato and blot it dry with a paper towel. This step keeps your wrap from getting soggy later, so don’t skip it.
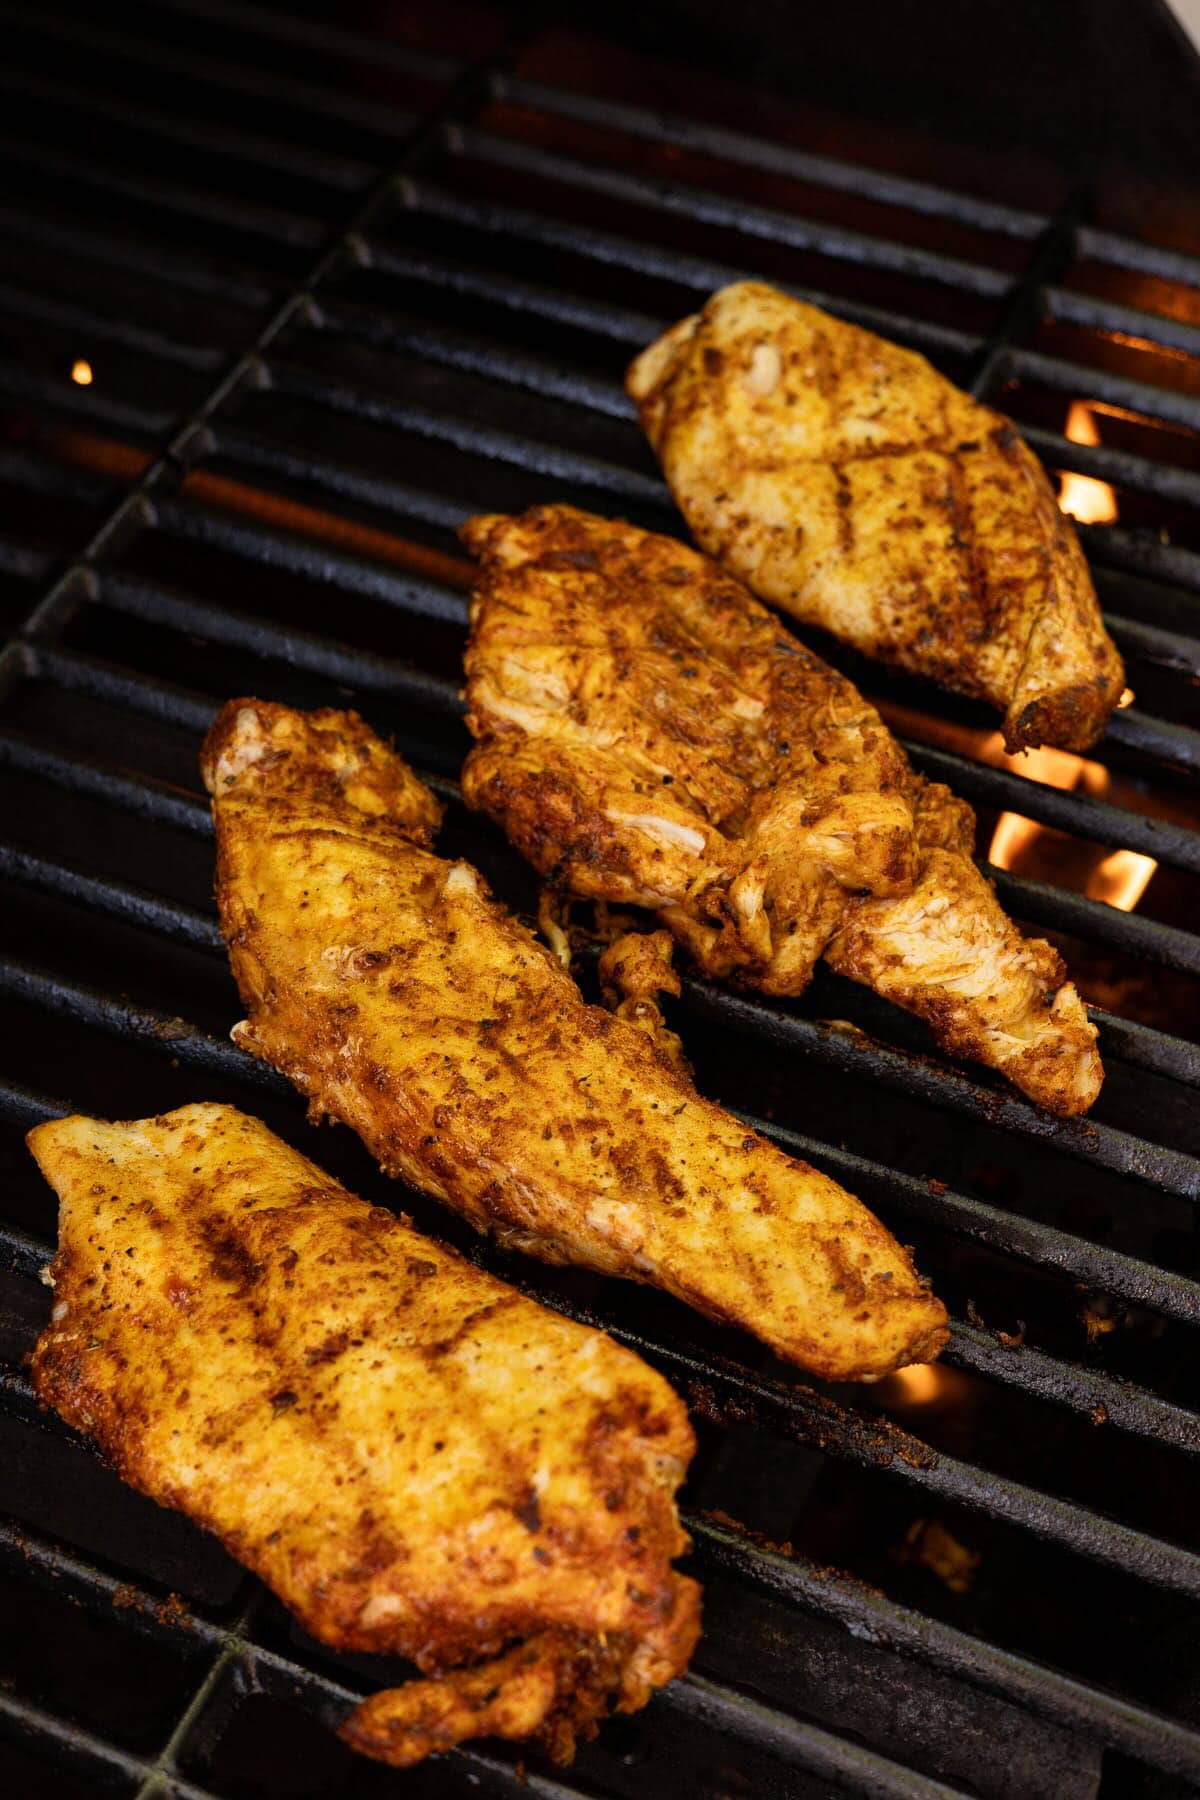
- Grill the chicken. Heat your grill or grill pan over medium-high for about 5 minutes until it’s fully preheated. A properly hot surface is what gives you good grill marks and keeps the chicken from sticking. Lightly oil the grates or pan, lay the chicken down, and leave it alone. Cook 4 to 5 minutes on the first side, then flip and cook another 3 to 4 minutes, until an instant-read thermometer hits 165°F.
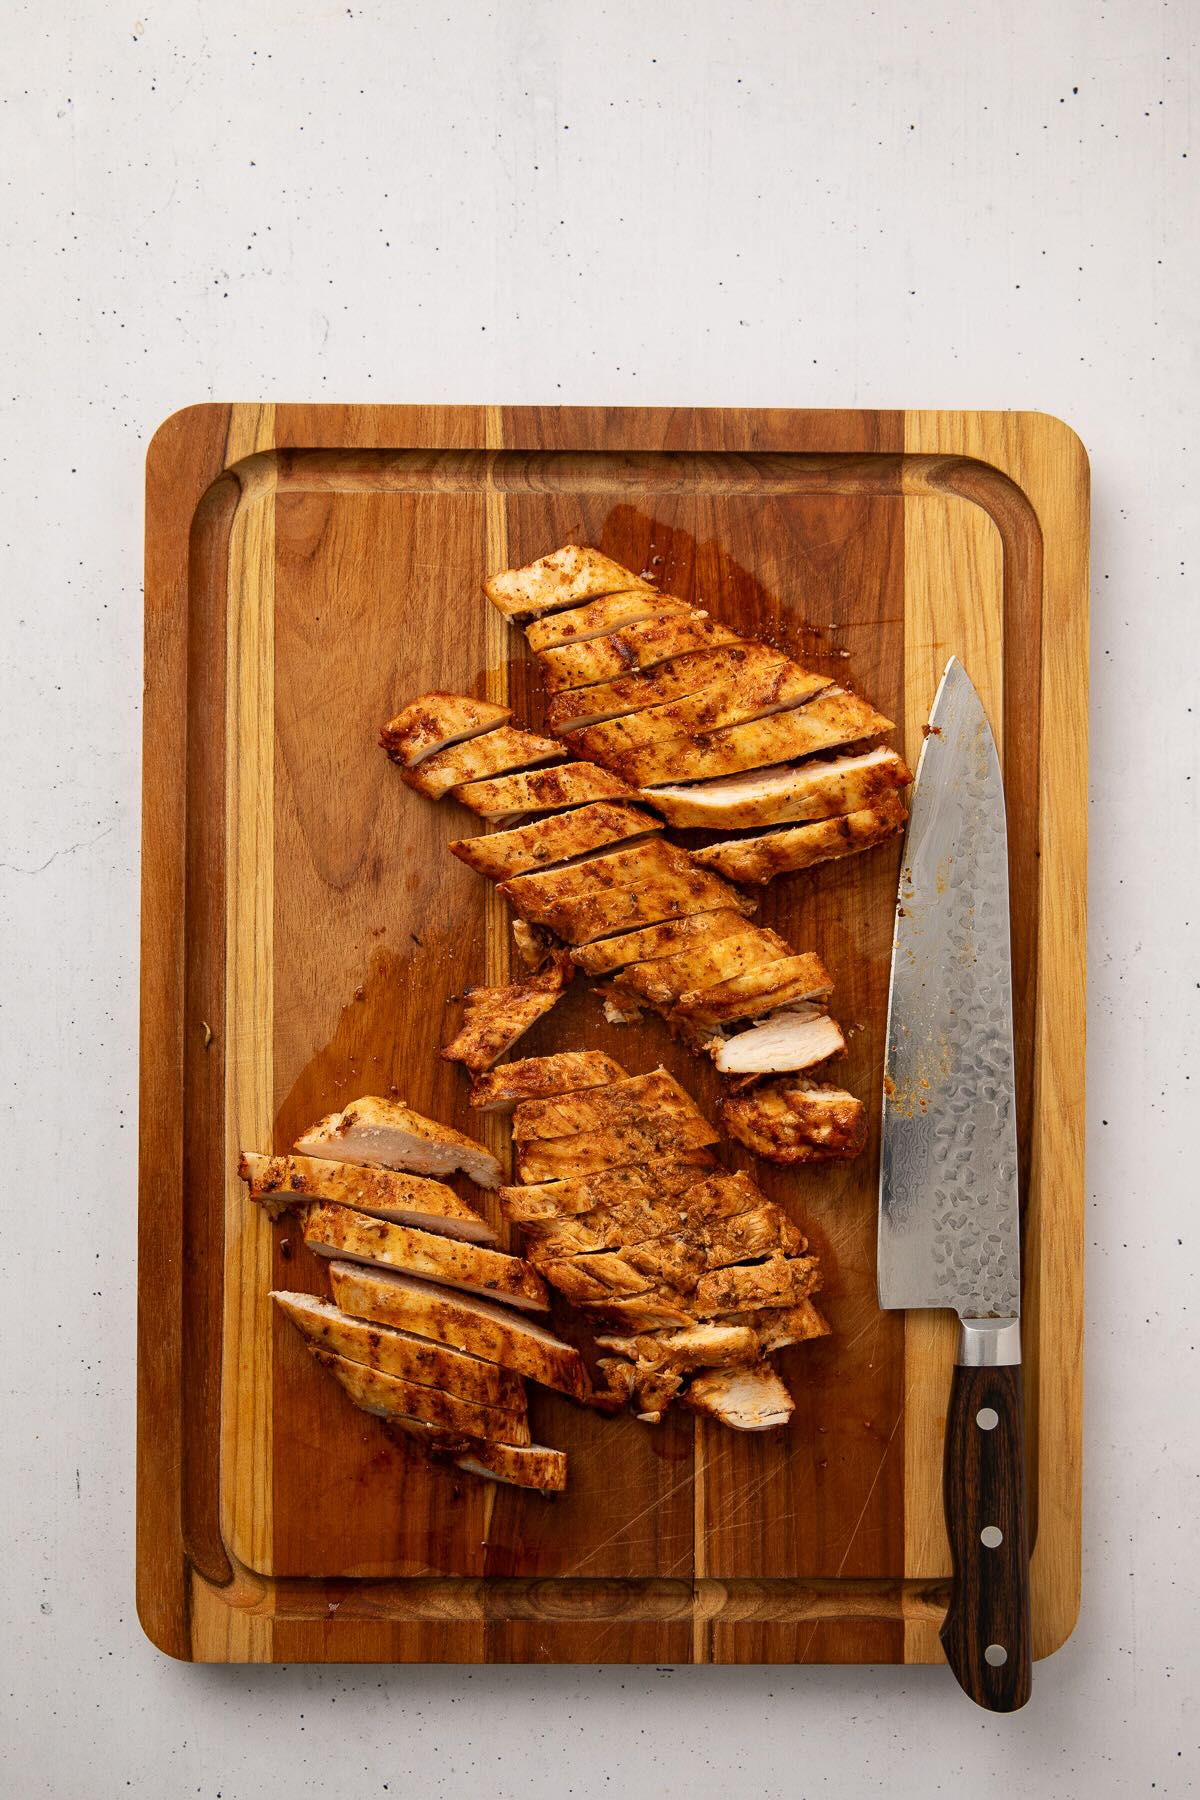
- Rest, then slice. Move the chicken to a cutting board and let it rest for 5 minutes before slicing, so the juices redistribute instead of running out onto your cutting board. While it rests, warm your tortillas. Slice the chicken against the grain into strips.
- Warm the tortillas.
- Grill: Place each tortilla right on the grates over medium heat for 10 to 15 seconds per side, just until it puffs slightly and turns soft. Work fast, they go from perfectly warm to stiff in seconds.
- Grill pan or skillet: Heat each tortilla in a dry pan over medium heat for about 20 seconds per side.
- Microwave: Wrap the stack in a damp paper towel and microwave 30 seconds.
Stack the warmed tortillas on a plate under a clean kitchen towel while you finish slicing the chicken, so they stay soft and pliable instead of cracking when you roll them.
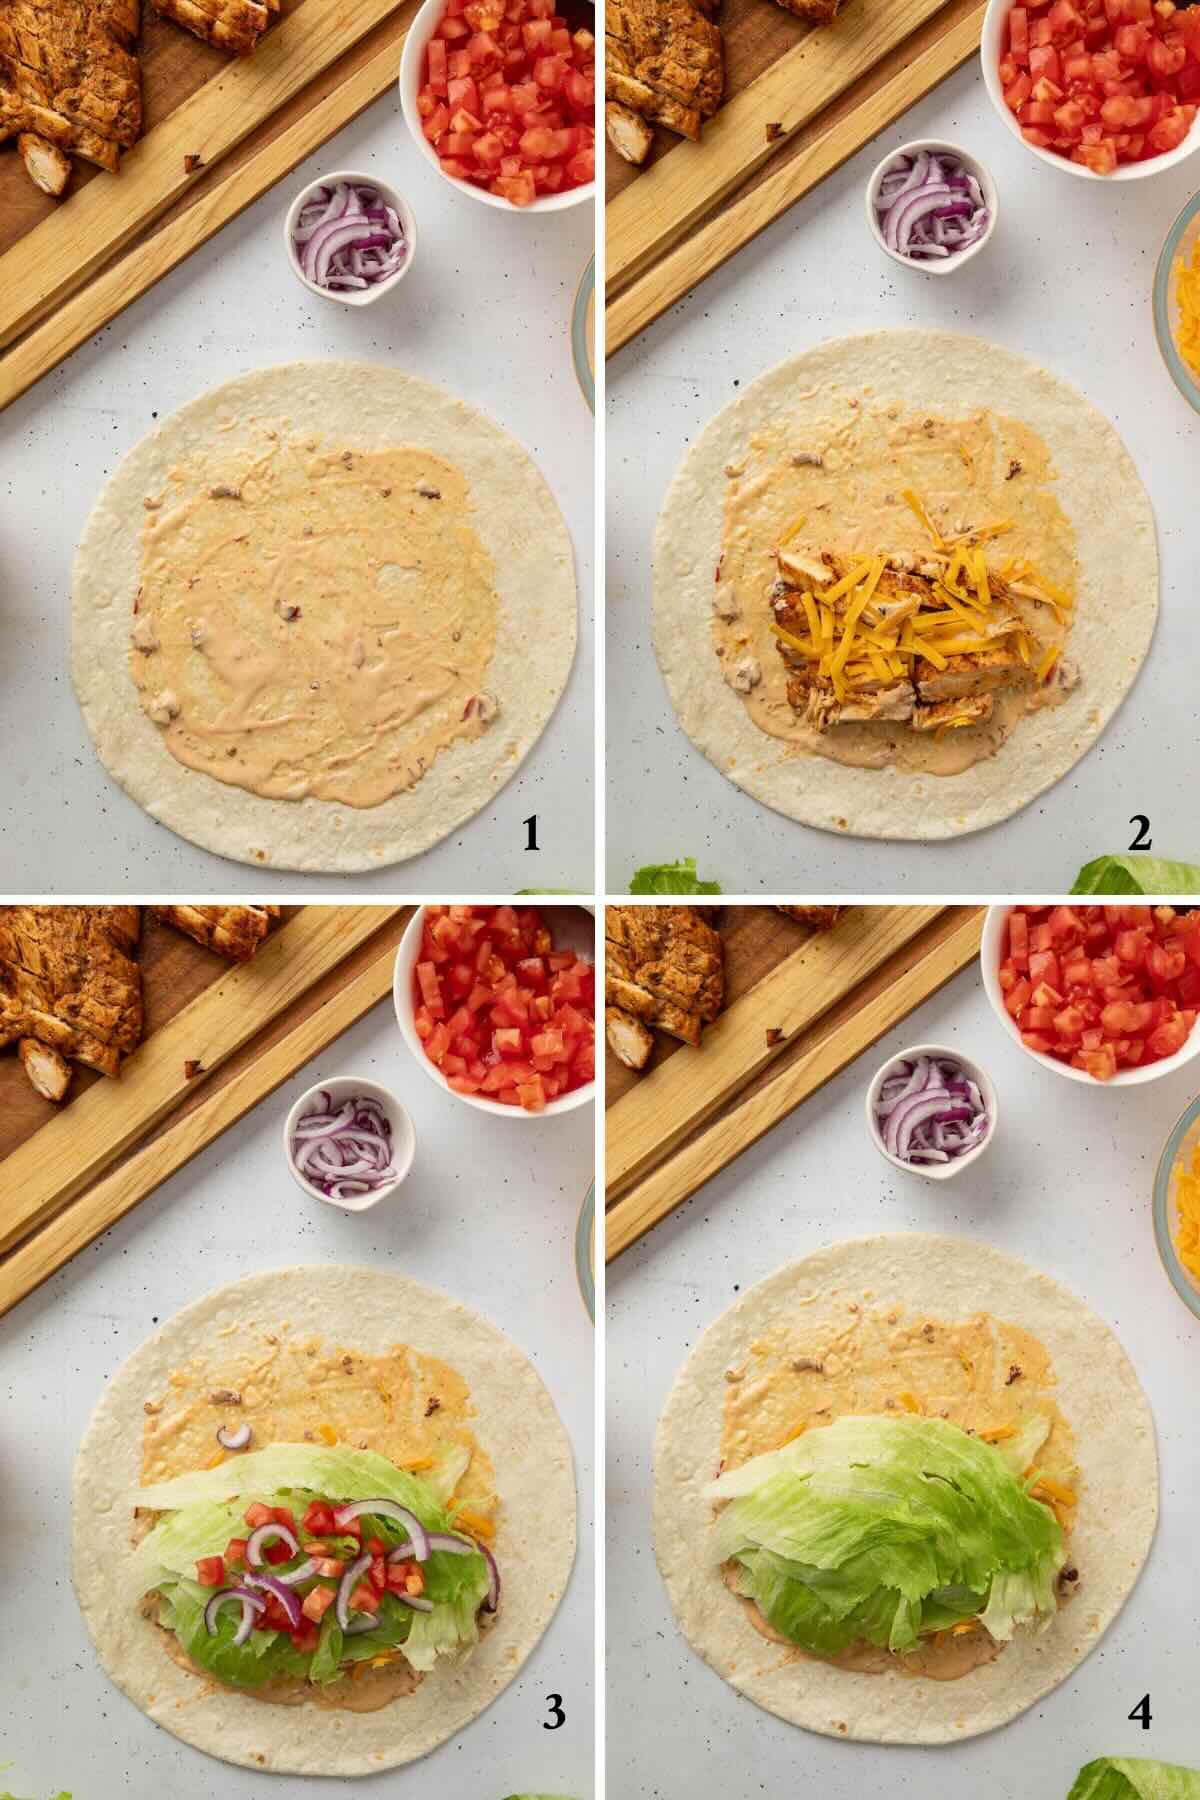
- Assemble. Lay a warm tortilla flat and spread 2 tablespoons of chipotle mayo across the center third, leaving a 2-inch border. That mayo layer does double duty. It adds flavor and slows moisture from soaking into the tortilla. Layer on the sliced chicken, then the cheese, then 1 to 2 whole lettuce leaves. Top with the blotted tomato and sliced red onion, and drizzle with a little more chipotle mayo if you like.
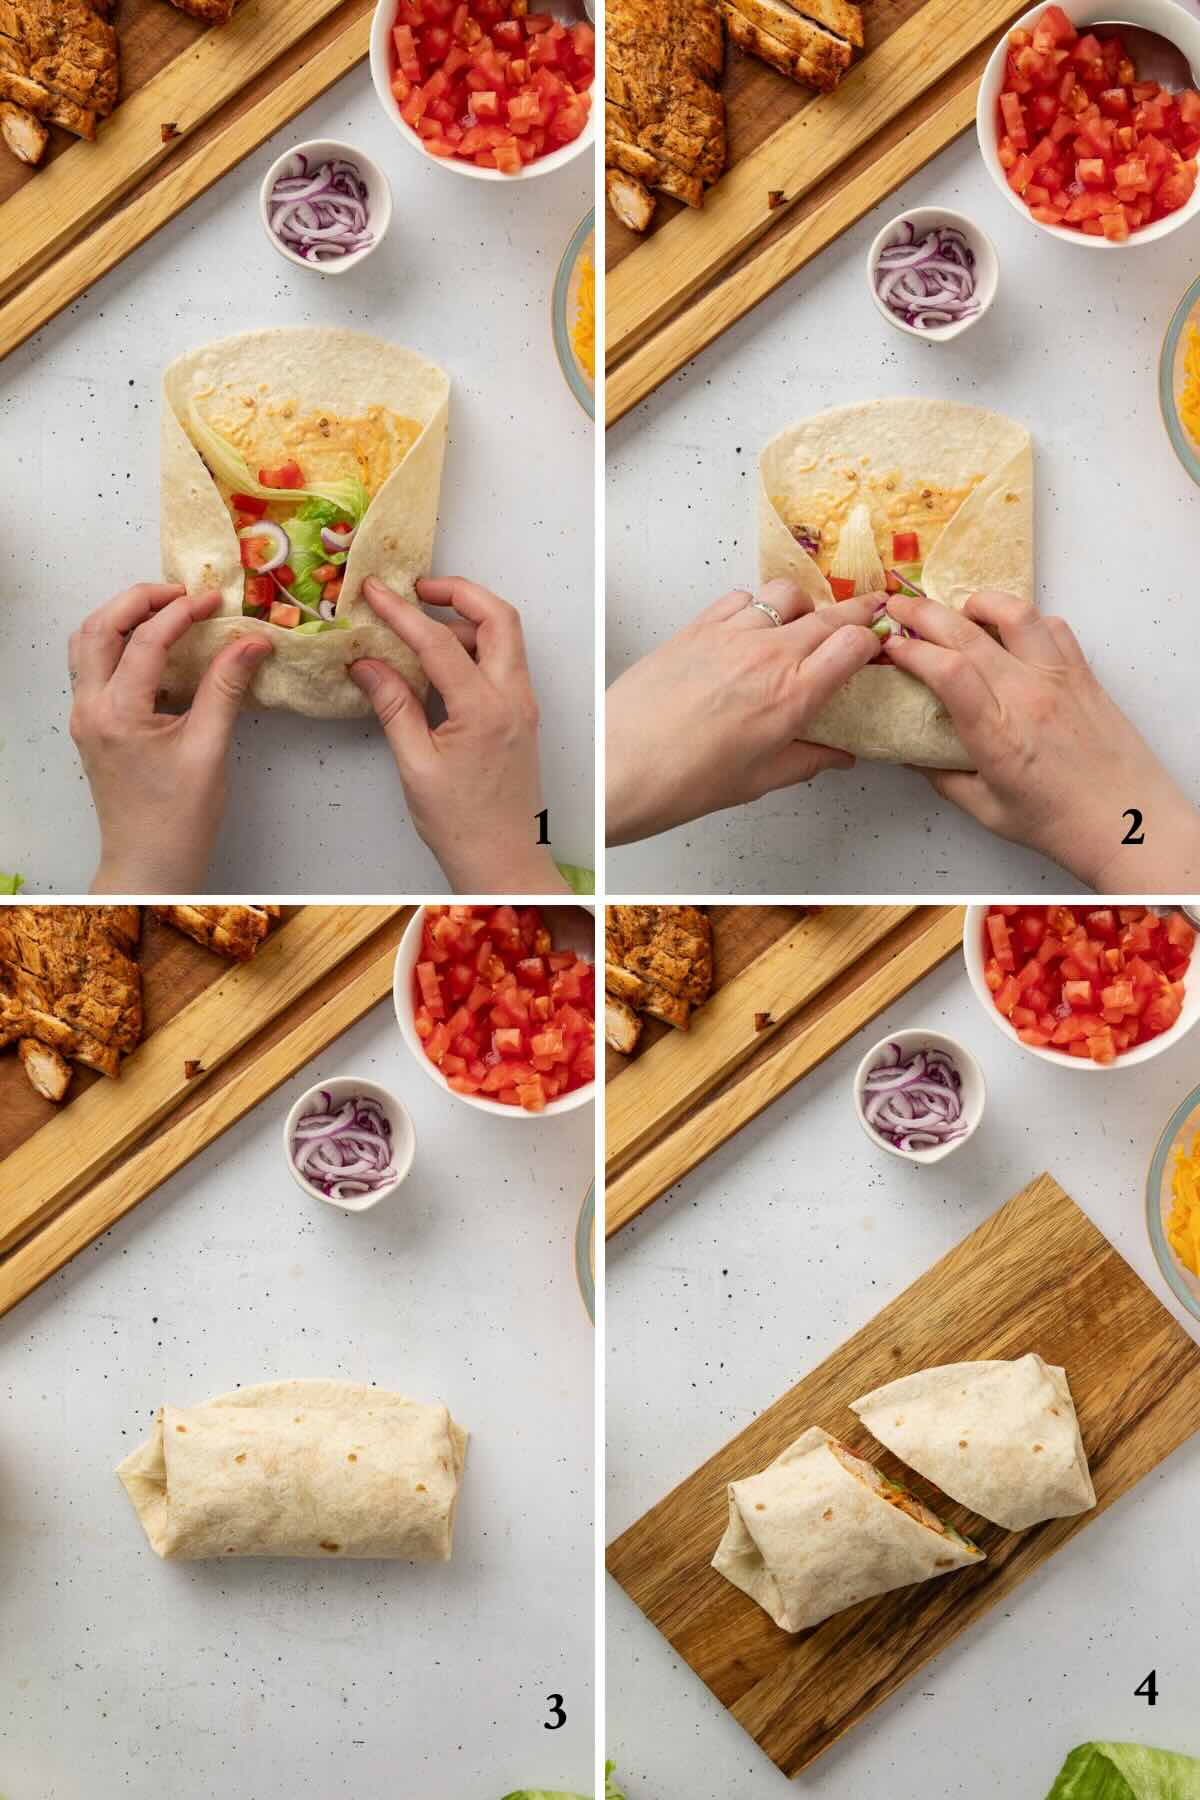
- Fold and serve. Fold both sides in snugly toward the center, then fold the bottom edge up and over the filling. Roll away from you with even pressure, keeping the filling tight as you go. Repeat with the remaining tortillas, slice each wrap in half on the diagonal, and serve right away.
Sharon’s Tips
- I tested grilling the chicken two ways, on my Big Green Egg and on a cast-iron grill pan on the stove, and both were delicious. The Egg gives you that real smoky char and a little more depth of flavor, especially if you throw the tortillas on there for the last minute, too.
- On a weeknight when I don’t feel like firing up the grill, the grill pan does the job, and honestly, the chicken’s texture was nearly as good. My advice: use whichever method you have time for. Both get you to that same juicy result as long as you don’t skip pounding the chicken evenly first; that’s truly the step that makes or breaks this recipe, no matter which heat source you’re standing over.
- Moisture is the enemy in this wrap and can make it soggy. Be sure to dry your lettuce thoroughly and drain and blot your tomatoes to remove excess moisture.
- One more thing I learned while testing this recipe: don’t rush the resting step. I cut into a batch early because I was in a hurry, and half the juice ended up on the cutting board instead of in the chicken, and you know what that means…it rhymes with cry.
What to Serve With Grilled Chicken Wraps
These wraps are a full meal on their own, but they’re even better with something crunchy or cool on the side. My Southern Potato Salad is my go-to, or keep it simple with tortilla chips and salsa for game day. Or, a side of my Southern Corn Salad or Broccoli Salad would round things out nicely too.
Storage and Reheating
- For the best texture, store everything separately, sliced chicken, chipotle mayo, toppings, and tortillas, in airtight containers in the fridge for up to 3 days, and build your wrap fresh when you’re ready to eat. If you do assemble ahead, wrap each one tightly in foil and refrigerate up to 24 hours.
- To reheat an assembled wrap, warm it in a dry skillet over medium heat for 2 to 3 minutes per side, until the tortilla is toasty. For chicken on its own, microwave in 30-second bursts. Try not to microwave a fully assembled wrap if you can help it, the tortilla steams and turns soft instead of staying nice and pliable.
- For meal prep, grilled chicken freezes beautifully. Slice it, freeze in a single layer on a baking sheet, then transfer to a freezer bag for up to 2 months. Thaw overnight in the fridge and reheat gently in a skillet. I wouldn’t recommend freezing a fully assembled wrap; the vegetables and tortilla just don’t hold up well when thawed.
Grilled Chicken Wraps FAQs
Yes, and I’d actually recommend it. It keeps well in the fridge for up to a week, and the flavor deepens a bit overnight.
A regular nonstick skillet works in a pinch. You won’t get the same char, but the chicken will still cook through evenly and taste great as long as you pound it to an even thickness first.
Slice into the thickest piece and check that the inside is white with no pink or translucency in the middle. You can also press on it; the thickest part should feel firm with just a slight resistance, the same way the thinner outside part feels. But honestly, please just get a meat thermometer. You can get one for around $15.00, and it will take the guesswork out completely and change the way you cook forever.
You can, but I don’t recommend it here. Shredded lettuce shifts around and falls out when you slice the wrap, and it releases more moisture over time, which can make your wrap soggy.
Yes, I have tried them before, but I haven’t tested all the available brands or done a side-by-side taste test. They were okay, but obviously not as good as fresh off the grill. In a pinch, go for it.
More Grilled Chicken Recipes You’ll Love
Join the Conversation
If you make these grilled chicken wraps, please leave a comment and a star rating below. I’d love to know how they turned out and whether you used your grill, an indoor grill pan, leftover chicken, or refrigerated grilled chicken you bought at the grocery store.
Recipe:
Want to Save This Recipe?
Enter your email & I’ll send it to your inbox. Plus, get great new recipes from me every week!
By submitting this form, you consent to receive emails from Grits and Pinecones.
Grilled Chicken Wraps with Chipotle Mayo
Equipment
- Outdoor grill, or indoor grill pan
Ingredients
CHIPOTLE MAYO
- ½ cup mayonnaise, I like and use Duke's
- 2 chipotle peppers in adobo sauce, finely minced (from a 7-ounce can)
- 1 tablespoon adobo sauce, from the same can
- 1 tablespoon fresh lime juice
- ¼ teaspoon kosher salt, or heaping ⅛ teaspoon table salt
CHICKEN
- 2 boneless skinless chicken breasts
- 1 tablespoon olive oil
- 1 teaspoon smoked paprika
- 1 teaspoon garlic powder
- ½ teaspoon chili powder
- ½ teaspoon dried oregano
- ½ teaspoon kosher salt, or heaping ¼ teaspoon table salt
- ¼ teaspoon freshly cracked black pepper
WRAPS
- 4 large flour tortillas burrito size, 10 to 12 inches, warmed
- 4 to 8 large iceberg lettuce leaves
- 1 large tomato, diced, drained and blotted dry
- 1 cup shredded cheddar cheese, block cheese, shredded at home
- ¼ cup thinly sliced red onion
Instructions
- Make the chipotle mayo first. In a small bowl, stir together the mayonnaise, minced chipotle peppers, adobo sauce, lime juice, and salt until well combined. Taste and adjust as needed. Add an extra minced pepper for more heat, or a small drizzle of honey if the sauce is too spicy. Cover and refrigerate until you are ready to assemble.
- Place the chicken breasts in a zip-top bag and use a meat mallet or rolling pin to pound the thickest end to about ½ inch thick, matching the thin end. This is the single most important step for juicy grilled chicken because even thickness ensures the whole breast finishes cooking at the same time, with no dry edges waiting for the thick center to catch up. Slice each pounded breast in half lengthwise to make four thinner pieces.
- In a medium bowl, combine the smoked paprika, garlic powder, chili powder, oregano, salt, and pepper. Add the chicken pieces, drizzle with olive oil, then toss to coat all sides evenly.
- Dice the tomato and blot it dry with a paper towel to remove excess moisture.
- Heat a grill or grill pan over medium-high heat for about 5 minutes until fully preheated. A properly hot surface gives you grill marks and a good sear without the chicken sticking. Lightly oil the grates or pan, then place the chicken pieces down and leave them alone. Do not move them once they hit the grill. Cook for 4 to 5 minutes on the first side, then flip and cook another 3 to 4 minutes, or until the internal temperature reaches 165°F on an instant-read thermometer.
- Transfer the chicken to a cutting board and let it rest for 5 minutes before slicing. Resting allows the juices to redistribute through the meat, so they do not run out when you cut into it. While the chicken rests, heat the tortillas. A cold tortilla will split at the seam and is much harder to work with. After resting, slice the chicken against the grain into strips.
- Heating tortillas:* Grill – Place each tortilla directly on the grill grates over medium heat for 10 to 15 seconds per side, just until the tortilla puffs slightly and feels soft and pliable. Work quickly, as tortillas go from perfectly warm to stiff and brittle in seconds.* Grill pan or skillet – Heat each tortilla in a dry grill pan or dry skillet over medium heat for about 20 seconds per side.* Microwave – Wrap the stack in a damp paper towel and microwave for 30 seconds. A warm tortilla is pliable and rolls tightly without cracking or tearing.For all methods, stack warmed tortillas on a plate and cover with a clean kitchen towel to keep them soft while you slice the chicken and get ready to assemble.
- Assemble the wraps. Lay one warm tortilla flat on a clean surface. Spread 2 tablespoons of chipotle mayo in the center third of the tortilla, leaving a 2-inch border on all sides. The mayo coating helps slow moisture absorption and keeps the wrap from getting soggy. Add the sliced chicken on top of the mayo, then the cheese, then lay 1 to 2 iceberg lettuce leaves flat over everything. Add the blotted tomato and sliced red onion on top of the lettuce. Drizzle a little extra chipotle mayo over the top if desired.
- To fold the wrap, fold both sides snugly toward the center. Then fold the bottom edge of the tortilla up and over the filling. Roll the wrap firmly away from you, maintaining even pressure throughout and using your fingers to keep the filling tight against the roll. Repeat with the remaining tortillas. Slice each wrap in half on a diagonal and serve immediately.

Leave a Reply