
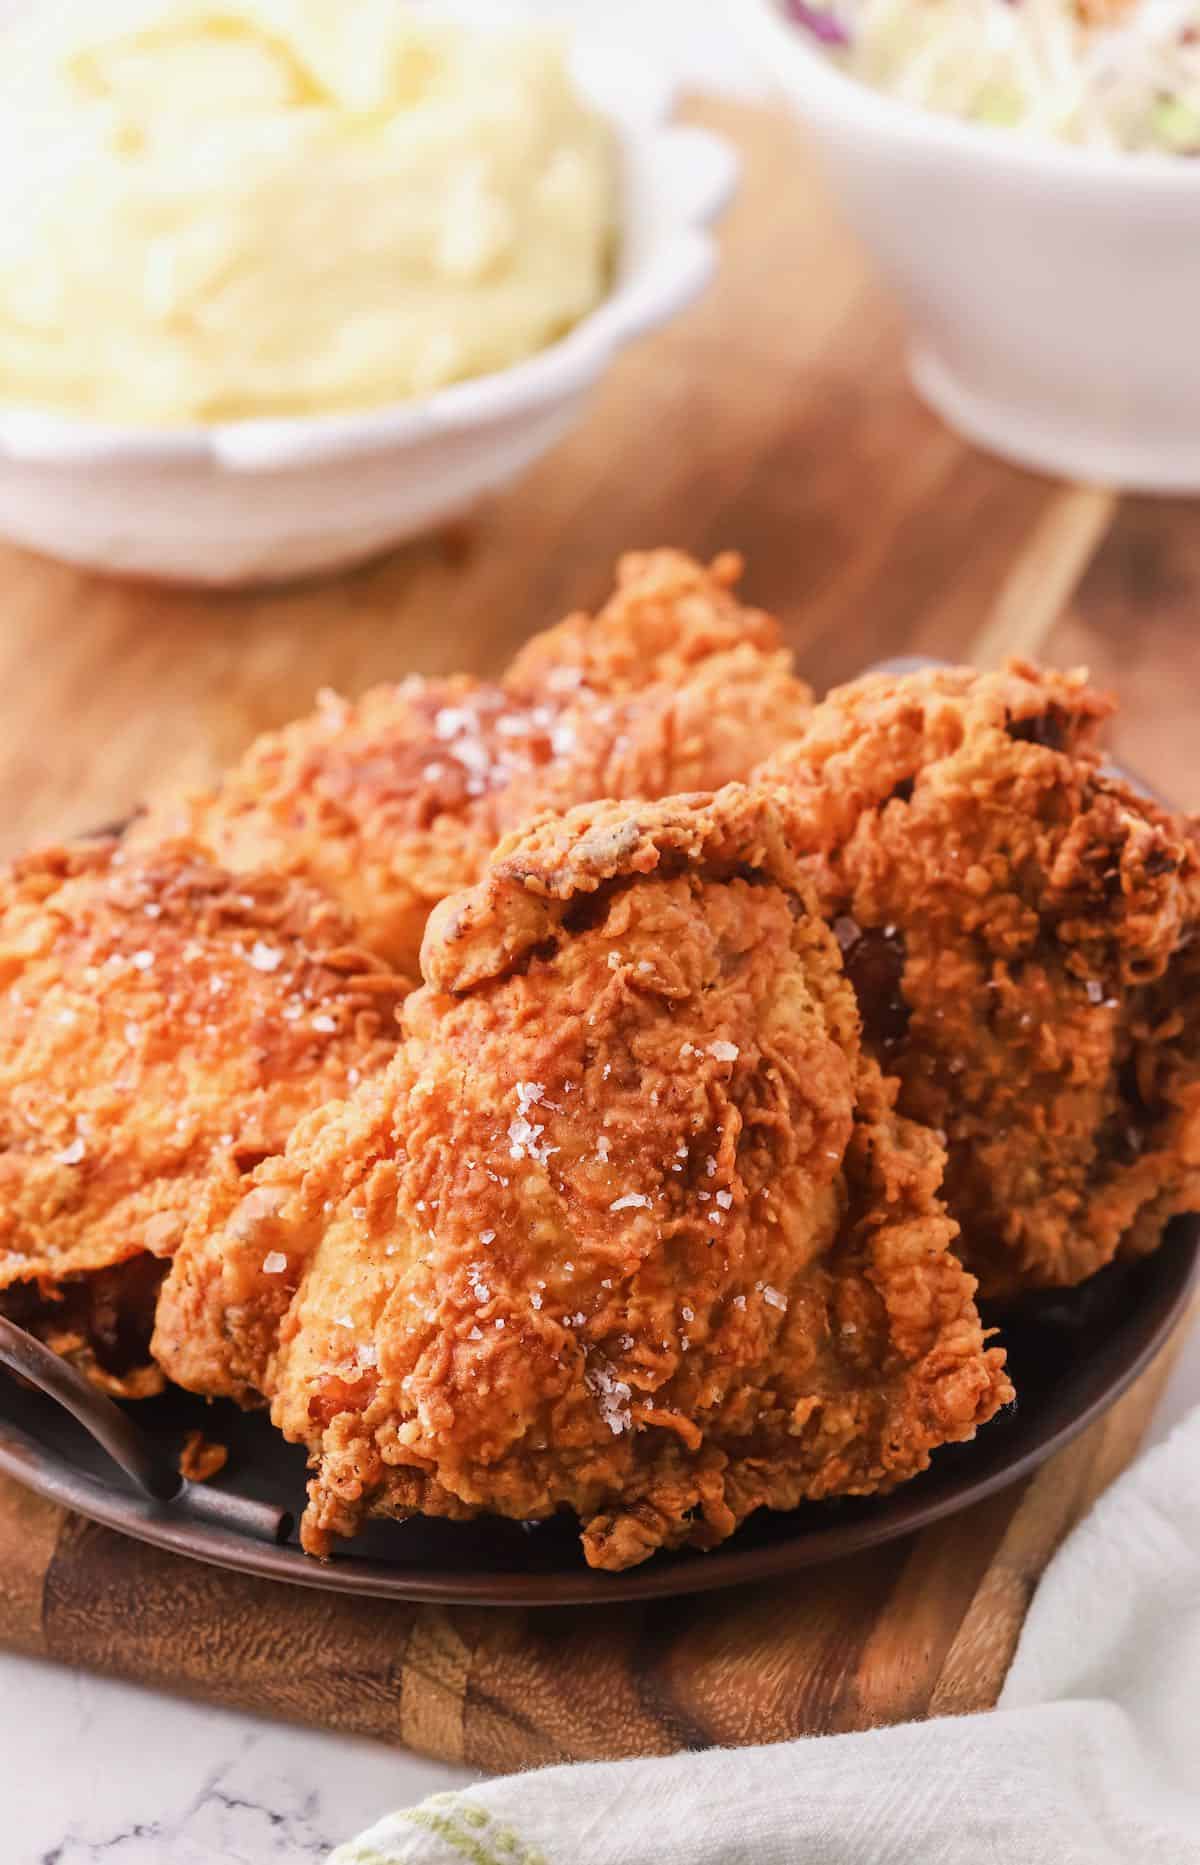
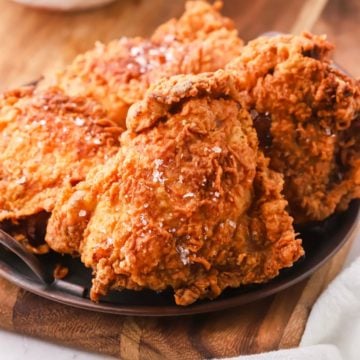
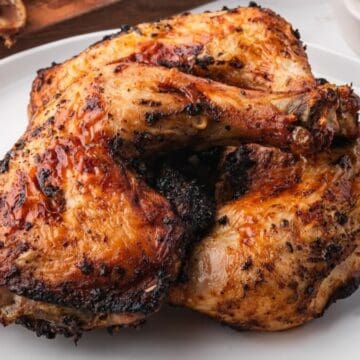
A classic Southern fried chicken recipe starts with bone-in chicken marinated in tangy buttermilk, coated in seasoned flour, and fried until the crust turns golden and irresistibly crispy. The result is juicy, tender meat inside and the kind of crunchy crust that Southern cooks have perfected for generations.
At Grits and Pinecones, fried chicken is one of those dishes I've cooked more times than I can count. This version keeps things simple and reliable, no complicated techniques – just a flavorful buttermilk marinade, well-seasoned flour, and careful temperature control for perfectly crispy chicken every time.
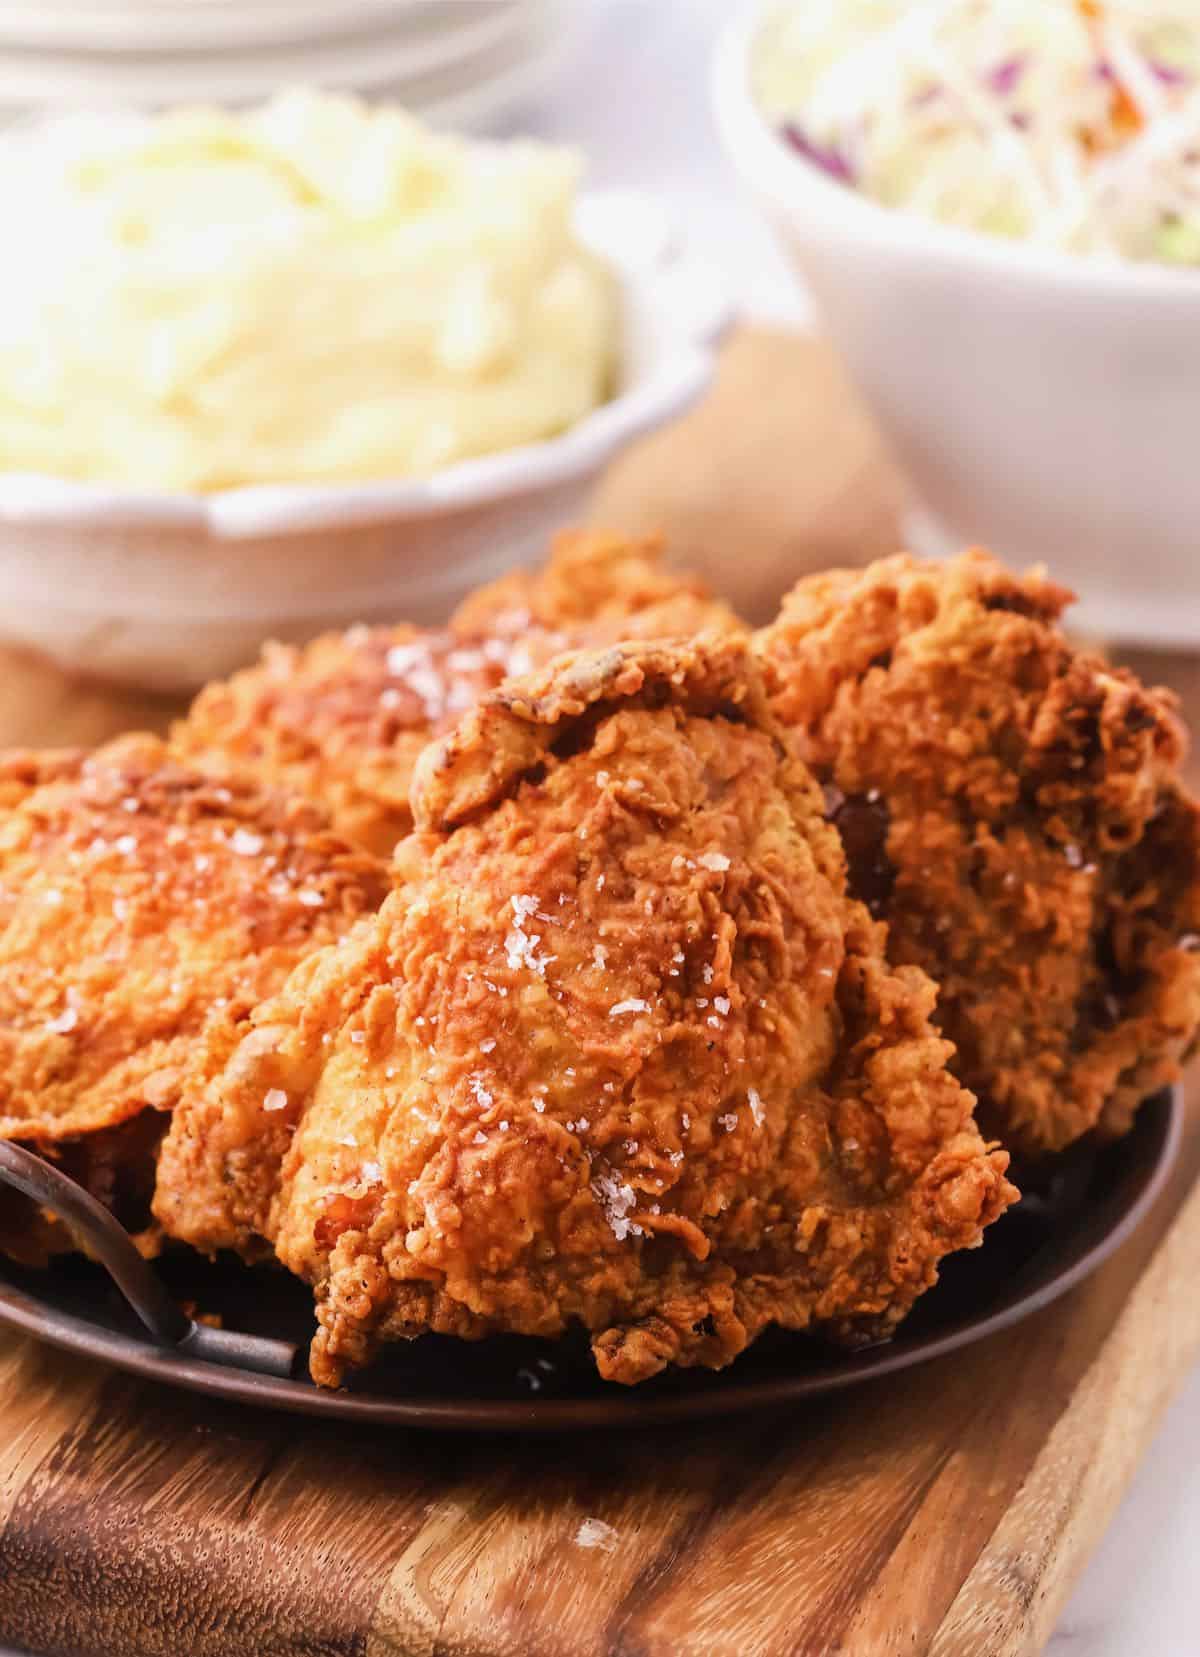
Whether you're cooking for Sunday supper, a picnic, or a tailgate party, this Southern classic never disappoints. This is the classic Southern fried chicken recipe I've relied on for years when I want perfectly crispy, juicy chicken every single time.
Quick Look at the Recipe
Crispy Southern fried chicken is made by marinating chicken pieces in buttermilk, coating them in seasoned flour, and frying them at a steady oil temperature until golden brown and perfectly cooked.
Ready in: 45 minutes (+ marinade time) | Serves: 4-6 | Difficulty: Moderate |
Best for: Sunday suppers, picnics, and potlucks
Jump to:
- Quick Look at the Recipe
- Key Tips for Perfect Southern Fried Chicken
- Why You'll Love This Southern Fried Chicken Recipe
- Ingredient Notes and Substitutions
- Best Chicken Pieces for Southern Fried Chicken
- Recipe Variations and Twists
- How to Make Southern Fried Chicken (Step-by-Step)
- Serving Ideas
- Recipe FAQs
- Tips for Perfect Fried Chicken Every Time
- Reader Favorites to Serve with Fried Chicken
- Join the Conversation
- Recipe:
Key Tips for Perfect Southern Fried Chicken
- Marinate the chicken in buttermilk for at least 4 hours for tender, flavorful meat.
- Let the breaded chicken rest 20-30 minutes before frying so the coating sticks.
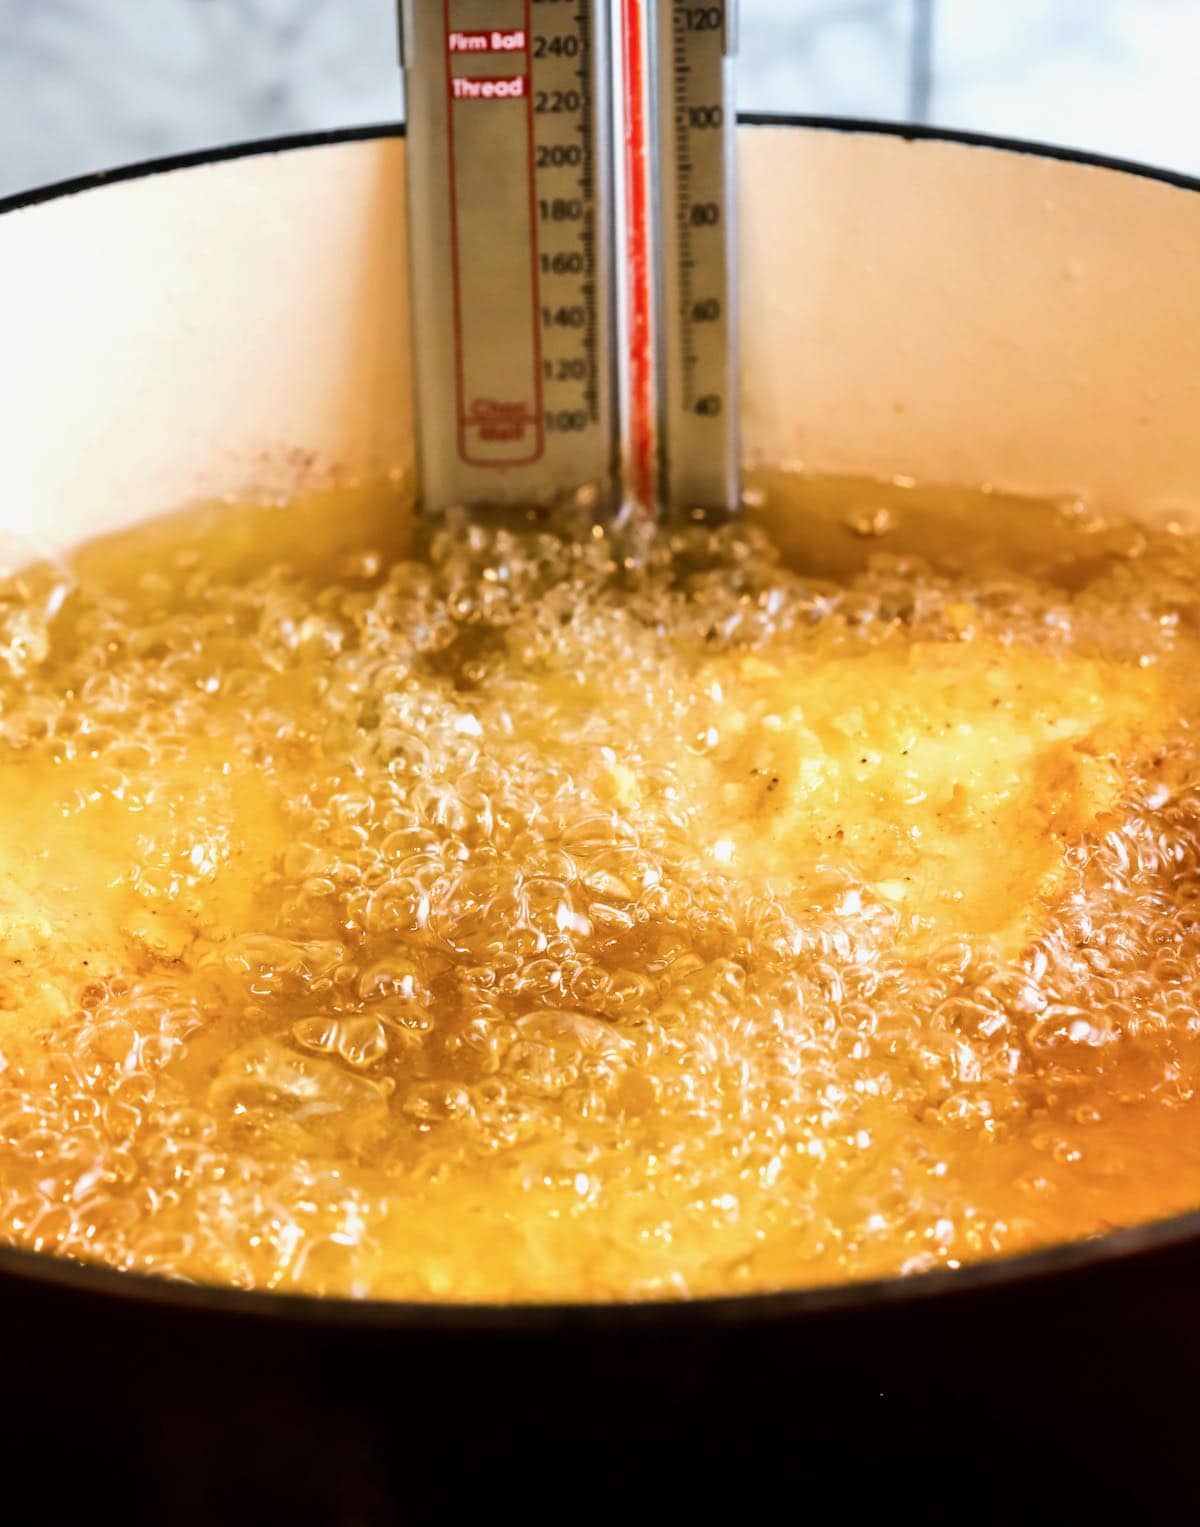
- Start the oil at 350°F, then maintain about 315°F while frying.
- Fry only 2-3 pieces at a time so the oil temperature stays stable.
- Drain the chicken on a wire rack, not paper towels, to keep the crust crispy.
When done right, Southern fried chicken should have a deep golden crust that crackles when you bite into it and juicy meat inside.
Why You'll Love This Southern Fried Chicken Recipe
- Classic buttermilk Southern flavor
- Crispy, crunchy crust every time
- Juicy, tender chicken inside
- Like my Southern Oven-Fried Chicken, it has simple ingredients and a straightforward technique
- Perfect for picnics, potlucks, and family dinners
Like my Country-Style Steak with Onion Gravy, it's the kind of timeless recipe every Southern cook should have in their back pocket.
Ingredient Notes and Substitutions
See the recipe card for full information on ingredients and quantities.
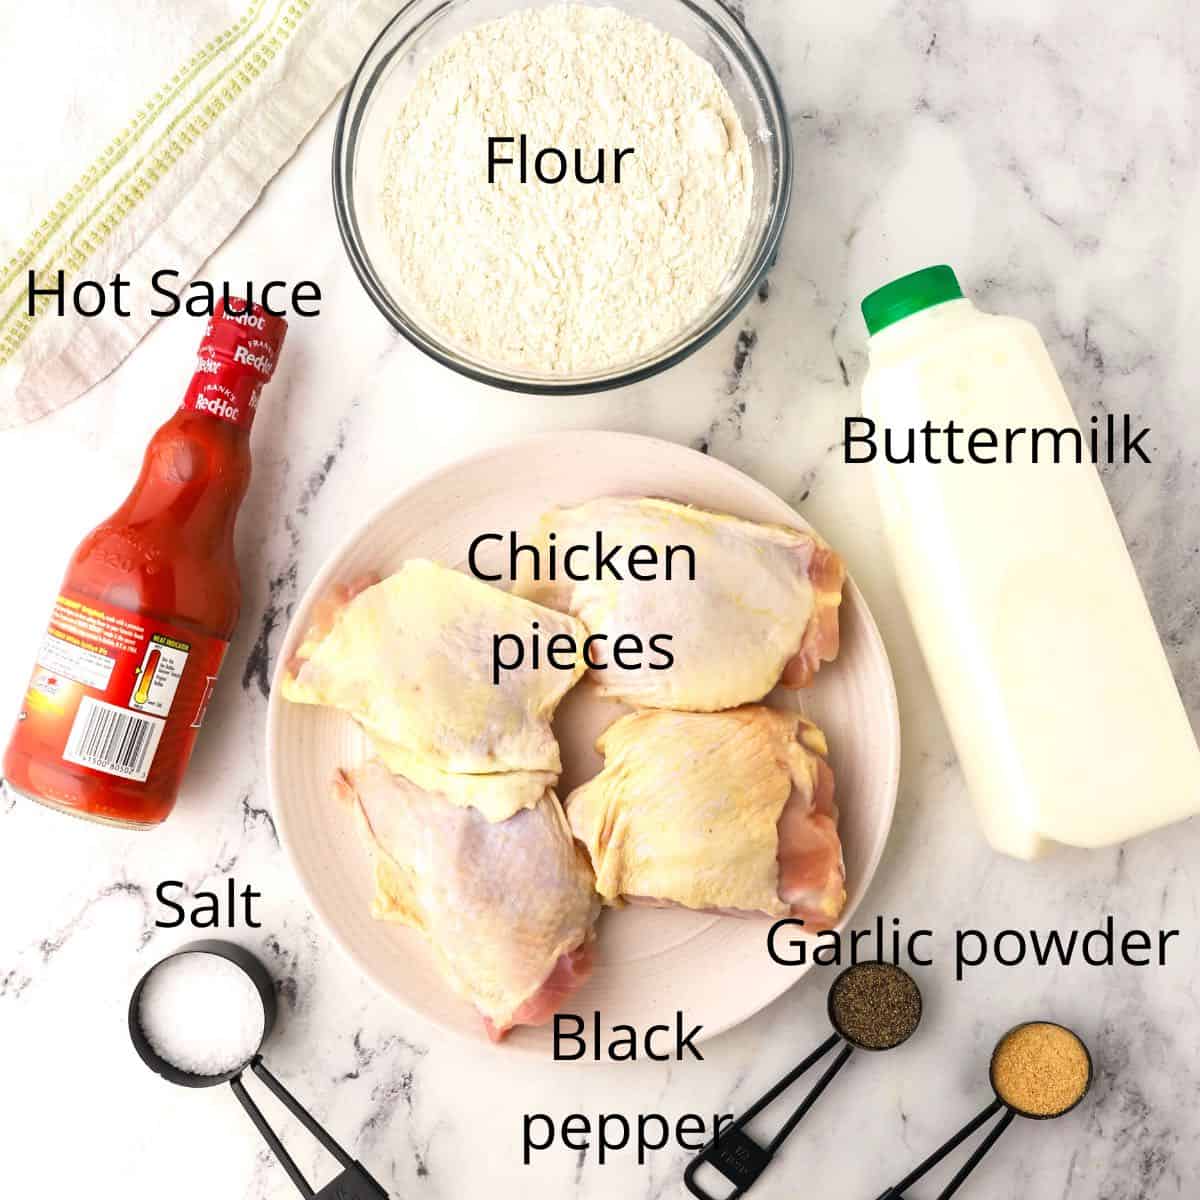
- Bone-in, skin-on chicken – Traditional Southern fried chicken uses bone-in pieces. The bones help retain moisture, and the skin creates the signature crispy crust.
- Buttermilk – The buttermilk marinade tenderizes the chicken while adding a subtle, tangy flavor.
- Hot sauce and garlic powder – These add gentle background flavor to the marinade without overpowering the chicken.
- All-purpose flour – Flour forms the base of the crispy coating.
- Peanut oil – Peanut oil is my go-to and is ideal for frying because it has a high smoke point and neutral flavor. Vegetable oil, soybean oil, or rice bran oil also works.
Best Chicken Pieces for Southern Fried Chicken
You can fry almost any cut of chicken, but some pieces produce better results than others.
- Chicken thighs – My favorite cut for fried chicken. Dark meat stays juicy and flavorful and is very forgiving during frying.
- Drumsticks – Another excellent option that cooks evenly and is great for gatherings or picnics.
- Chicken breasts – Breasts work well, but can dry out if they are very large. Cutting them into smaller pieces helps them cook evenly.
If you're new to frying chicken, starting with thighs and drumsticks is the most foolproof option.
| Chicken Cut | Flavor | Forgiveness | Cook Time |
|---|---|---|---|
| Thighs | Rich | Very forgiving | 14-18 minutes |
| Drumsticks | Savory | Forgiving | 12-16 minutes |
| Breasts | Mild | Less forgiving | 10-14 minutes |
Recipe Variations and Twists
- Use boneless chicken pieces for fried chicken burgers
- Double-dipped fried chicken for an extra thick crust
- Add smoked paprika or cayenne to the flour for spicy fried chicken
- Drizzle with hot honey before serving
How to Make Southern Fried Chicken (Step-by-Step)
This is a summary of the steps; the complete directions are in the recipe card below.
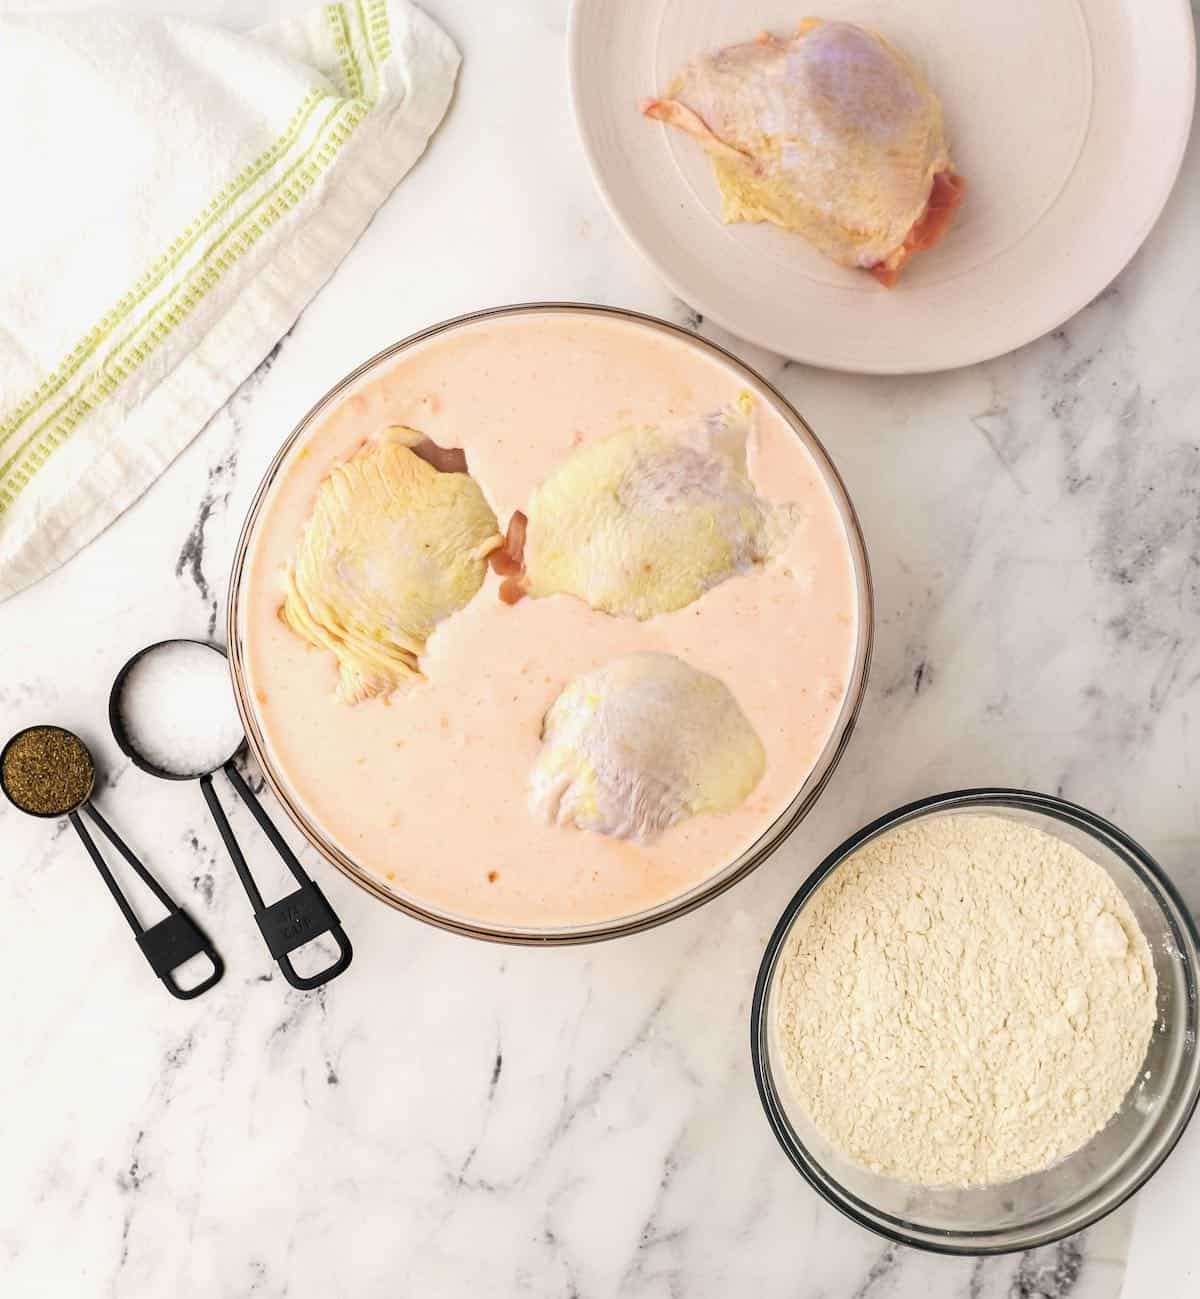
- Marinate the Chicken – Combine buttermilk, garlic powder, and hot sauce in a bowl. Add the chicken pieces, cover, and refrigerate for at least 4 hours or up to 24 hours.
- Bring Chicken to Room Temperature – Remove the chicken from the refrigerator about one hour before frying so it cooks more evenly.
- Prepare the Seasoned Flour – Combine flour, kosher salt, and black pepper in a large bag or shallow dish.
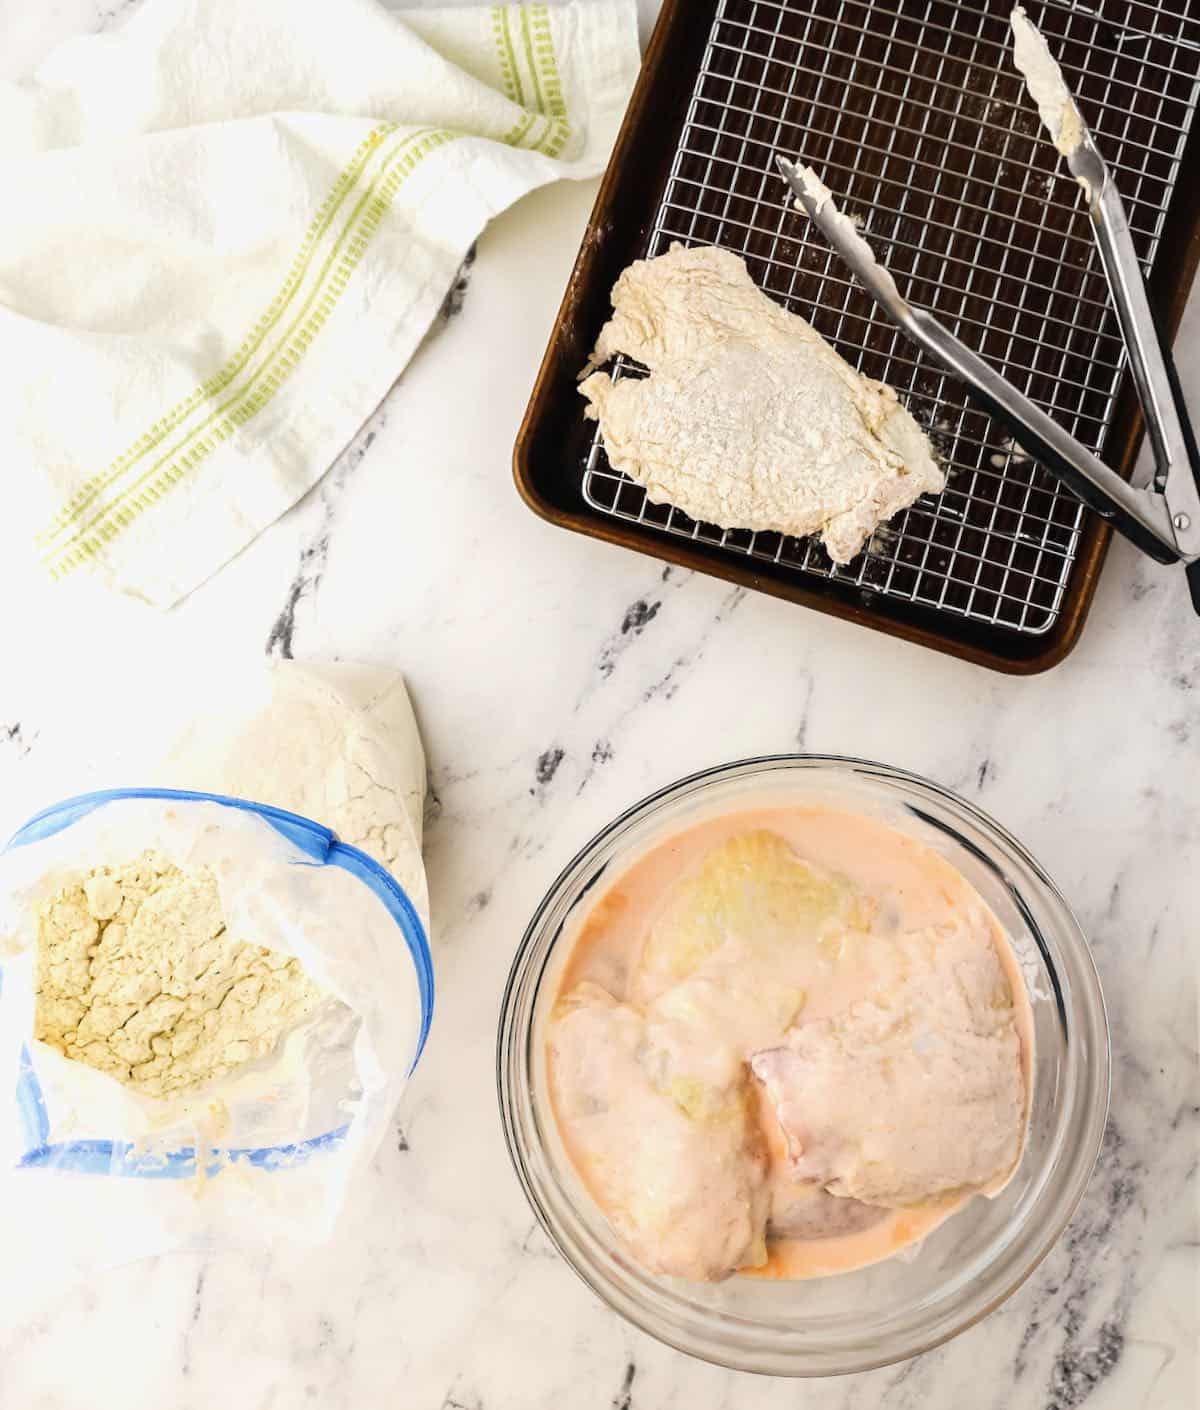
- Coat the Chicken – Remove chicken from the marinade, allow excess buttermilk to drip off, and coat each piece in the seasoned flour.
- Rest the Coating – Place coated chicken on a wire rack and let it sit for about 30 minutes so the crust adheres.
- Heat the Oil – Pour about 1 to 1½ inches of oil into a cast-iron Dutch oven or skillet. Heat the oil to 350°F.
- Fry the Chicken – Add 2-3 pieces at a time and maintain an oil temperature of about 315°F while cooking.
- Cook Until Done – Fry for 10-20 minutes, depending on the size and cut of the chicken.
- Check the Temperature – Chicken is done when it reaches an internal temperature of 165°F.
- Rest Before Serving – Place the fried chicken on a wire rack over paper towels to cool slightly before serving.

- Serve with your favorite sides.
Serving Ideas
Southern fried chicken pairs beautifully with classic comfort food sides. Try serving it with:
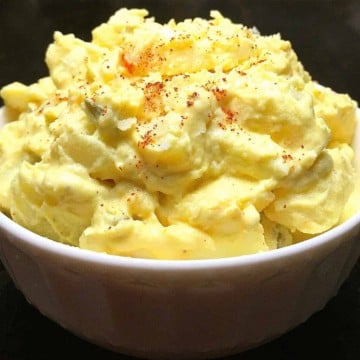
- Southern Potato Salad
- Smoked Baked Beans
- Creamed Corn
- Mac and Cheese
- White Acre Peas or Purple Hull Peas
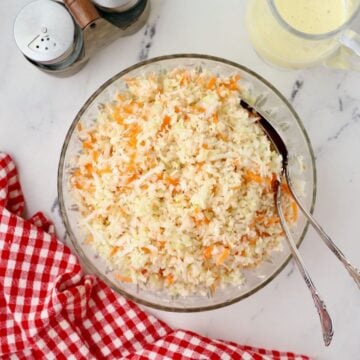
- American Cole Slaw or Purple Cabbage Cole Slaw
For a full Southern supper spread, add sweet potato biscuits and sweet tea.
Recipe FAQs
Fried chicken usually turns soggy when the oil temperature drops too low or when the chicken is drained on paper towels rather than on a wire rack. Maintaining the oil around 315°F and resting the chicken on a rack keeps the crust crisp.
Peanut oil is one of the best oils for frying chicken because it has a high smoke point and neutral flavor. Vegetable oil, soybean oil, or rice bran oil also works well.
Yes. Reheat fried chicken in a 400°F oven for 10-15 minutes on a wire rack over a baking sheet. This keeps the crust crispy while warming the meat.
Fried chicken can be frozen for up to 3 months, but it's not ideal because the crust loses some crispness after thawing. For best results, store leftovers in the refrigerator and reheat in the oven within a few days. If freezing, reheat directly from frozen in a hot oven.
The secret to crispy Southern fried chicken is letting the breaded chicken rest before frying and maintaining a steady oil temperature around 315°F during cooking. Resting helps the coating adhere, while stable oil heat ensures the crust crisps properly without burning.
Fried Chicken Troubleshooting Guide
If your fried chicken isn't turning out quite right, this quick troubleshooting guide can help you pinpoint the problem.
| Problem | Likely Cause | Fix |
|---|---|---|
| Soggy crust | Oil too cool | Maintain 315°F |
| Greasy chicken | Overcrowded pan | Fry fewer pieces |
| Coating falls off | Chicken not rested | Rest breaded chicken 30 minutes |
| Burnt crust | Oil too hot | Lower heat slightly |
Tips for Perfect Fried Chicken Every Time
- Dark meat cuts like thighs are more forgiving for beginners.
- Maintain a steady oil temperature throughout frying.
- Let the breaded chicken rest before frying to help the crust stick.
- Fry in small batches to avoid lowering the oil temperature.
- Use a cast-iron Dutch oven or skillet for even heat retention.
Reader Favorites to Serve with Fried Chicken
Building a full Southern dinner around fried chicken? These reader-favorite sides are always a hit.
Join the Conversation
⭐ ⭐ ⭐⭐⭐ If you make this recipe, please leave a comment and give it a star rating. I'd love to hear how it turned out and what sides you served with it.
Thank you so much for visiting Grits and Pinecones-I hope you come back soon!
G&P Wisdom
"Perfect fried chicken isn't about fancy tricks. It's about patience, good seasoning, and letting that golden crust do its magic."
Southern Comfort Food Made Simple and Shareable
For over a decade, Grits and Pinecones has been serving up delicious recipes with a Southern flair-simple, flavorful dishes that are perfect to share with family and friends.
Recipe:
Want to Save This Recipe?
Enter your email & I’ll send it to your inbox. Plus, get great new recipes from me every week!
By submitting this form, you consent to receive emails from Grits and Pinecones.
Southern Fried Chicken Recipe
Ingredients
- 6 chicken thighs (skin on with bones, or six assorted chicken pieces)
Buttermilk marinade
- 1 quart buttermilk
- ⅓ cup hot sauce (I use Frank's Red Hot Cayenne Pepper Sauce; you can also use Tabasco Sauce)
- 1 tablespoon garlic powder
Seasoned flour coating
- 4 cups all-purpose flour
- 4 tablespoons kosher salt
- 1 tablespoon ground black pepper
- 1 quart peanut oil (the amount may vary depending on the size of the pan you are using)
Instructions
- Combine the buttermilk, garlic, and hot sauce in a large bowl.
- Add the chicken, cover and refrigerate for a minimum of four hours or up to 24 hours. The longer, the better.
- About an hour before you are ready to fry, remove the bowl from the refrigerator and let everything come to room temperature. Doing this will allow the meat to cook more evenly.
- Add the flour, salt, and pepper to a large gallon-size plastic storage bag.
- Remove one piece at a time from the buttermilk and allow any excess to drip off. Place the piece in the bag with the flour mixture and shake so that the chicken is evenly coated. Shake off any excess flour and place it on a wire rack.
- Once all of the pieces have been coated with flour, allow them to sit on the rack for about 30 minutes to firm up the coating.
- When you are ready to fry, pour the oil in a deep cast-iron Dutch oven or cast-iron skillet. You may need a little less or more oil, depending on the size of your pan. The oil should be approximately one to one and one-half inches deep.
- Place the pan over medium-high heat and heat the oil to 350 degrees F. Use a candy or deep-frying thermometer to monitor the temperature of the oil.
- Carefully add a few pieces and be sure not to crowd them. I usually cook three pieces at a time.
- The oil temperature will come down once the chicken has been added. It is crucial to continually monitor it and I have found; 315 degrees F. is the perfect oil temperature for frying chicken. You will probably need to adjust the heat under the pan to keep it at 315 degrees. If the oil gets too hot, the crust will burn before the meat is done, and if it is too low, the chicken will be greasy.
- Fry for a total of 10-20 minutes. Dark meat and larger pieces will take more time to cook. White meat and smaller pieces will take less time to cook. Try to cook the same size pieces at the same time.
- Both white and dark meat is done when the internal temperature reaches 165 degrees F. Use an instant-read meat thermometer inserted in the meat not touching the bone to determine the temperature.
- When the chicken is done, place it on a wire rack over some paper towels to allow it to cool slightly before serving. Do not put it directly on the paper towels or your crust will get soggy.
- Repeat the steps above to fry the rest of the chicken.
Notes
- The temperature of the oil can make the difference between a golden-brown and underdone or a burned crust. You must use a candy or deep-frying thermometer to monitor your oil temperature.
- Your meat will cook more uniformly if you remove it from the refrigerator about an hour before you fry it.
- I prefer to fry thighs. One because dark meat is much more forgiving and more flavorful, and two, because the same size pieces will cook in approximately the same amount of time. If you prefer white meat and the breasts are large, cut them up into two or three pieces. For assorted pieces, keep in mind they will each take a different amount of time to cook.
- If the crust browns too quickly, before the meat is done, remove it from the oil. Preheat your oven to 325 degrees and place the underdone chicken on a wire rack over a baking sheet. Cook for 5-10 minutes or until it reaches the correct internal temperature.
- A regular cast-iron skillet is perfect for frying. But I like to use a deep cast-iron Dutch oven because it helps to minimize the chances of grease splatter.
- To reheat, place the pieces on a lightly greased rimmed baking sheet in a 400-degree oven. Cook for 10-15 minutes. Start checking it at 10 minutes.
- If you are feeding a crowd, there is more than enough buttermilk marinade, flour mixture, and oil to cook up a few more pieces.
- You can make this recipe on the stove, or you can use a deep-fryer. I have not tested it in an air-fryer.


Ashley
Those are REALLY good tips for the ultimate delicious tender fried chicken. I am definately going to be begging my husband “Fry Daddy” who hates frying .. LOL to make this!!!
Ashley
That looks DELICIOUS! I truly enjoy reading your post in regards to your amazing dishes! They make me SMILE EVERYTIME!! 🙂 Winner Winner to that Chicken Dinner!!
Kelly | Foodtasia
Sharon, this fried chicken is perfection! Love that crispy crust and I agree with you on single dipping vs. double dipping. I see that you use peanut oil. Is there a reason why you use peanut oil and do you have any experience with the effects of other types of oil on crispiness?
Sharon Rigsby
Hi Kelly,
I’m so glad you enjoyed the fried chicken. I use peanut oil because it has a higher smoke point than other oils and I think it has a lighter flavor too. I’m experimenting with a rice bran oil which is supposed to be healthier, but the jury is still out. Thanks so much for taking the time to leave a comment.
All the best,
Sharon
Linger
I, too, grew up eating fried chicken … at least once a week around my house. It is such a comfort food! I love all your tips for this recipe, especially the one where you let the battered chicken rest before frying. I have never heard that before. So interesting. Your photos make this chicken look so tempting. I will have to try fried chicken again soon and will definitely use your tips. Thanks so much Sharon for sharing!
Sally
YUM! Gotta make this! I grew up on fried chicken too (I’m from NC), and this looks so delish! I’ve not actually successfully made it for myself though (yet), but your tips and tricks have me inspired to try it real soon! Thanks for the inspiration!
Gritsandpinecones
Thanks so much for leaving a comment Sally I hope you will try it soon and please do let me know how you like it!
All my best,
Sharon
Carolyn Haley
I never fry chicken anymore but after reading your blog post I am now craving some.
Vicki
This sounds very good, but is the recipe correct that you only use six chicken thighs? A quart of buttermilk and a quart of floured sounds like way too much for that small amount of chicken. The recipe says it serves six…..that would barely feed the two guys in my family!
Gritsandpinecones
Hi Vicki,
Yes, I only used 6 thighs in this recipe, because it’s just my husband and me, and the thighs I had were really large. However, there is more than enough of the flour mixture and oil to cook at least 12 or more pieces, maybe more depending on the size of the pieces. Thanks so much for leaving me this comment, I thought of adding a note about it last night, but totally forgot to include it.
All my best,
Sharon