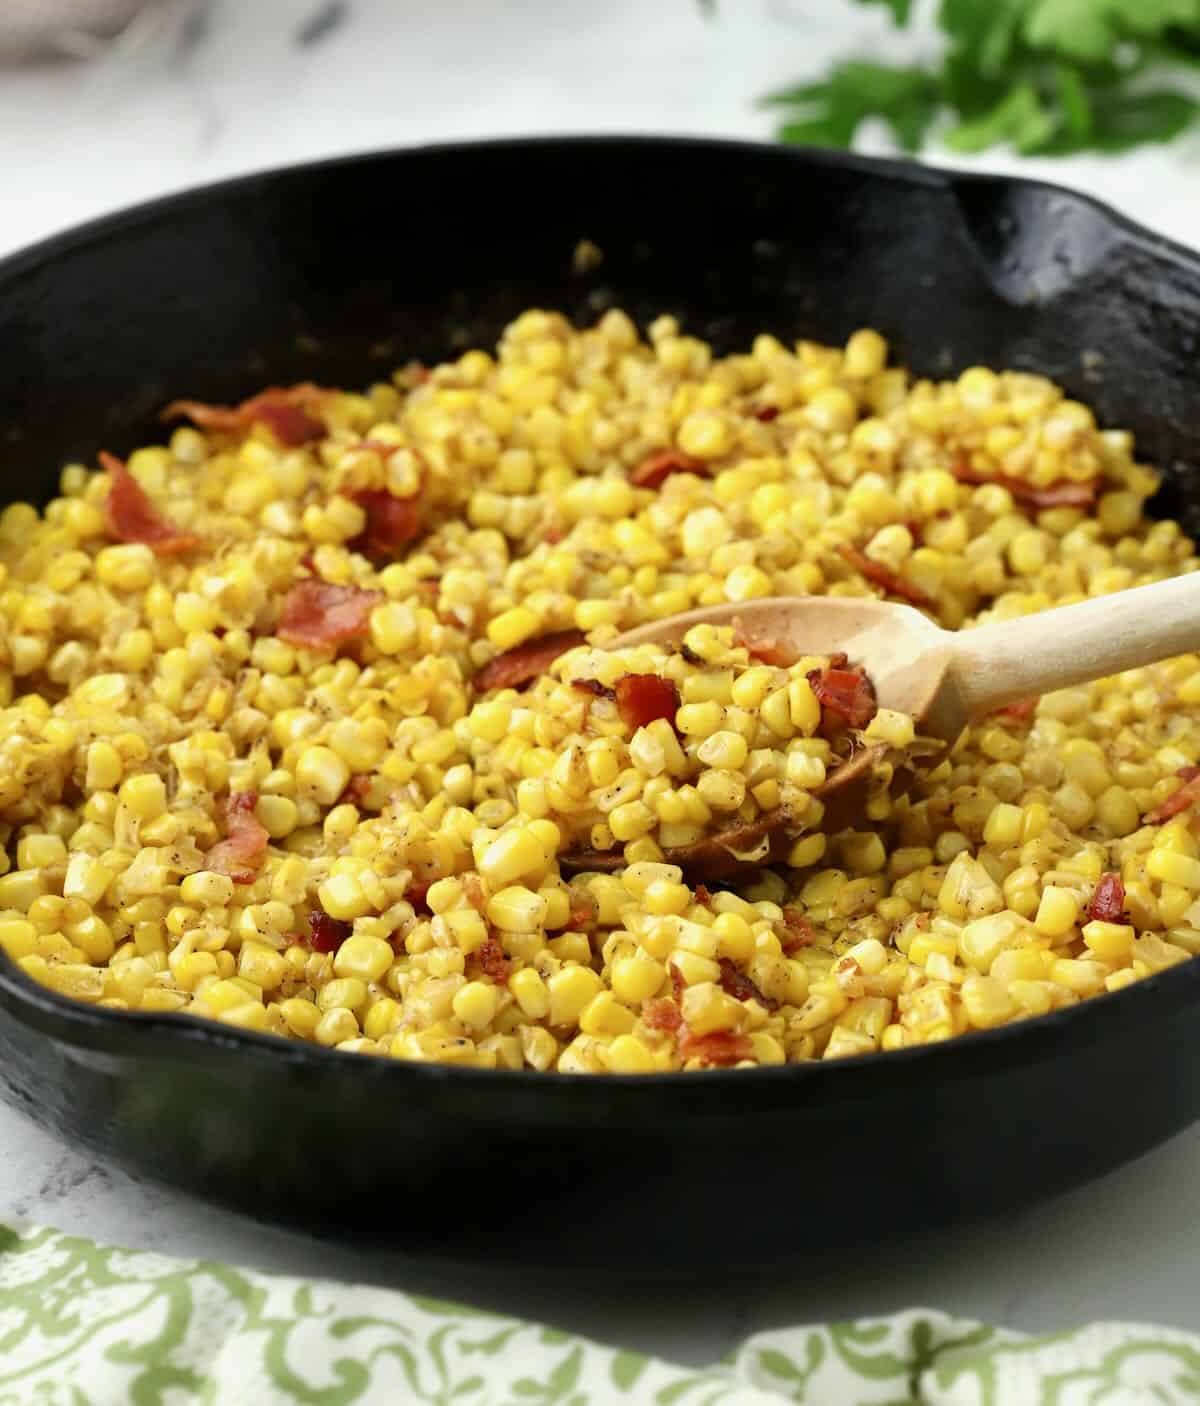
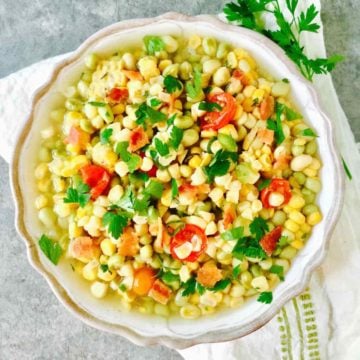
Introducing my Best Southern Fried Corn with Bacon Recipe. It epitomizes a classic Southern side dish cooked to perfection in a trusty cast iron skillet.
Combining the simplicity of fresh sweet corn and the irresistible allure of crispy bacon, this fried corn with bacon recipe delivers an explosion of amazing flavors with every bite.
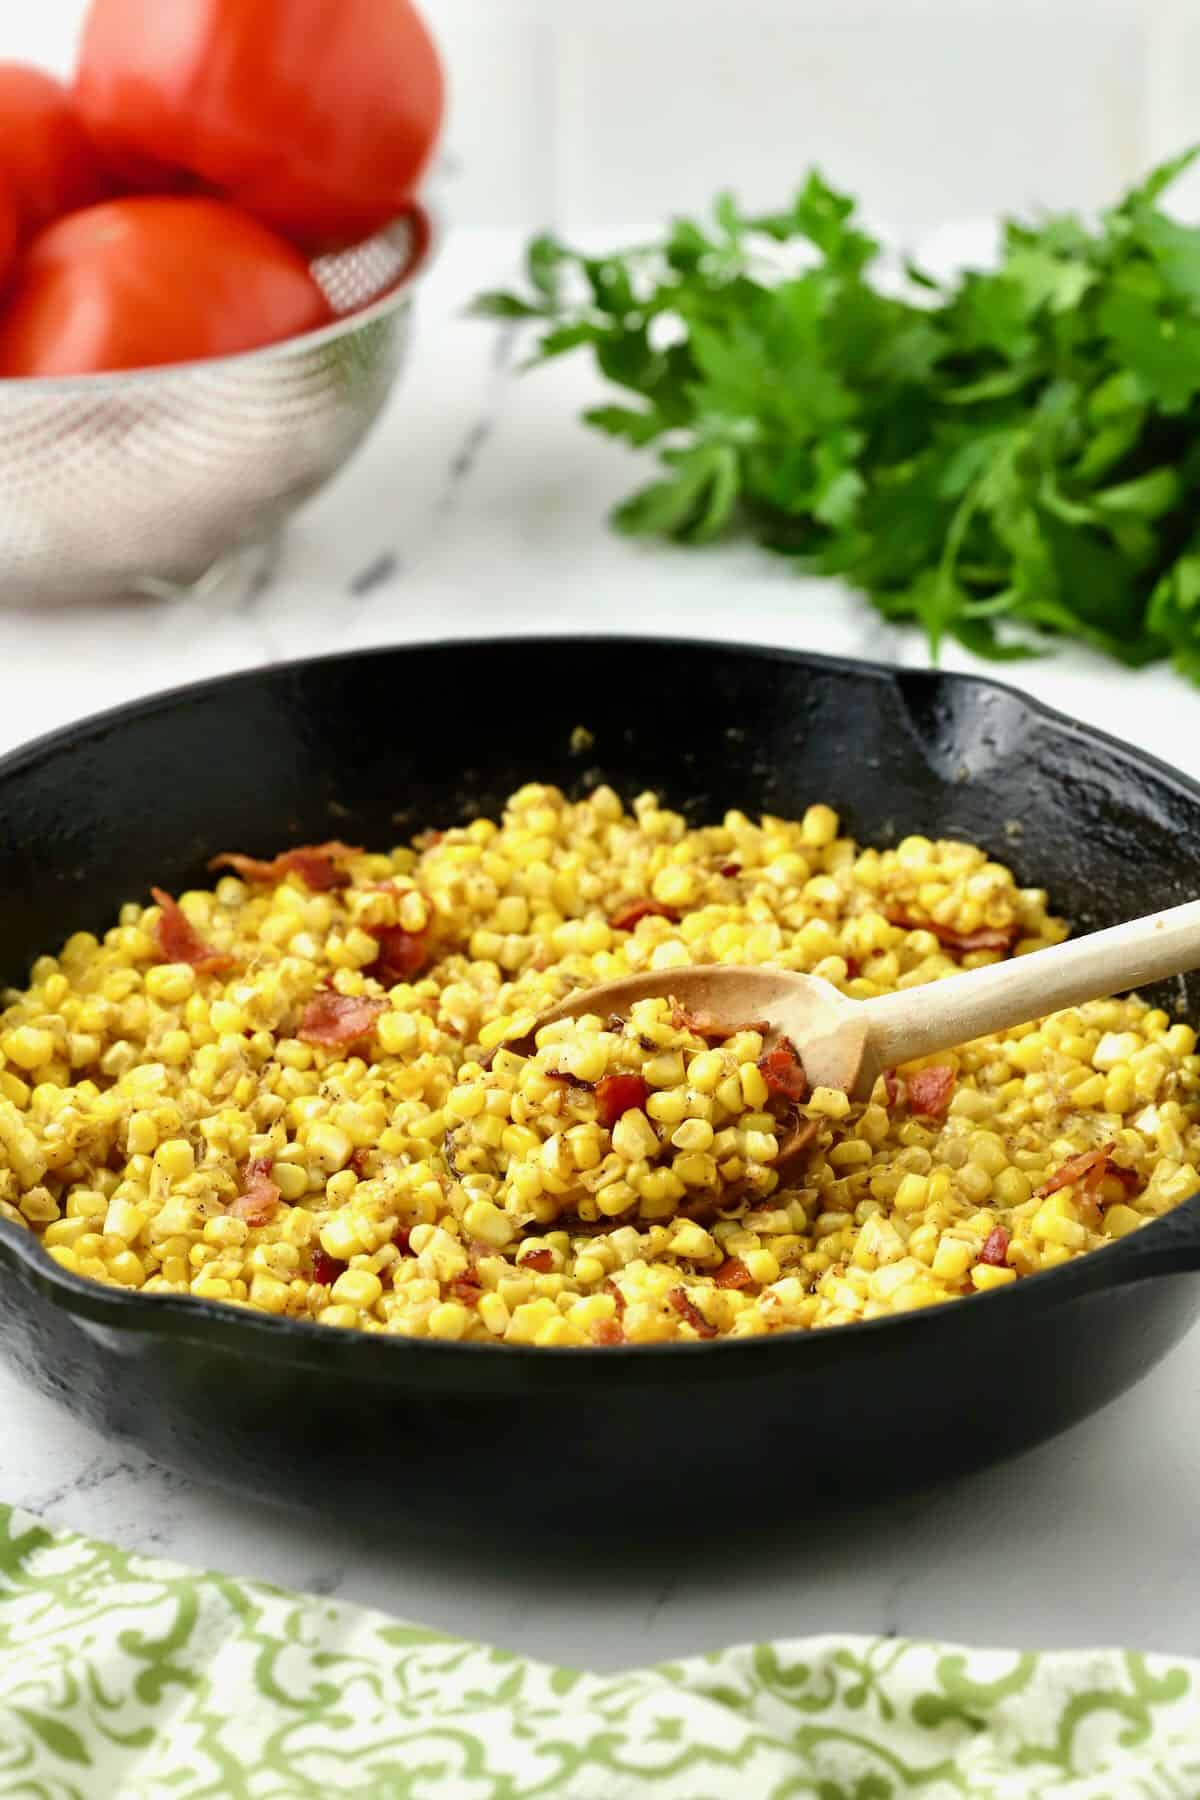
In the South, it is said that we will fry anything, and while that’s partially true, fresh sweet corn fried in bacon grease is a true delicacy.
With just a handful of simple ingredients, like my Southern Creamed Corn Recipe, fried corn with bacon is a quintessential addition to any meal and a Southern classic beloved family favorite.
Jump to:
- Three reasons you will love this recipe:
- Ingredient notes and substitutions:
- How to make Fried Corn with Bacon:
- Serving suggestions:
- Recipe variations:
- What’s the difference between fried corn and creamed corn?
- What variety of corn is best for this recipe?
- How to shuck corn (two options):
- How to make this recipe ahead:
- How to store and reheat leftovers:
- Recipe FAQs:
- Sharon’s tips and tricks:
- More corn recipes:
- Recipe:
Three reasons you will love this recipe:
- This Southern comfort food recipe only takes minutes to prepare.
- It is one of the best ways to showcase the incredible taste of fresh summer corn.
- Only five simple ingredients and you can make it ahead of time.
Ingredient notes and substitutions:
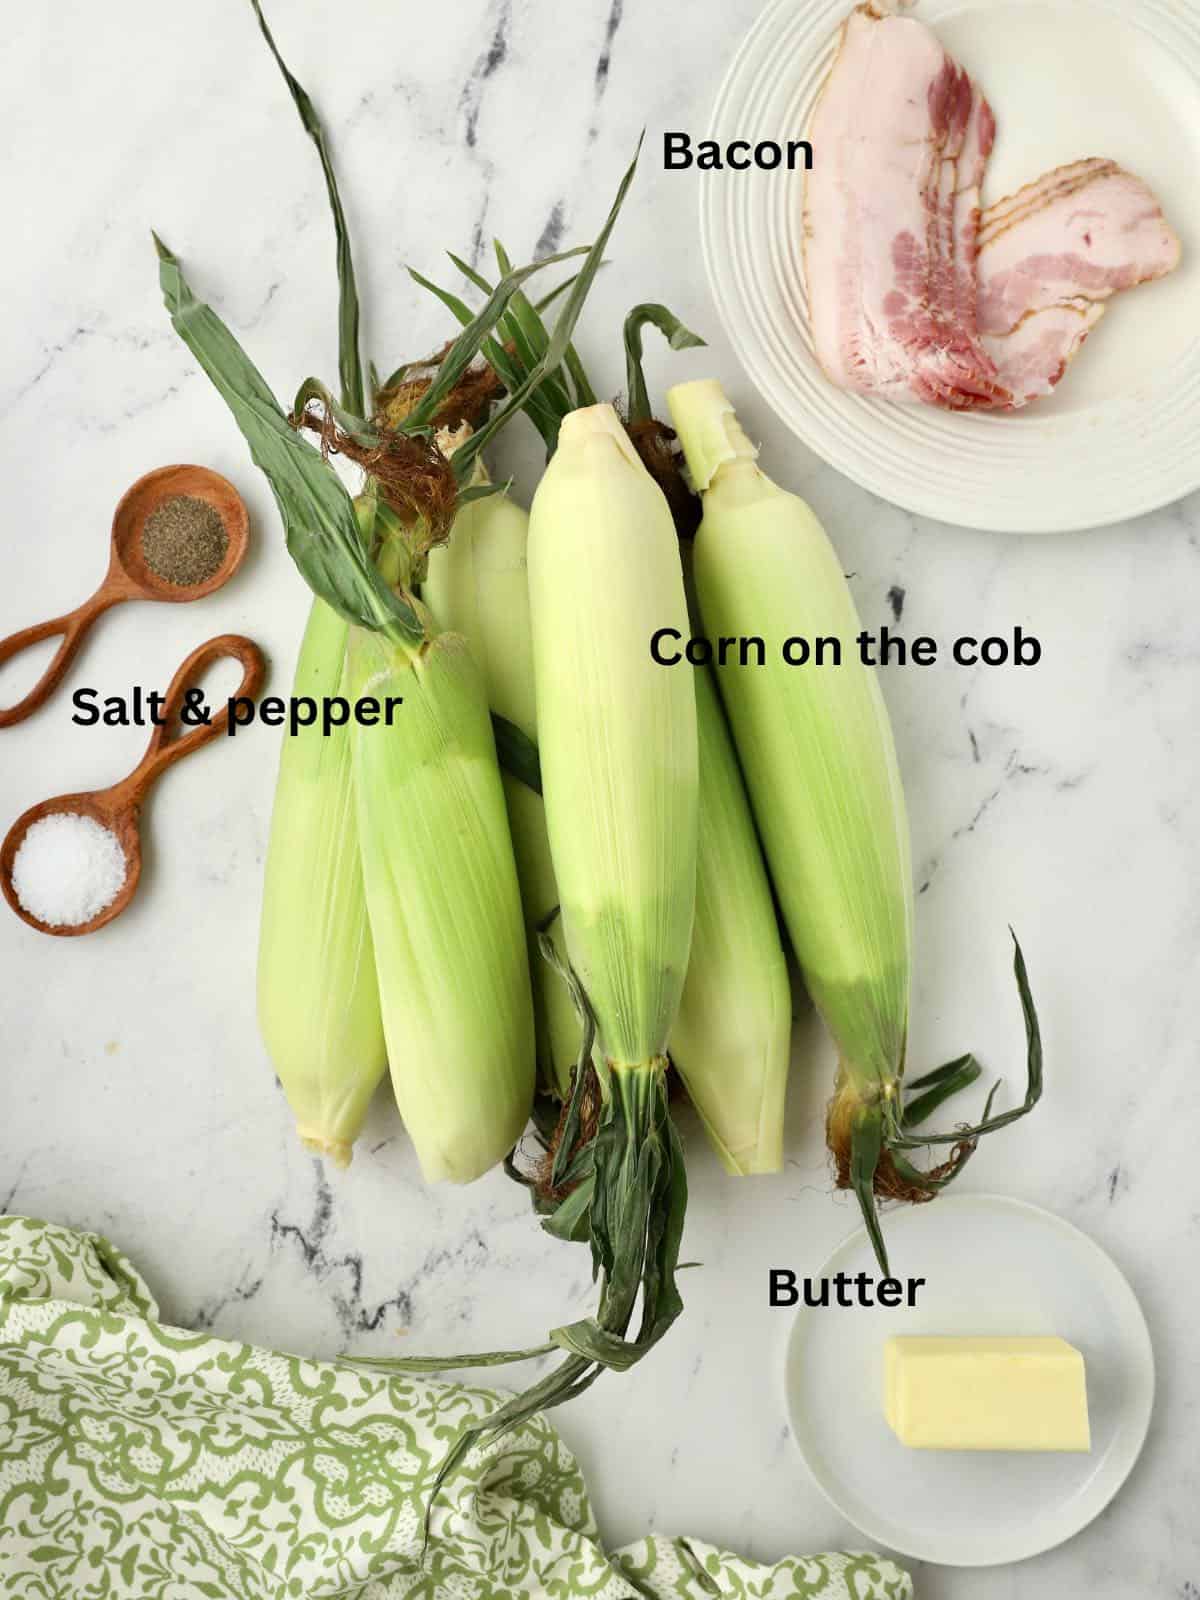
- Sweet corn – fresh is best, and while I don’t recommend it, in a pinch, you can substitute frozen corn or even canned corn as a last resort. Just know the taste and texture will not be the same.
- Bacon – regular sliced bacon works best in this recipe.
- Butter – I use unsalted butter; if all you have is salted, you may want to cut back on the amount of salt listed in the recipe.
- Kosher salt and ground black pepper – enhance all of the flavors in this recipe.
Complete measurements are listed in the recipe card below.
How to make Fried Corn with Bacon:
- Add the bacon slices to a cold 10-inch, cast-iron skillet over medium low heat and cook for about five minutes or until the fat starts rendering out of the bacon.
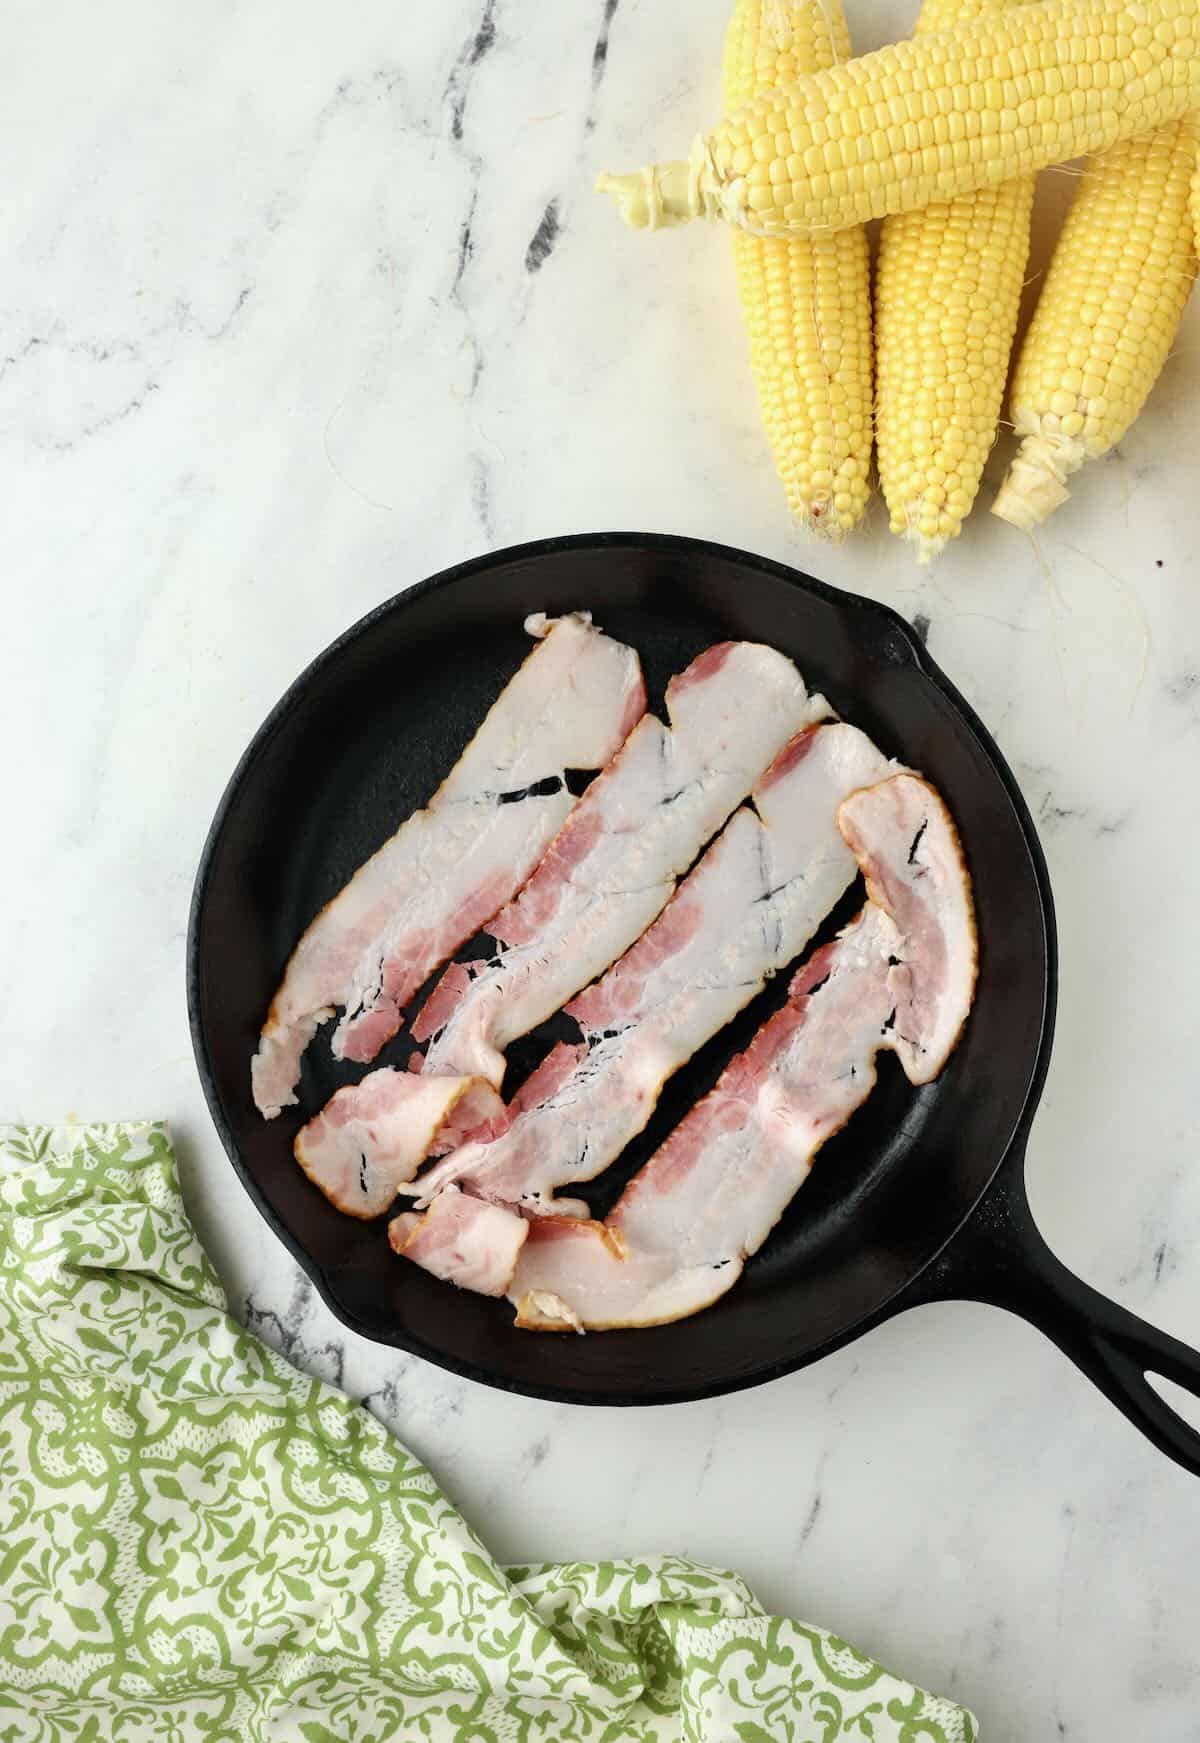
- Turn the heat up to medium high and cook, frequently turning, for another four to five minutes or until the bacon is browned and crispy. Remove the bacon and drain it on paper towels. Set aside. Leave the bacon drippings in the skillet.
- While the bacon is cooking, cut the kernels off of the corn cobs. Grab a deep large bowl and a sharp knife. Hold each ear up with the bottom of the cob touching the bottom of the bowl and slice the kernels off. You may have to go around several times to get all of the kernels.
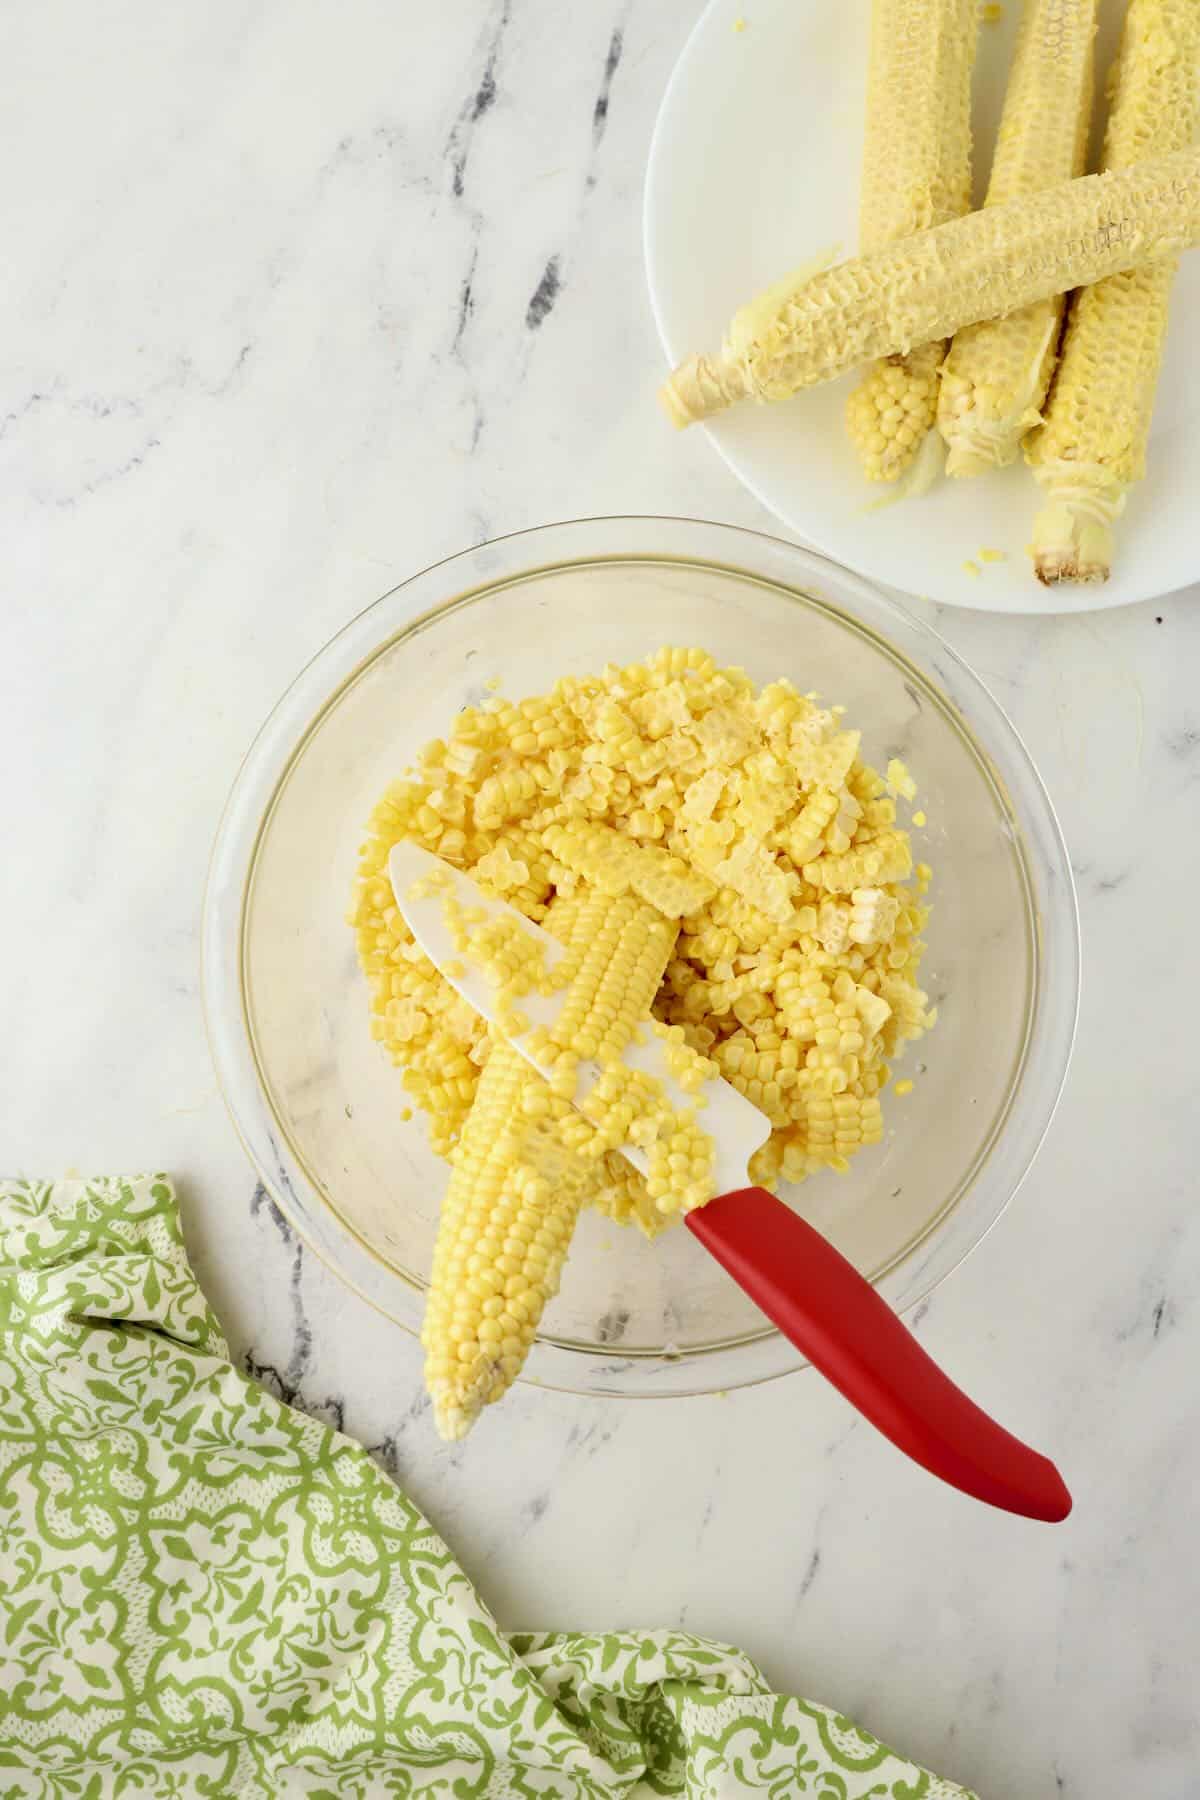
- Then, take the back of the knife and scrape the cob to get all that milky goodness. Don’t skip this step.
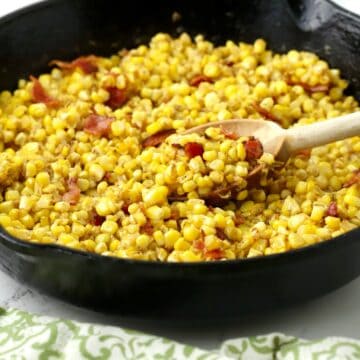
- Add the butter to the skillet and when it is melted, add the kernels. Season it with salt and pepper.
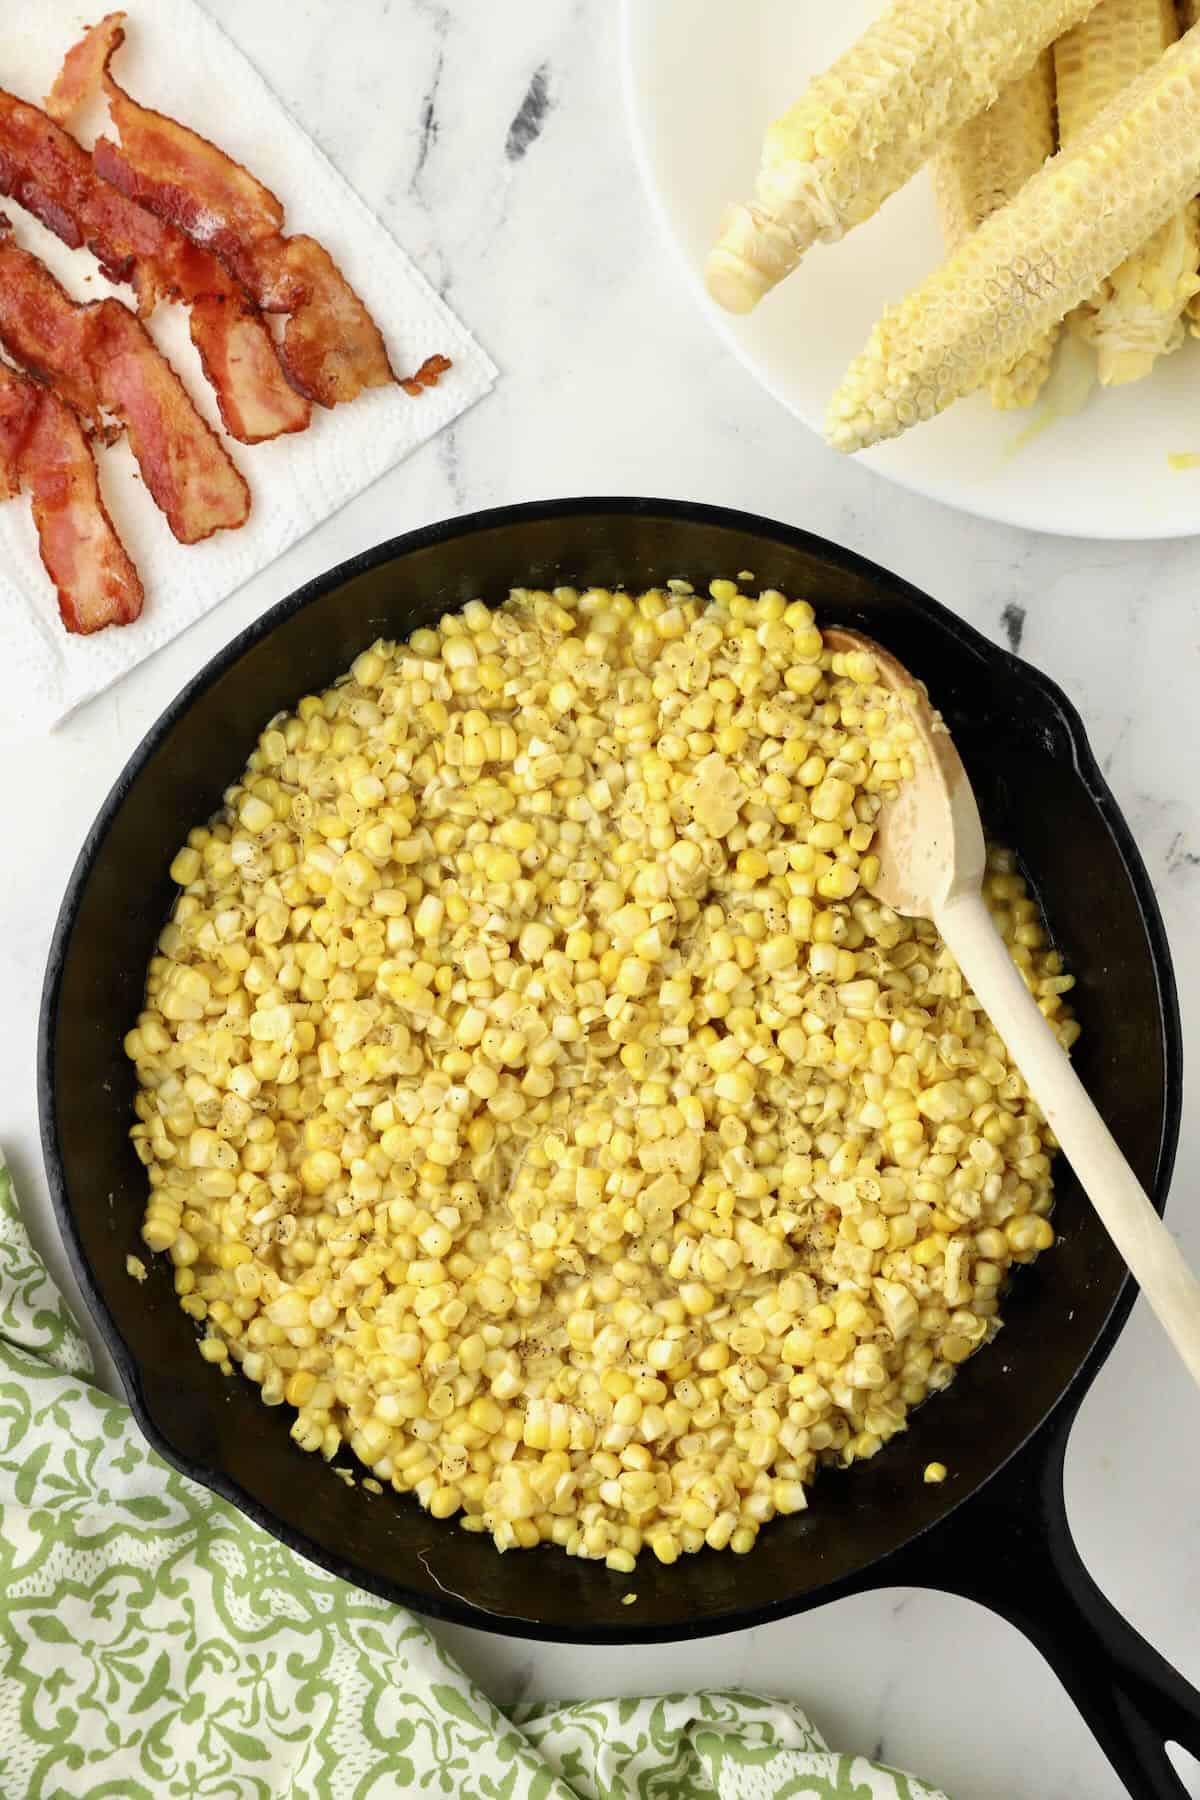
- Stir and cook it for anywhere from five to fifteen minutes. (The amount of time it will take to cook depends on how fresh the corn is; if it’s just picked, it barely needs any cooking, and if it’s older, it will take longer.) It’s important to start tasting for tenderness at about the 7-minute mark.
- Remove it from the heat, top with crumbled bacon and serve immediately.
Serving suggestions:
Add a glass of sweet tea, some sliced tomatoes, a Squash Casserole, Field Peas or Purple Hull Peas, Fried Chicken or Fried Fish, and a slice of Cornbread, and you have a classic Southern meal that’s beyond compare.
Recipe variations:
- Season the dish with a Cajun or Creole seasoning blend for a bold and flavorful twist to make Cajun Fried Corn.
- Cook diced onions and green bell peppers with the bacon until they’re caramelized, and add them to the fried corn. You can also add additional vegetables, such as cooked green beans or chopped tomatoes, to the dish.
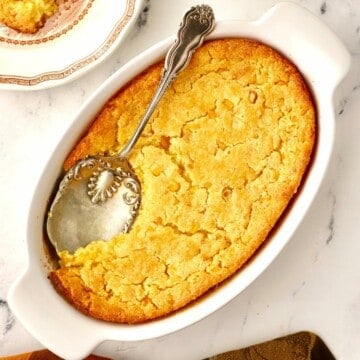
What’s the difference between fried corn and creamed corn?
While Creamed Corn and fried corn are made with fresh corn kernels cooked in bacon grease, creamed corn has a small amount of heavy cream or milk, flour to thicken it and sometimes a little sugar. As the name implies, it also has a creamy consistency.
Fried corn, on the other hand, is made with just four ingredients: corn, butter, salt, and pepper. Both dishes are delicious in their own right, and I would have a hard time choosing if I had to pick just one favorite.
What variety of corn is best for this recipe?
I have made this easy side dish with white corn, yellow, and bi-color, and they are all delicious. In our area, Silver Queen is the gold standard. But, honestly, instead of what kind, the most important variable is how fresh it is. Even field corn is delicious if it is freshly picked.
When buying it, look for ears with bright green husks, that are heavy for their size and feel slightly damp. For the best results, plan to cook it the same day you buy it. If you have to store it, wrap it up in a plastic bag and store it in the refrigerator for up to three days.
How to shuck corn (two options):
If there is anything remotely difficult about this recipe, it’s shucking the corn, which means removing the husk and then the silk. If you have never done it before, the microwave method is easiest, but once you get the hang of it, just pulling the husk off by hand and removing the silk is quicker.
1. How to shuck corn using a microwave:
Cut off the stalk end one-inch above the last row of kernels. Place two ears on a microwave-safe plate and microwave uncovered for two to four minutes. Let the ears cool, then, grab the cob by the uncut end and shake and squeeze it until the ear comes out husk and silk-free. Repeat.

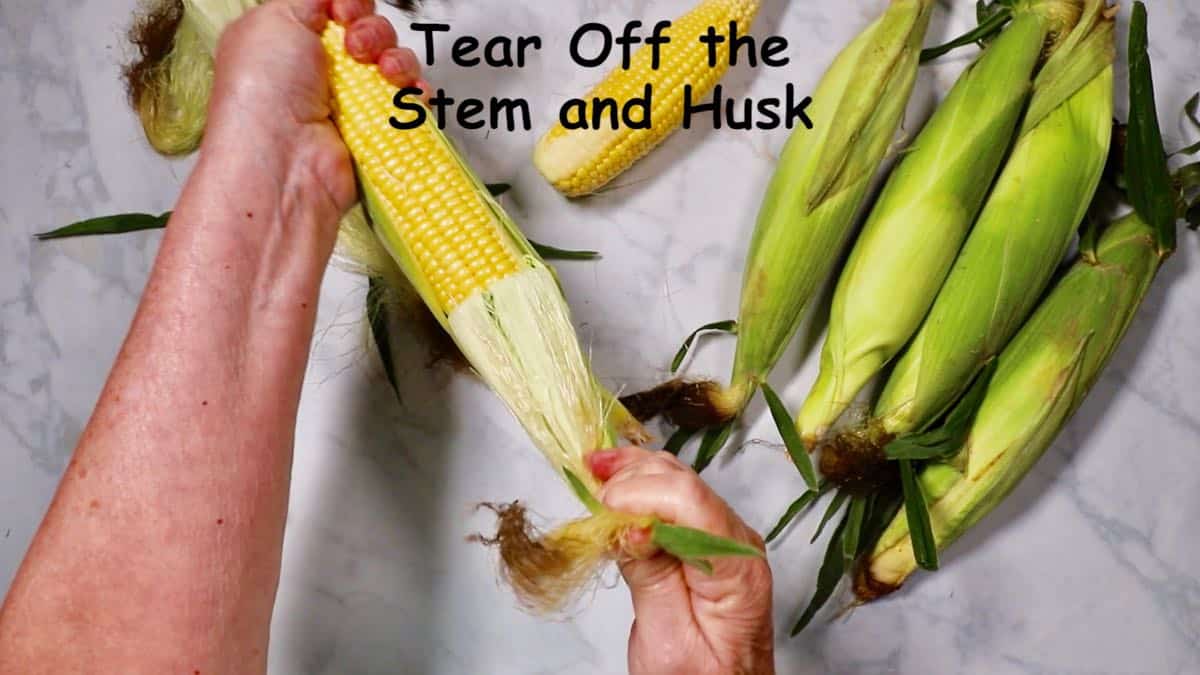
2. How to shuck corn by hand:
Peel back the husk at the tip of the ear just until you can see the top few rows of kernels. Slip your finger under the husk layers, grasp about a quarter of the husk and silk firmly, and peel downward.
Continue doing this until all of the kernels are exposed. Gather the husk and silks in one hand and snap them off with the stalk at the base. Discard the husks, silks, and tassels.
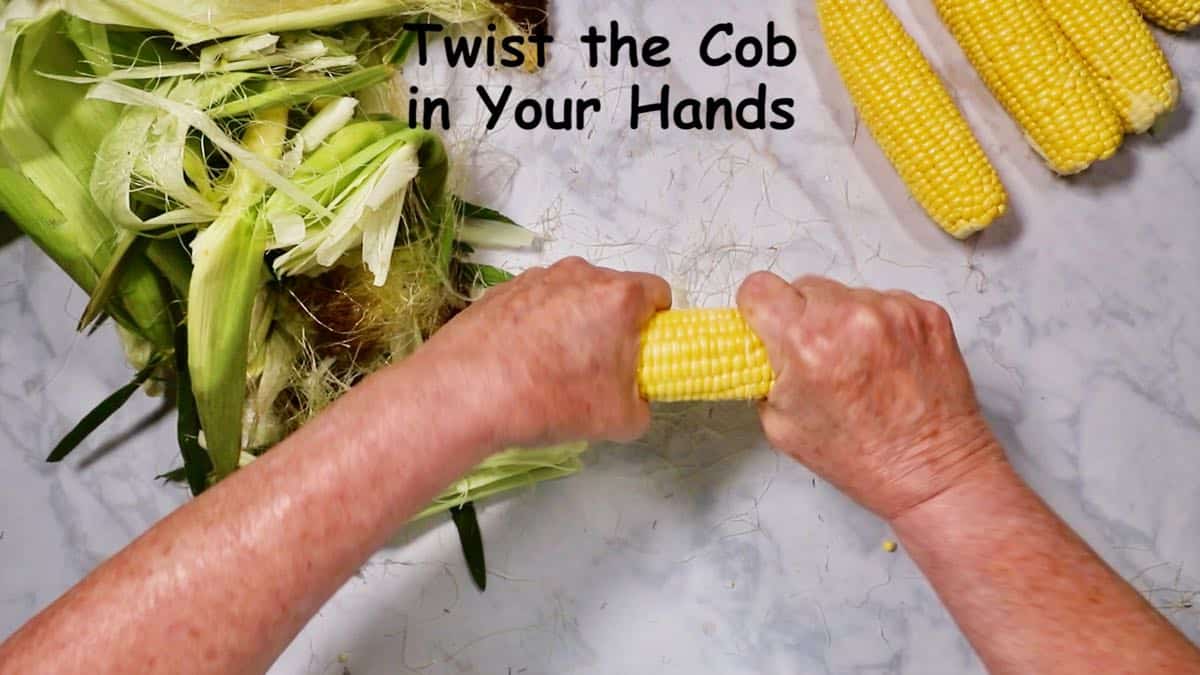
If you have any silk remaining on the cob, hold the cob in both hands and twist each hand in the opposite direction. Check out my video if you have questions.
How to make this recipe ahead:
Make this dish up to the point of adding the crumbled bacon. Allow the pan to cool and store it covered in the refrigerator for up to 24 hours. To reheat, just place the pan on the stove over medium-low heat and allow it to heat back up. Top with the bacon and serve.
How to store and reheat leftovers:
It’s highly unlikely you will have any leftovers, but if you do, store them in an airtight container in the refrigerator for up to four days.
The best way to reheat leftover fried corn is to use a skillet or frying pan over medium heat. Add a small amount of butter or oil to prevent sticking and to help bring back some of the original crispiness. Stir occasionally to ensure even heating, and cook until the leftovers are heated through.
Recipe FAQs:
Yes, you can substitute frozen corn for fresh if you don’t have fresh available. However, fresh will provide a better flavor and texture.
You can make this recipe vegetarian or vegan by omitting the bacon and using vegetable oil or vegan butter instead. You can also add extra vegetables or vegan-friendly protein options for additional flavor and texture.
I always use a well-seasoned cast iron skillet however, you can use any heavy-bottomed skillet or frying pan for making fried corn with bacon. The key is to ensure even heat distribution for proper cooking
Sharon’s tips and tricks:
- Start with fresh sweet corn for the best flavor and texture. Look for corn that has bright green husks and plump kernels.
- Make sure your skillet is properly preheated before adding the corn. This helps to ensure even cooking and prevents sticking.
- When cutting the kernels off the cob, try to cut as close to the cob as possible without cutting into the cob itself. This helps to extract as much flavor as possible.
More corn recipes:
If you like recipes like this, you might also like these reader favorites:


If you need some more side dish ideas, here is a link to all of my side dish recipes.
⭐ ⭐ ⭐⭐⭐ If you make this dish, please leave a comment and give this recipe a star rating. I would love to know how you liked it!
Thank you so much for visiting Grits and Pinecones; I hope you come back soon.
Recipe:
Want to Save This Recipe?
Enter your email & I’ll send it to your inbox. Plus, get great new recipes from me every week!
By submitting this form, you consent to receive emails from Grits and Pinecones.
Best Southern Fried Corn with Bacon Recipe
Equipment
- cast iron skillet or heavy bottom frying pan
Ingredients
- 6 ears fresh sweet corn, shucked
- 4 slices bacon, regular slice
- 4 tablespoons unsalted butter
- 1 teaspoon kosher salt
- ½ teaspoon ground black pepper
Instructions
- Add the bacon slices to a cold 10-inch, cast-iron skillet over medium low heat and cook for about five minutes or until the fat starts rendering out of the bacon.
- TTurn the heat up to medium high and cook, frequently turning, for another four to five minutes or until the bacon is browned and crispy. Remove the bacon and drain it on paper towels. Set aside. Leave the bacon dripping in the skillet.
- While the bacon is cooking, cut the kernels off of the corn cobs. Grab a deep bowl and a sharp knife. Hold each ear up with the bottom of the cob touching the bottom of the bowl and slice the kernels off. You may have to go around several times to get all of the kernels.
- Then, take the back of the knife and scrape the cob to get all that milky goodness. Don't skip this step.
- Add the butter to the skillet, and when it is melted, add the kernels. Season with salt and pepper.
- Stir and cook it for anywhere from five to fifteen minutes. (The amount of time it will take to cook depends on how fresh the corn is; if it's just picked, it barely needs any cooking, and if it's older, it will take longer.) It's important to start tasting for tenderness at about the 7-minute mark.
- Remove it from the heat, top with crumbled bacon, and serve immediately.
Notes
-
- Start with fresh sweet corn for the best flavor and texture. Look for corn that has bright green husks and plump kernels.
-
- Make sure your skillet is properly preheated before adding the corn. This helps to ensure even cooking and prevents sticking.
-
- When cutting the kernels off the cob, try to cut as close to the cob as possible without cutting into the cob itself. This helps to extract as much flavor as possible.


C W
OMG!!! This is the most DELICIOUS recipe! I could have eaten the entire bowl by myself!!
Sharon Rigsby
I am so happy you enjoyed it! And, thanks so much for taking the time to leave a comment and rating to let me know.
All the best,
Sharon
Linger
Hi Sharon. I love the words “Southern” and “fried” all in the same recipe name. And then you added bacon. This is truly a piece of heaven right here in this post. As always, thanks so much for sharing.
Verna M Buchanan
I did not make this wonderful corn dish, but had it at the home of a native Floridian. Delicious!! I love that you include tips, alternatives, and photos so there is no possibility of failure with your recipes. I also love your blog name: Grits for when I lived 25+ years in Tampa Bay, and Pinecones for Maine, where I grew up and now live in retirement.
Sharon Rigsby
Hi Verna,
Thank you so much for taking the time to leave such a sweet note. It truly made my day!
All the best,
Sharon